Supabase handles auth, your database, and file storage, but it doesn't ship with a messaging layer. Most Supabase notification integrations stop at the auth table or push you to write Edge Functions for anything else.
Knock's Supabase data source takes a different approach. Any event on any table you've modeled, whether that's auth.users, posts, or subscriptions, can identify users, set objects, manage subscriptions, or trigger workflows directly. There's no glue code in between.
In this post we'll wire Knock up to Supabase. We'll start with a new-user welcome workflow driven by the auth table, then build a pub/sub flow where users subscribe to posts and receive a notification when those posts update.
Video walkthrough
If you prefer to learn with video, watch it here.
What you'll need
- A Knock account.
- A Supabase project with at least one custom table. We'll use a blog schema with
postsandsubscriptionstables alongside the built-inauth.userstable. - A frontend that can create users, posts, and subscriptions. Anything works; we built a small management app to drive the demo.
How Knock's Supabase data source works
Knock data sources are normalized HTTP listeners. When Supabase fires a database webhook, the payload includes the schema, the table, and the event type (INSERT, UPDATE, or DELETE). Knock parses those fields and reconstructs them into a single normalized event, like auth.users:INSERT or public.posts:INSERT.
That normalized event is what you map to a Knock action. Each table-and-event combination can have its own mapping, so one webhook URL can drive user identifies, object updates, subscription changes, and workflow triggers across every table you care about.
The mapping itself is a JavaScript snippet you can extend for custom behavior, which means the same pattern works for any source that speaks HTTP: Supabase, WorkOS, Clerk, or your own service.
Connecting Knock to Supabase
Create the Supabase source in Knock
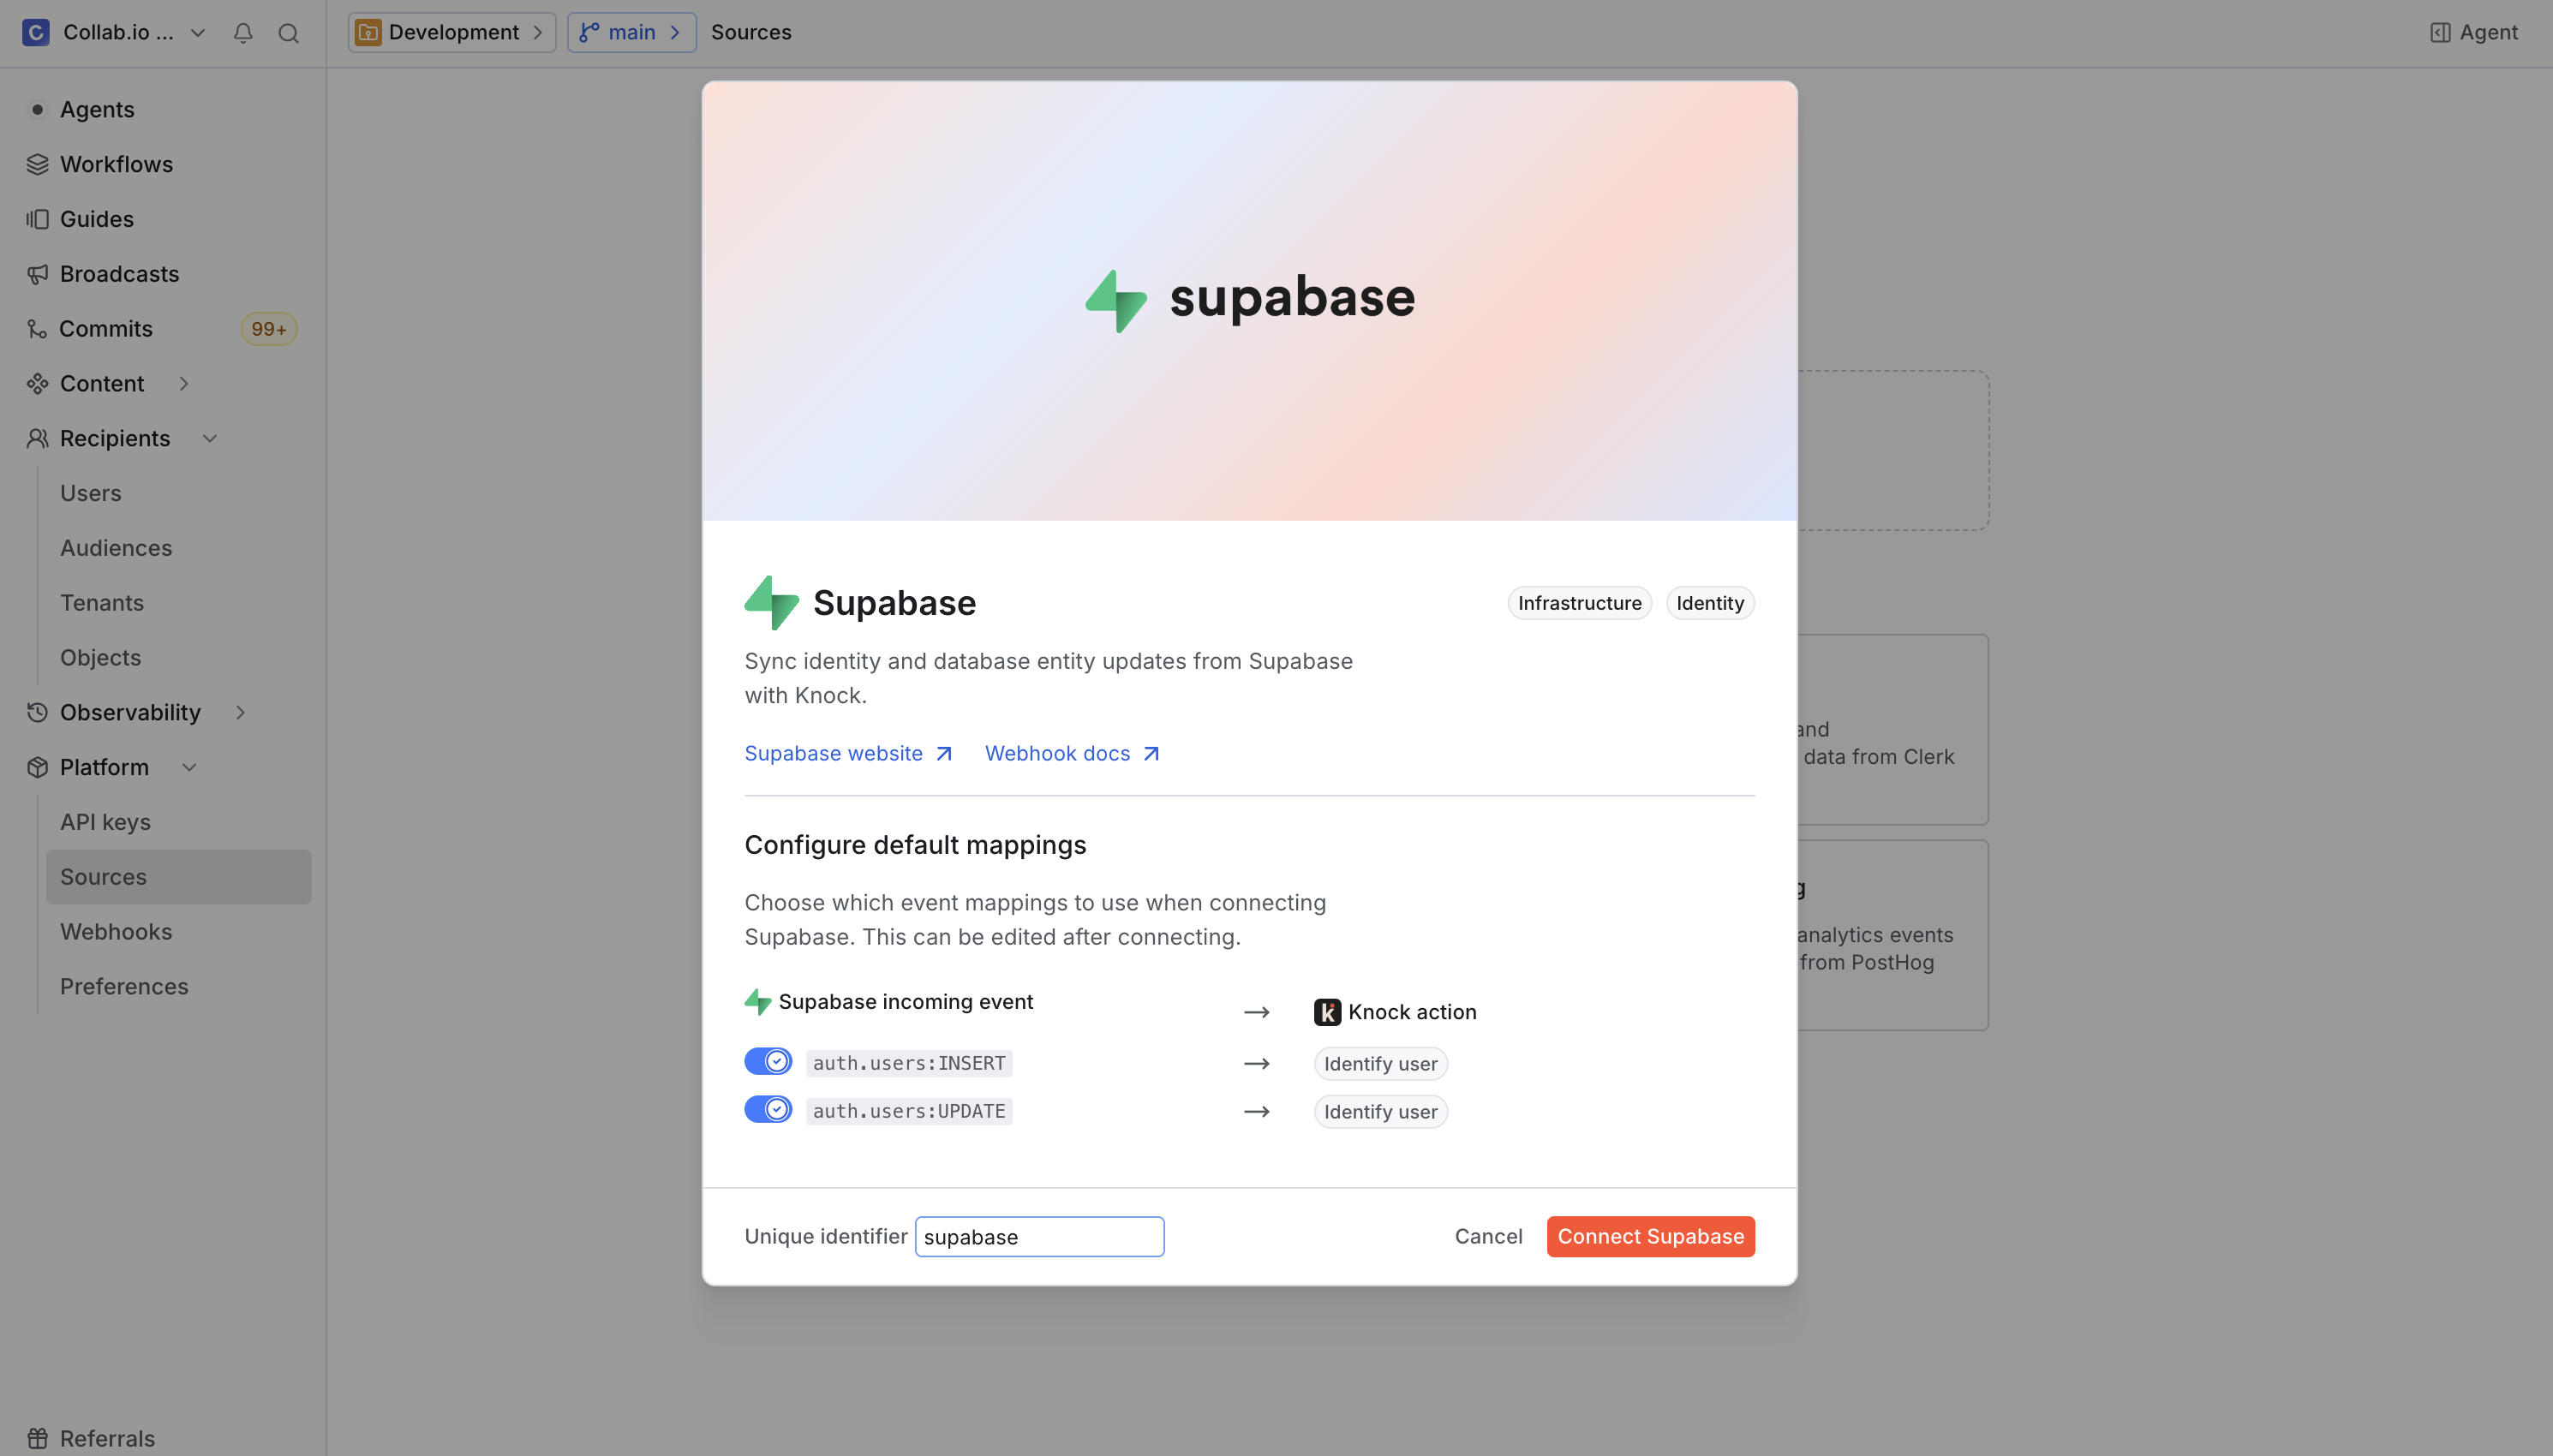
In the Knock dashboard, go to Sources, find the Supabase template, and create a new connection. Knock generates a webhook URL for the source. Copy it; we'll paste it into Supabase in the next step.
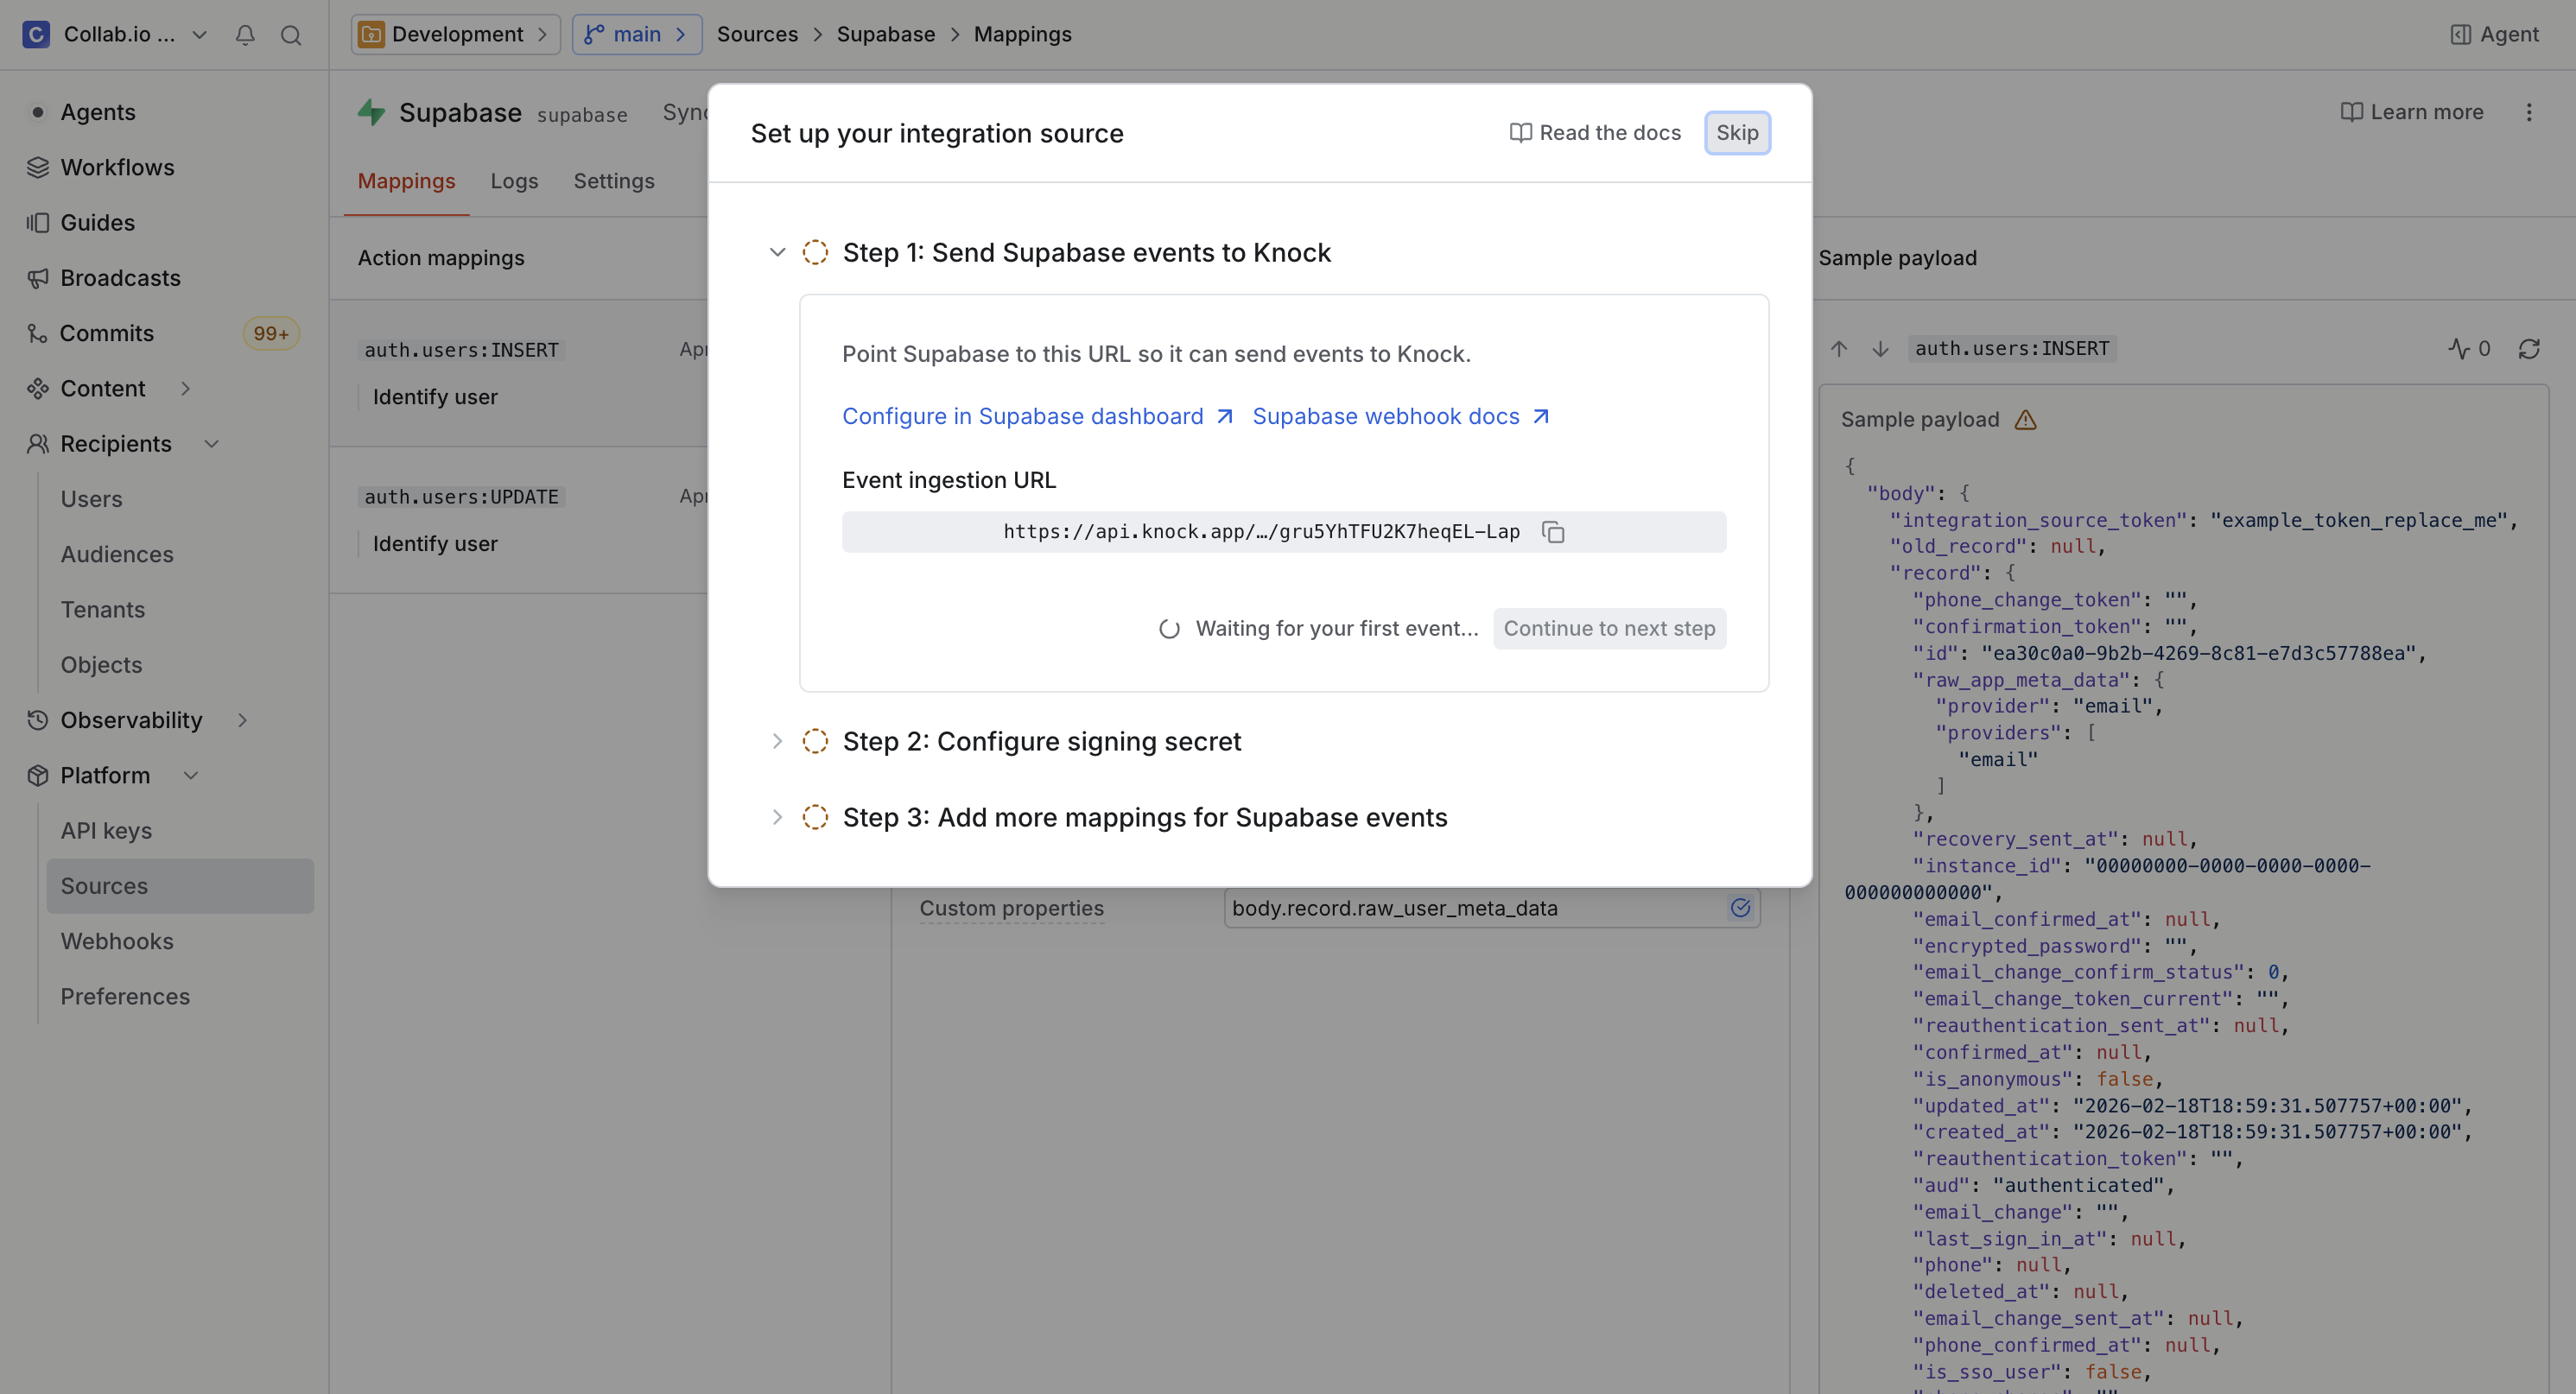
The template comes pre-configured with event action mappings for auth.users:INSERT and auth.users:UPDATE. We'll keep the defaults for now and customize them later.
Point Supabase at the Knock URL
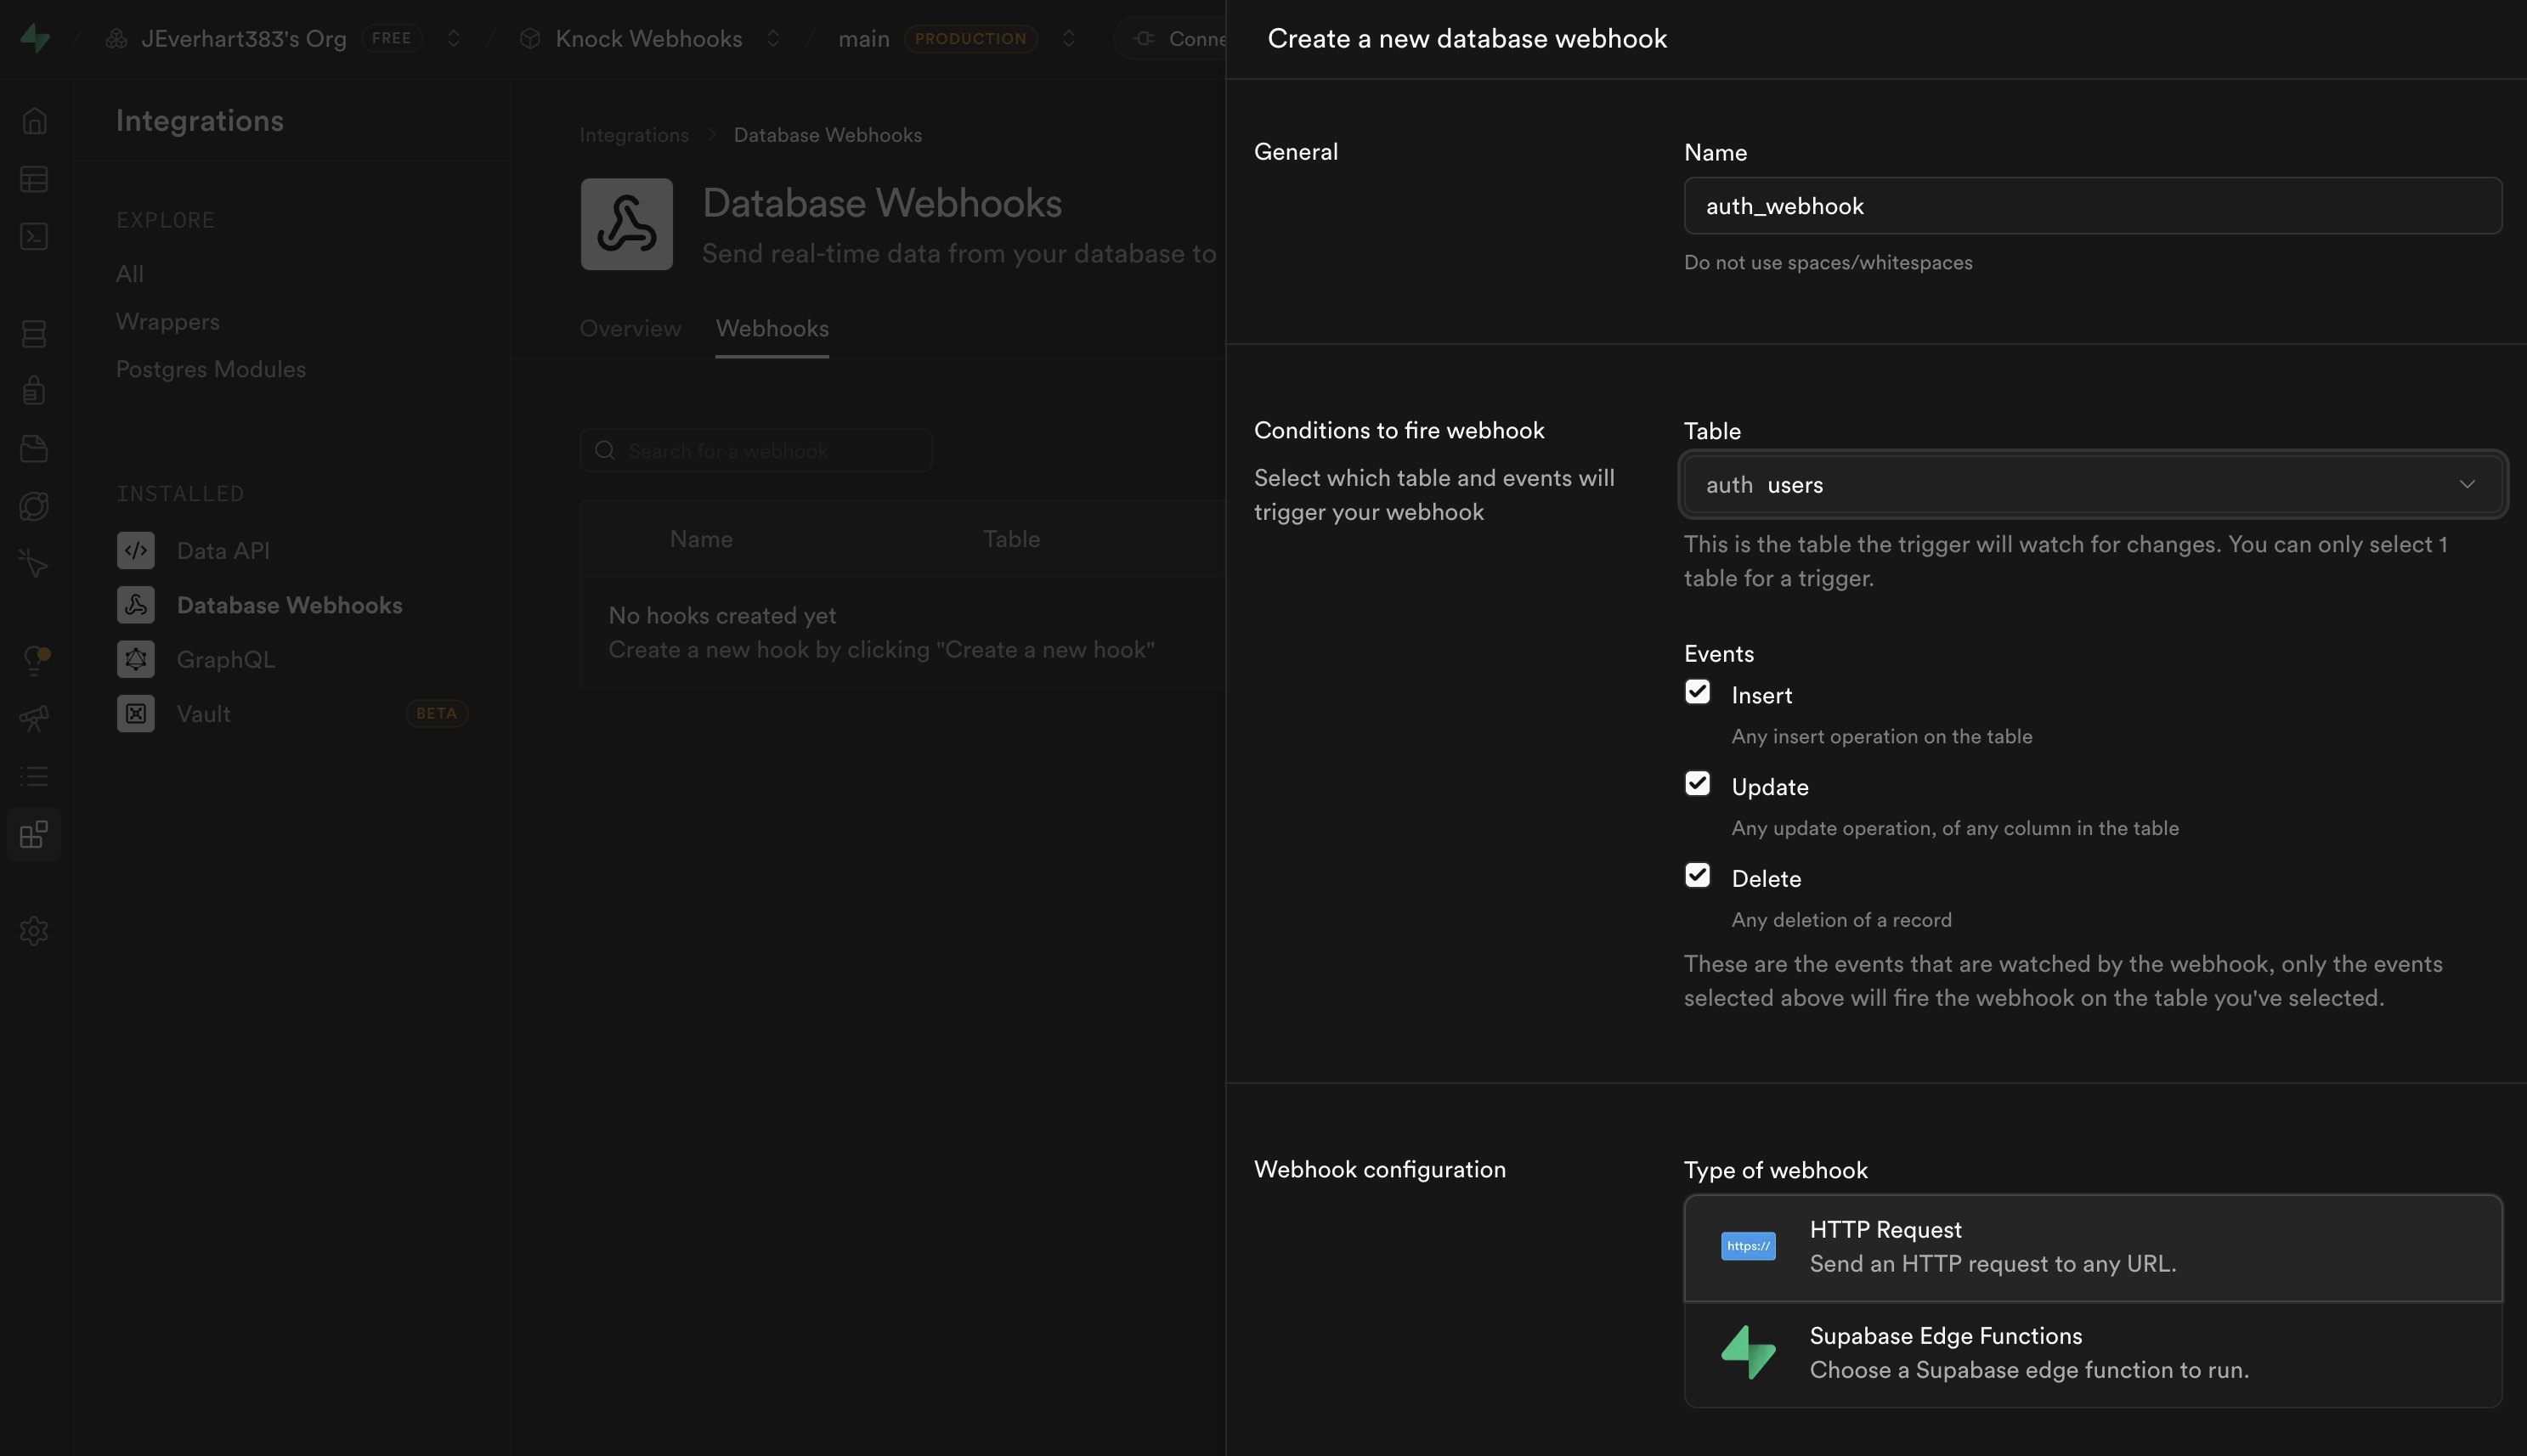
In Supabase, head to Database > Webhooks to create a new hook.
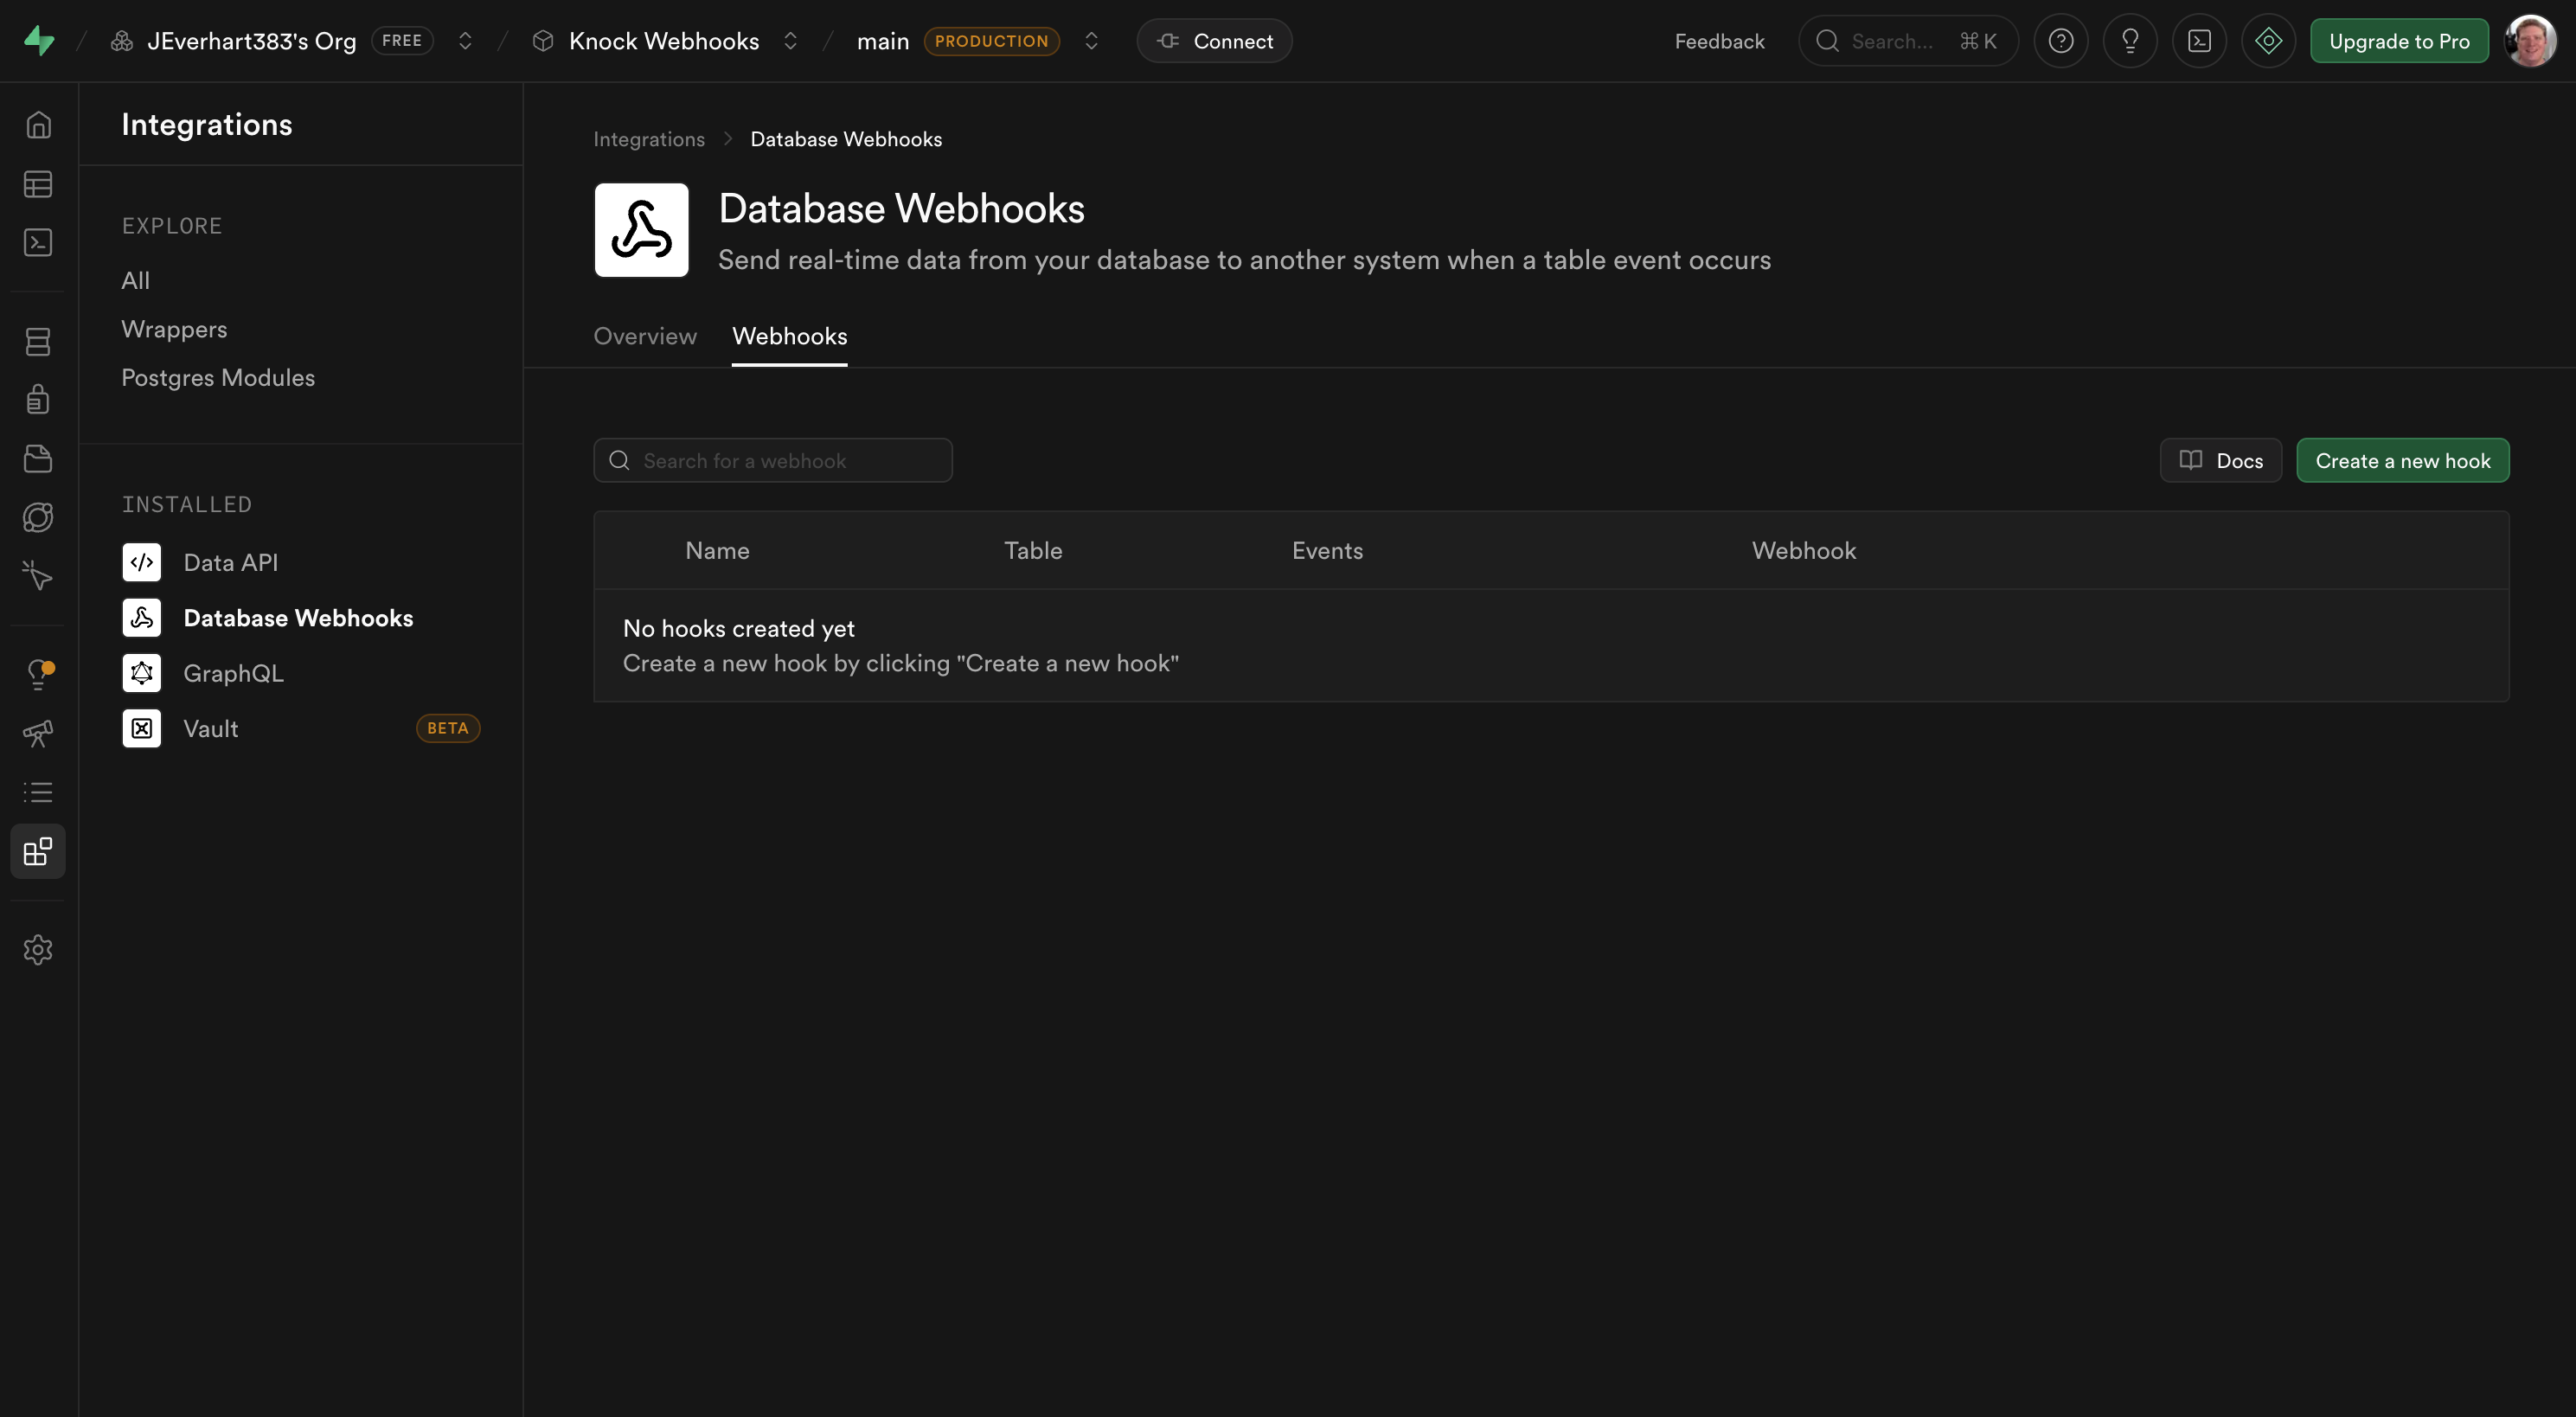
Click Create a new hook, name it auth_hook, and set the table to auth.users. For the request, choose POST and paste the Knock source URL you copied above.
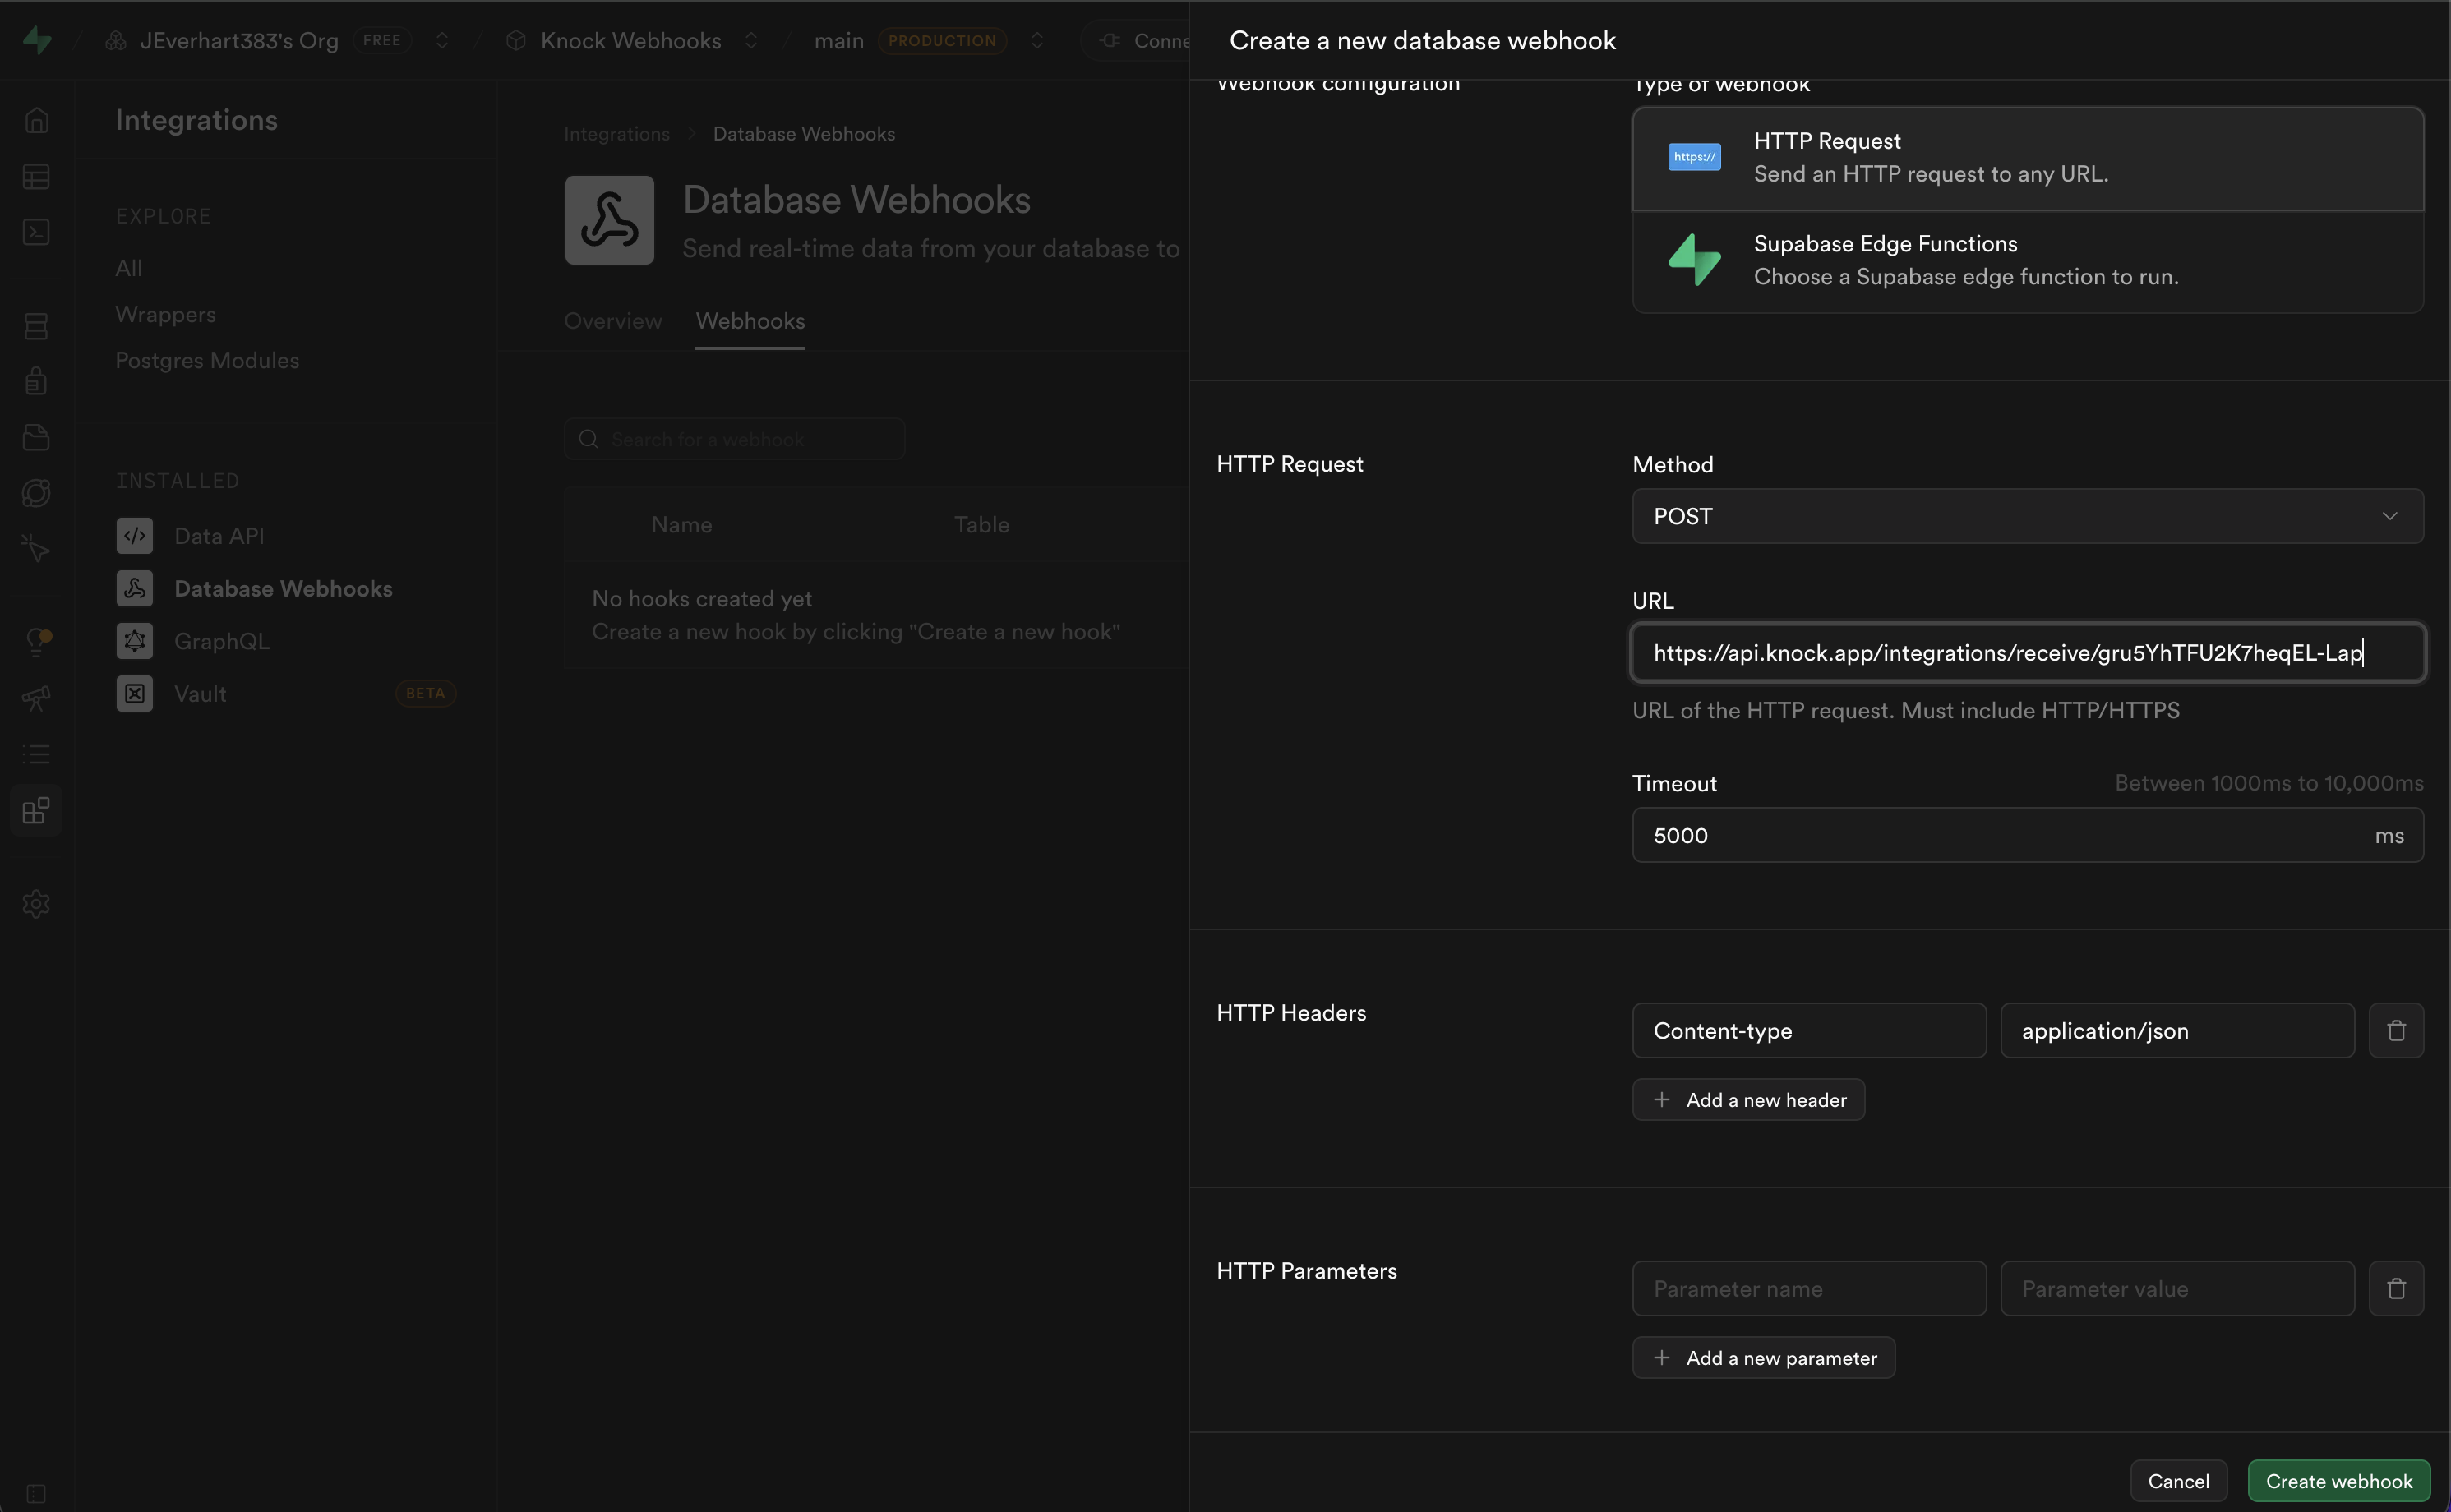
Subscribe the hook to both INSERT and UPDATE events on the auth.users table, then click Create webhook.
Now any user creation or update in Supabase will land in Knock.
Test the connection
To verify the wiring, create a user from your app or directly in Supabase. The Knock source logs should show the incoming event, and the default mappings will identify that user automatically. You can confirm the result under Users in the dashboard.
Triggering a welcome workflow on user signup
Identifying users is just the foundation. To put the event to work, we need a workflow attached to it. A new-user welcome — an in-app message, an email, or both — is a good starting point.
Open the Knock agent and prompt it:
Create a new user welcome workflow with an in-app step and an email step that welcomes the user to our blog.
The agent reads your channels and templates, generates the workflow, and wires the steps together. Open the workflow, review the in-app and email copy, then commit it to your development environment.
Now connect the workflow to the Supabase event. Back in the source, add a new event action mapping for auth.users:INSERT:
- Action: Trigger workflow.
- Workflow:
user-welcome. - Recipient:
body.record.id. - Data: leave empty for now.
Save the mapping. Knock will prompt you to recommit the workflow because its trigger type changed from a direct API call to a source event. Confirm, and you're live.
Create a real user from your app. The source logs should show two entries: an identify action and a workflow.trigger action. Sign in as that user and the in-app welcome message will be waiting.
Rendering that message takes a few of Knock's React components. KnockFeedProvider connects to the user's notification feed, NotificationIconButton is the bell, and NotificationFeedPopover is the dropdown.
// components/Notifications.jsx
import {
  KnockProvider,
  KnockFeedProvider,
  NotificationIconButton,
  NotificationFeedPopover,
} from "@knocklabs/react";
import { useRef, useState } from "react";

export function Notifications({ user }) {
  const [isOpen, setIsOpen] = useState(false);
  const buttonRef = useRef(null);

  return (
    <KnockProvider
      apiKey={process.env.NEXT_PUBLIC_KNOCK_PUBLIC_API_KEY}
      userId={user.id}
    >
      <KnockFeedProvider feedId={process.env.NEXT_PUBLIC_KNOCK_FEED_ID}>
        <NotificationIconButton
          ref={buttonRef}
          onClick={() => setIsOpen(!isOpen)}
        />
        <NotificationFeedPopover
          buttonRef={buttonRef}
          isVisible={isOpen}
          onClose={() => setIsOpen(false)}
        />
      </KnockFeedProvider>
    </KnockProvider>
  );
}
The userId here is the same body.record.id Knock used when it identified the user from the Supabase webhook, so the feed populates as soon as the welcome workflow runs. See the in-app feed docs for theming and customization options.
That's the basic auth flow, and it's where most Supabase notification integrations stop. The rest of this post covers what you can do once you treat any other table the same way.
Listening to any table event
The auth flow is one webhook. The same source URL handles webhooks from any other table; you just add more mappings.
Let's build a pub/sub flow: users subscribe to posts, and when a post updates, every subscriber gets notified. That means two more tables (posts and subscriptions) and two new Supabase webhooks pointing at the same Knock source URL.
In Supabase, create:
post_hook: listens toINSERTevents on thepoststable.subs_hook: listens toINSERTevents on thesubscriptionstable.
Both post to the same Knock source URL. From the app, create a draft post and a subscription so Knock receives sample events. The source logs will show public.posts:INSERT and public.subscriptions:INSERT arriving with no mappings yet, which is exactly what we want: we now have real payloads to write the mappings against.
Modeling posts as Knock objects
In Knock, an object is a non-user entity that can act as a recipient and hold subscribers. A post fits the model neatly: it's something users can subscribe to, and something workflows can target.
In your source, add a mapping for public.posts:INSERT:
- Action: Set object.
- Collection:
posts. - Object ID:
body.record.id.
Whenever a post is inserted in Supabase, Knock creates a matching object in the posts collection. You can sync additional properties (title, author, slug) by mapping them in the action's body. We'll keep ours minimal for now.
Subscribing users to objects
Next, map the subscriptions table. Add a mapping for public.subscriptions:INSERT:
- Action: Subscribe to object.
- Collection:
posts. - Object ID:
body.record.post_id. - Recipient:
body.record.user_id.
Save the mapping. Create a real post and a real subscription from your app, then check Knock: the new object should be in the posts collection, with the subscriber relationship listed under the object's subscriptions tab.
Triggering a fan-out workflow
With objects and subscriptions modeled, fan-out is automatic. When you trigger a workflow against an object, Knock runs that workflow once for every subscriber of the object.
Open the Knock agent again:
Create a post update workflow that's triggered for objects in the post collection as the recipient. Include details about the post update that the user might find interesting.
The agent picks up the posts collection, reads its schema, and generates a workflow with an in-app step and an email step. The richer your object schema — title, URL, excerpt — the richer the templates the agent can compose.
To test, run the workflow from the dashboard. Pick the object as the recipient, supply some test data, and click "Run test." Knock triggers the workflow against the object, fans it out to its subscribers, and produces a workflow run per subscriber. The in-app feed in your app should show the update.
In production, you'll trigger the same workflow from your application code whenever a post changes, usually from a post-update handler.
// server/triggerPostUpdate.js
import Knock from "@knocklabs/node";

const knock = new Knock({ apiKey: process.env.KNOCK_API_KEY });

export async function triggerPostUpdate(post) {
  await knock.workflows.trigger("post-update", {
    recipients: [
      {
        collection: "posts",
        id: post.id,
      },
    ],
    data: {
      title: post.title,
      excerpt: post.excerpt,
      url: `https://yourblog.com/posts/${post.slug}`,
      updated_at: post.updated_at,
    },
  });
}
Passing the post as an object recipient is what unlocks the fan-out. Knock looks up every subscriber on that object (every user inserted into the subscriptions table) and runs the workflow once per subscriber. One trigger call, one notification per interested user, no fan-out logic in your application code.
Where to go from here
You've now turned three Supabase tables into a working notification system: signups trigger a welcome flow, posts become Knock objects, and subscriptions wire users into per-post fan-out, none of it requiring Edge Functions or custom backend code.
The same pattern extends to anything in your database. A comments table can drive @mention notifications. An orders table can drive transactional email. A documents table can drive collaboration alerts. Each one is a webhook in Supabase and a mapping in Knock.
A few next steps worth exploring:
- Listen for updates and deletes. We only mapped
INSERTevents. Adding anUPDATEmapping onpostslets you trigger the post update workflow from a real Supabase event instead of a manual test run. - Sync more properties. Map fields like
title,slug, andauthor_idinto your post objects so workflow templates can reference them directly. - Customize the mapping logic. The data source uses a JavaScript snippet to normalize event types. Edit it when you need to handle custom event names or reshape the payload before it reaches your mappings.
Knock data sources follow the same shape for WorkOS, Clerk, and any HTTP-capable service. If you're building on Supabase and want cross-channel messaging without the glue code, the data source is a good place to start.