Slack won't let your application anywhere near its users and platform without authentication through the Slack OAuth flow.
This gives Slack a secure way to control access to its API, ensuring that only authorized applications can interact with user data and functionality. It also allows users to grant specific permissions to your application based on the required scopes, thereby protecting their privacy and data security.
Luckily, implementing the OAuth flow in your application is straightforward, so developers can integrate their applications with Slack's features and functionalities, enabling them to enhance their app's capabilities, such as posting messages, scheduling reminders, or reading from channels where the app is present.
In this post, we're going to build a simple app that does just that - uses the OAuth flow to grant our application access to user data, all in less than 100 lines of code, including error handling.
Video walkthrough
If you prefer to learn with video, watch it here.
Why third-party apps use OAuth
Using OAuth with Slack offers several significant benefits for your application:
- Secure authentication. OAuth is a secure standard for authorization that allows applications to authenticate users without handling their passwords. This minimizes the security risks associated with storing and transmitting sensitive credentials.
- Scoped access. OAuth allows applications to request specific levels of access, commonly known as scopes, to a user's Slack resources, such as channels, messages, or user data. This means the application doesn’t gain more access than necessary, following the principle of least privilege.
- User experience. The OAuth flow provides a more streamlined user experience by allowing users to authenticate with an existing Slack account.
- Token-based access. After the OAuth process is complete, the application receives an access token to interact with the Slack API on behalf of the user. This token can be stored and used for future authenticated requests without further user interaction as long as the token remains valid.
- Revoke access. Users can revoke the application's access through their Slack settings, giving them control over which third-party apps can access their Slack account.
Building the Slack OAuth flow into a Node.js application
Let's build a small Node.js application allowing you to authenticate using the Slack OAuth flow. This app only needs two components:
- A route to call the Slack OAuth flow URL
- A route to handle the redirect with the Slack access token
We'll also need a few dependencies to help us build this:
npm install dotenv express axios express-sessionWe need these for:
dotenv: loads environment variables from a.envfile intoprocess.envto make it easy to manage configuration variables like API keys.express: a minimalist web server for Node.js.axios: a common library for making HTTP requests.express-session: session middleware for Express used to store session data on the server and allow persistence across requests.
Here's the complete code, which we'll add to a file called app.js:
require("dotenv").config();
const express = require("express");
const axios = require("axios");
const session = require("express-session");

const app = express();
const port = 3000;

// Configure session middleware
app.use(
  session({
    secret: process.env.SESSION_SECRET,
    resave: false,
    saveUninitialized: true,
    cookie: { secure: "auto" },
  }),
);

// Redirect user to Slack's OAuth authorization page
app.get("/auth/slack", (req, res) => {
  const scopes = "channels:read";
  res.redirect(
    `https://slack.com/oauth/v2/authorize?client_id=${
      process.env.SLACK_CLIENT_ID
    }&user_scope=${encodeURIComponent(
      scopes,
    )}&redirect_uri=${encodeURIComponent(process.env.SLACK_REDIRECT_URI)}`,
  );
});

// Callback URI endpoint
app.get("/auth/slack/callback", async (req, res) => {
  const { code } = req.query;
  try {
    const tokenResponse = await axios.post(
      "https://slack.com/api/oauth.v2.access",
      null,
      {
        params: {
          code,
          client_id: process.env.SLACK_CLIENT_ID,
          client_secret: process.env.SLACK_CLIENT_SECRET,
          redirect_uri: process.env.SLACK_REDIRECT_URI,
        },
      },
    );

    if (tokenResponse.data.ok) {
      // Save the tokens in session or a secure place
      const accessToken = tokenResponse.data.authed_user.access_token;
      req.session.slack_access_token = accessToken;
      req.session.slack_user_id = tokenResponse.data.authed_user.id;

      // Fetch user's channels
      const channelsResponse = await axios.get(
        "https://slack.com/api/conversations.list",
        {
          headers: { Authorization: `Bearer ${accessToken}` },
        },
      );

      if (channelsResponse.data.ok) {
        const channels = channelsResponse.data.channels
          .map((channel) => channel.name)
          .join(", ");
        res.send(
          `Authorization successful! Here are your channels: ${channels}`,
        );
      } else {
        res
          .status(500)
          .send("Error fetching channels: " + channelsResponse.data.error);
      }
    } else {
      res
        .status(500)
        .send("Error authorizing with Slack: " + tokenResponse.data.error);
    }
  } catch (error) {
    console.error(error);
    res
      .status(500)
      .send(
        "Server error when exchanging code for token or fetching channels.",
      );
  }
});

// Start the server
app.listen(port, () => {
  console.log(`Server running on http://localhost:${port}`);
});
Let's go through this to see how we're implementing OAuth in this app.
At the top, we have this line:
require("dotenv").config();This line loads environment variables from a .env file into process.env. We haven't got our environment variables yet. We'll do that in a moment.
Then we need to set up Express:
const express = require("express");
const session = require("express-session");

const app = express();
const port = 3000;
Here, we require express and create a constant variable called app that represents the Express application. We also set the port variable to 3000, which is the port our server will listen on.
Then we're going to set up our session using express-session:
app.use(
  session({
    secret: process.env.SESSION_SECRET,
    resave: false,
    saveUninitialized: true,
    cookie: { secure: "auto" },
  }),
);
Sessions are used to store information about the user across multiple requests. The secret is used to sign the session ID cookie, resave and saveUninitialized are flags for session saving behavior, and cookie: { secure: "auto" } ensures that cookies are secure in production (used over HTTPS).
With our server set up, we can create two endpoints to communicate with Slack. First, we'll create an endpoint for redirecting to the Slack OAuth flow:
app.get("/auth/slack", (req, res) => {
  const scopes = "channels:read";
  res.redirect(
    `https://slack.com/oauth/v2/authorize?client_id=${
      process.env.SLACK_CLIENT_ID
    }&user_scope=${encodeURIComponent(
      scopes,
    )}&redirect_uri=${encodeURIComponent(process.env.SLACK_REDIRECT_URI)}`,
  );
});
In this route, when a GET request is made to the /auth/slack path, the server responds by redirecting the client to Slack's OAuth authorization page.
The Slack URL is constructed with the query parameters from your application:
[https://slack.com/oauth/v2/authorize](https://slack.com/oauth/v2/authorize) is the base URL for Slack's OAuth 2.0 authorization endpoint.client_id=${process.env.SLACK_CLIENT_ID}is the query parameter that includes the client ID for your application, which you obtain from Slack when you register your application. It identifies which application is making the request.&user_scope=${encodeURIComponent(scopes)}is the query parameter that includes the OAuth scopes. The scopes variable contains the permissions the application requests from the user's Slack account. In this case, it asks permission to read the user's channels. URL encoding ensures that the scope string is safely formatted for inclusion in a URL.&redirect_uri=${encodeURIComponent(process.env.SLACK_REDIRECT_URI)}is the query parameter for the URL-encoded redirect URI, telling Slack where to redirect the user after they have either approved or denied the authorization request. The redirect URI must match one of the URIs configured in your Slack app settings.
When the user navigates to your server's /auth/slack endpoint, they are immediately redirected to the Slack authorization page with the proper query parameters set, starting the OAuth flow.
Our next route is our Slack OAuth callback route. This is the endpoint Slack will call when they have authenticated the user:
// Callback URI endpoint
app.get("/auth/slack/callback", async (req, res) => {
  const { code } = req.query;
  try {
    const tokenResponse = await axios.post(
      "https://slack.com/api/oauth.v2.access",
      null,
      {
        params: {
          code,
          client_id: process.env.SLACK_CLIENT_ID,
          client_secret: process.env.SLACK_CLIENT_SECRET,
          redirect_uri: process.env.SLACK_REDIRECT_URI,
        },
      },
    );

    if (tokenResponse.data.ok) {
      // Save the tokens in session or a secure place
      const accessToken = tokenResponse.data.authed_user.access_token;
      req.session.slack_access_token = accessToken;
      req.session.slack_user_id = tokenResponse.data.authed_user.id;

      // Fetch user's channels
      const channelsResponse = await axios.get(
        "https://slack.com/api/conversations.list",
        {
          headers: { Authorization: `Bearer ${accessToken}` },
        },
      );

      if (channelsResponse.data.ok) {
        const channels = channelsResponse.data.channels
          .map((channel) => channel.name)
          .join(", ");
        res.send(
          `Authorization successful! Here are your channels: ${channels}`,
        );
      } else {
        res
          .status(500)
          .send("Error fetching channels: " + channelsResponse.data.error);
      }
    } else {
      res
        .status(500)
        .send("Error authorizing with Slack: " + tokenResponse.data.error);
    }
  } catch (error) {
    console.error(error);
    res
      .status(500)
      .send(
        "Server error when exchanging code for token or fetching channels.",
      );
  }
});
Let's break this down. The whole thing is a GET route handler for the /auth/slack/callback path. This is the URL where Slack redirects users after they have authorized the application.
When Slack redirects back to this URL, it will include a temporary authorization code as a query parameter that can be exchanged for an access token, which we access using const { code } = req.query.
We then POST that code using Axios with our CLIENT_ID, CLIENT_SECRET, and REDIRECT_URI to the Slack API's oauth.v2.access endpoint.
If the request is successful, meaning tokenResponse.data.ok returns true, then we can use an access token to access Slack data as long as it is within the scopes. We save the access token in the session and then use it with the conversations.list API method. This sends back a list of channel names to the browser. The channel names are extracted from the API response and sent to the browser.
This seems like a lot of back-and-forth, and it is, but it can be summarized like this:
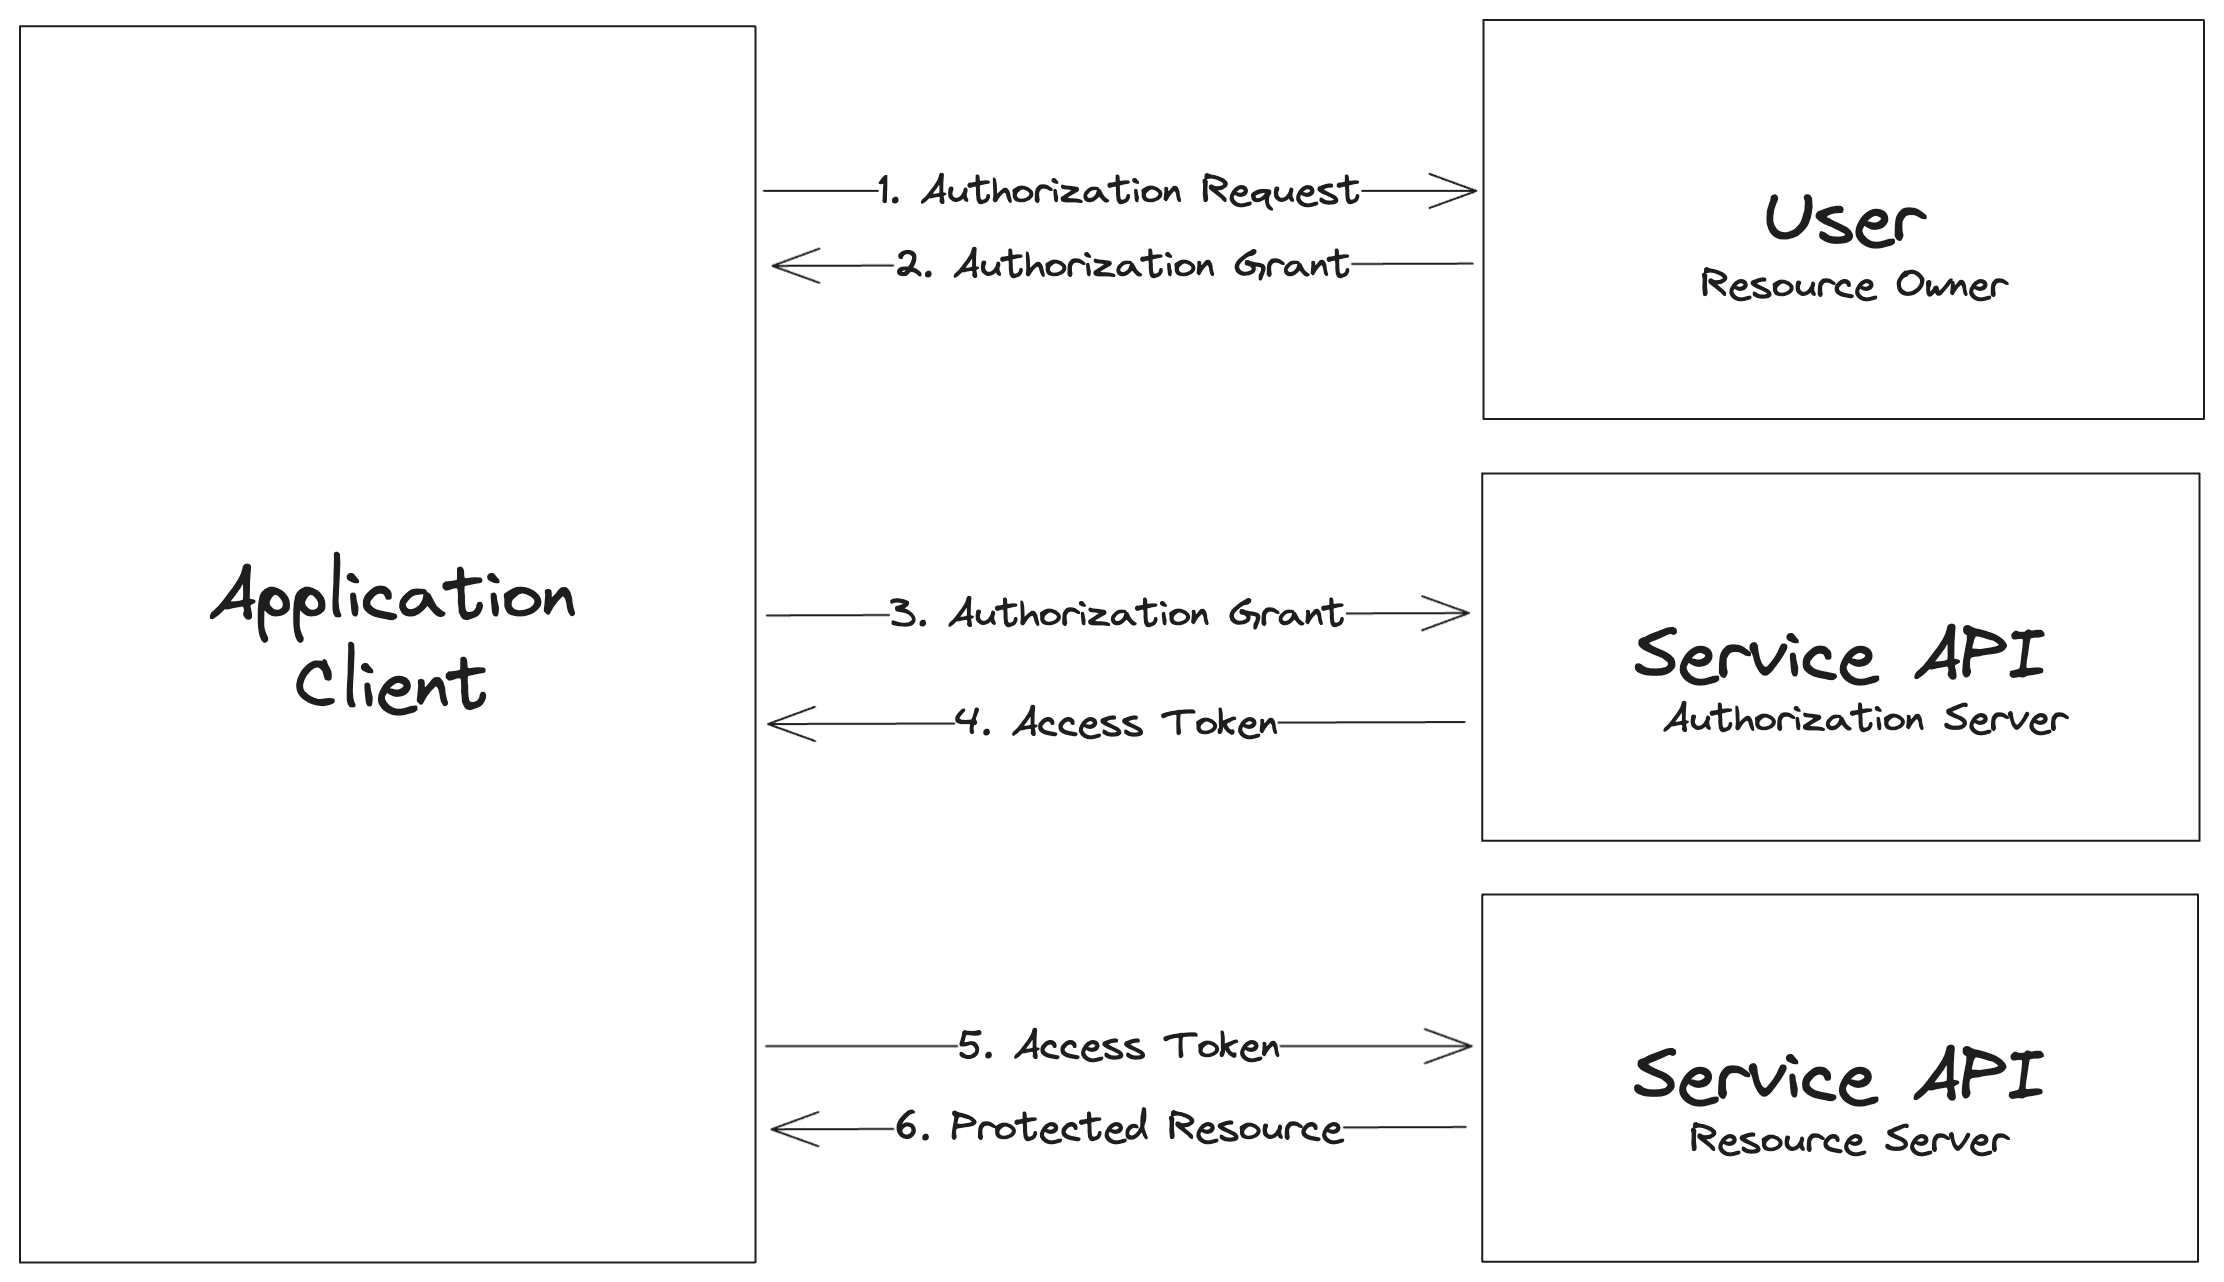
Steps 1 & 2 happen in the /auth/slack route, and steps 3 through 6 occur in the auth/slack/callback route.
Finally, we can start the server:
app.listen(port, () => {
  console.log(`Server running on <http://localhost>:${port}`);
});
If we were to run this now with node app.js it would error because we're missing all the environment variables we need. We need to create the .env file that dotenv will read the environment variables from:
# .env
SLACK_CLIENT_ID=your-slack-client-id
SLACK_CLIENT_SECRET=your-slack-client-secret
SLACK_REDIRECT_URI=your-slack-redirect-uri
SESSION_SECRET=some-random-string
But, of course, we don't have those variables. Let's move to Slack to create our application and get a client ID and client secret.
Setting up OAuth in Slack
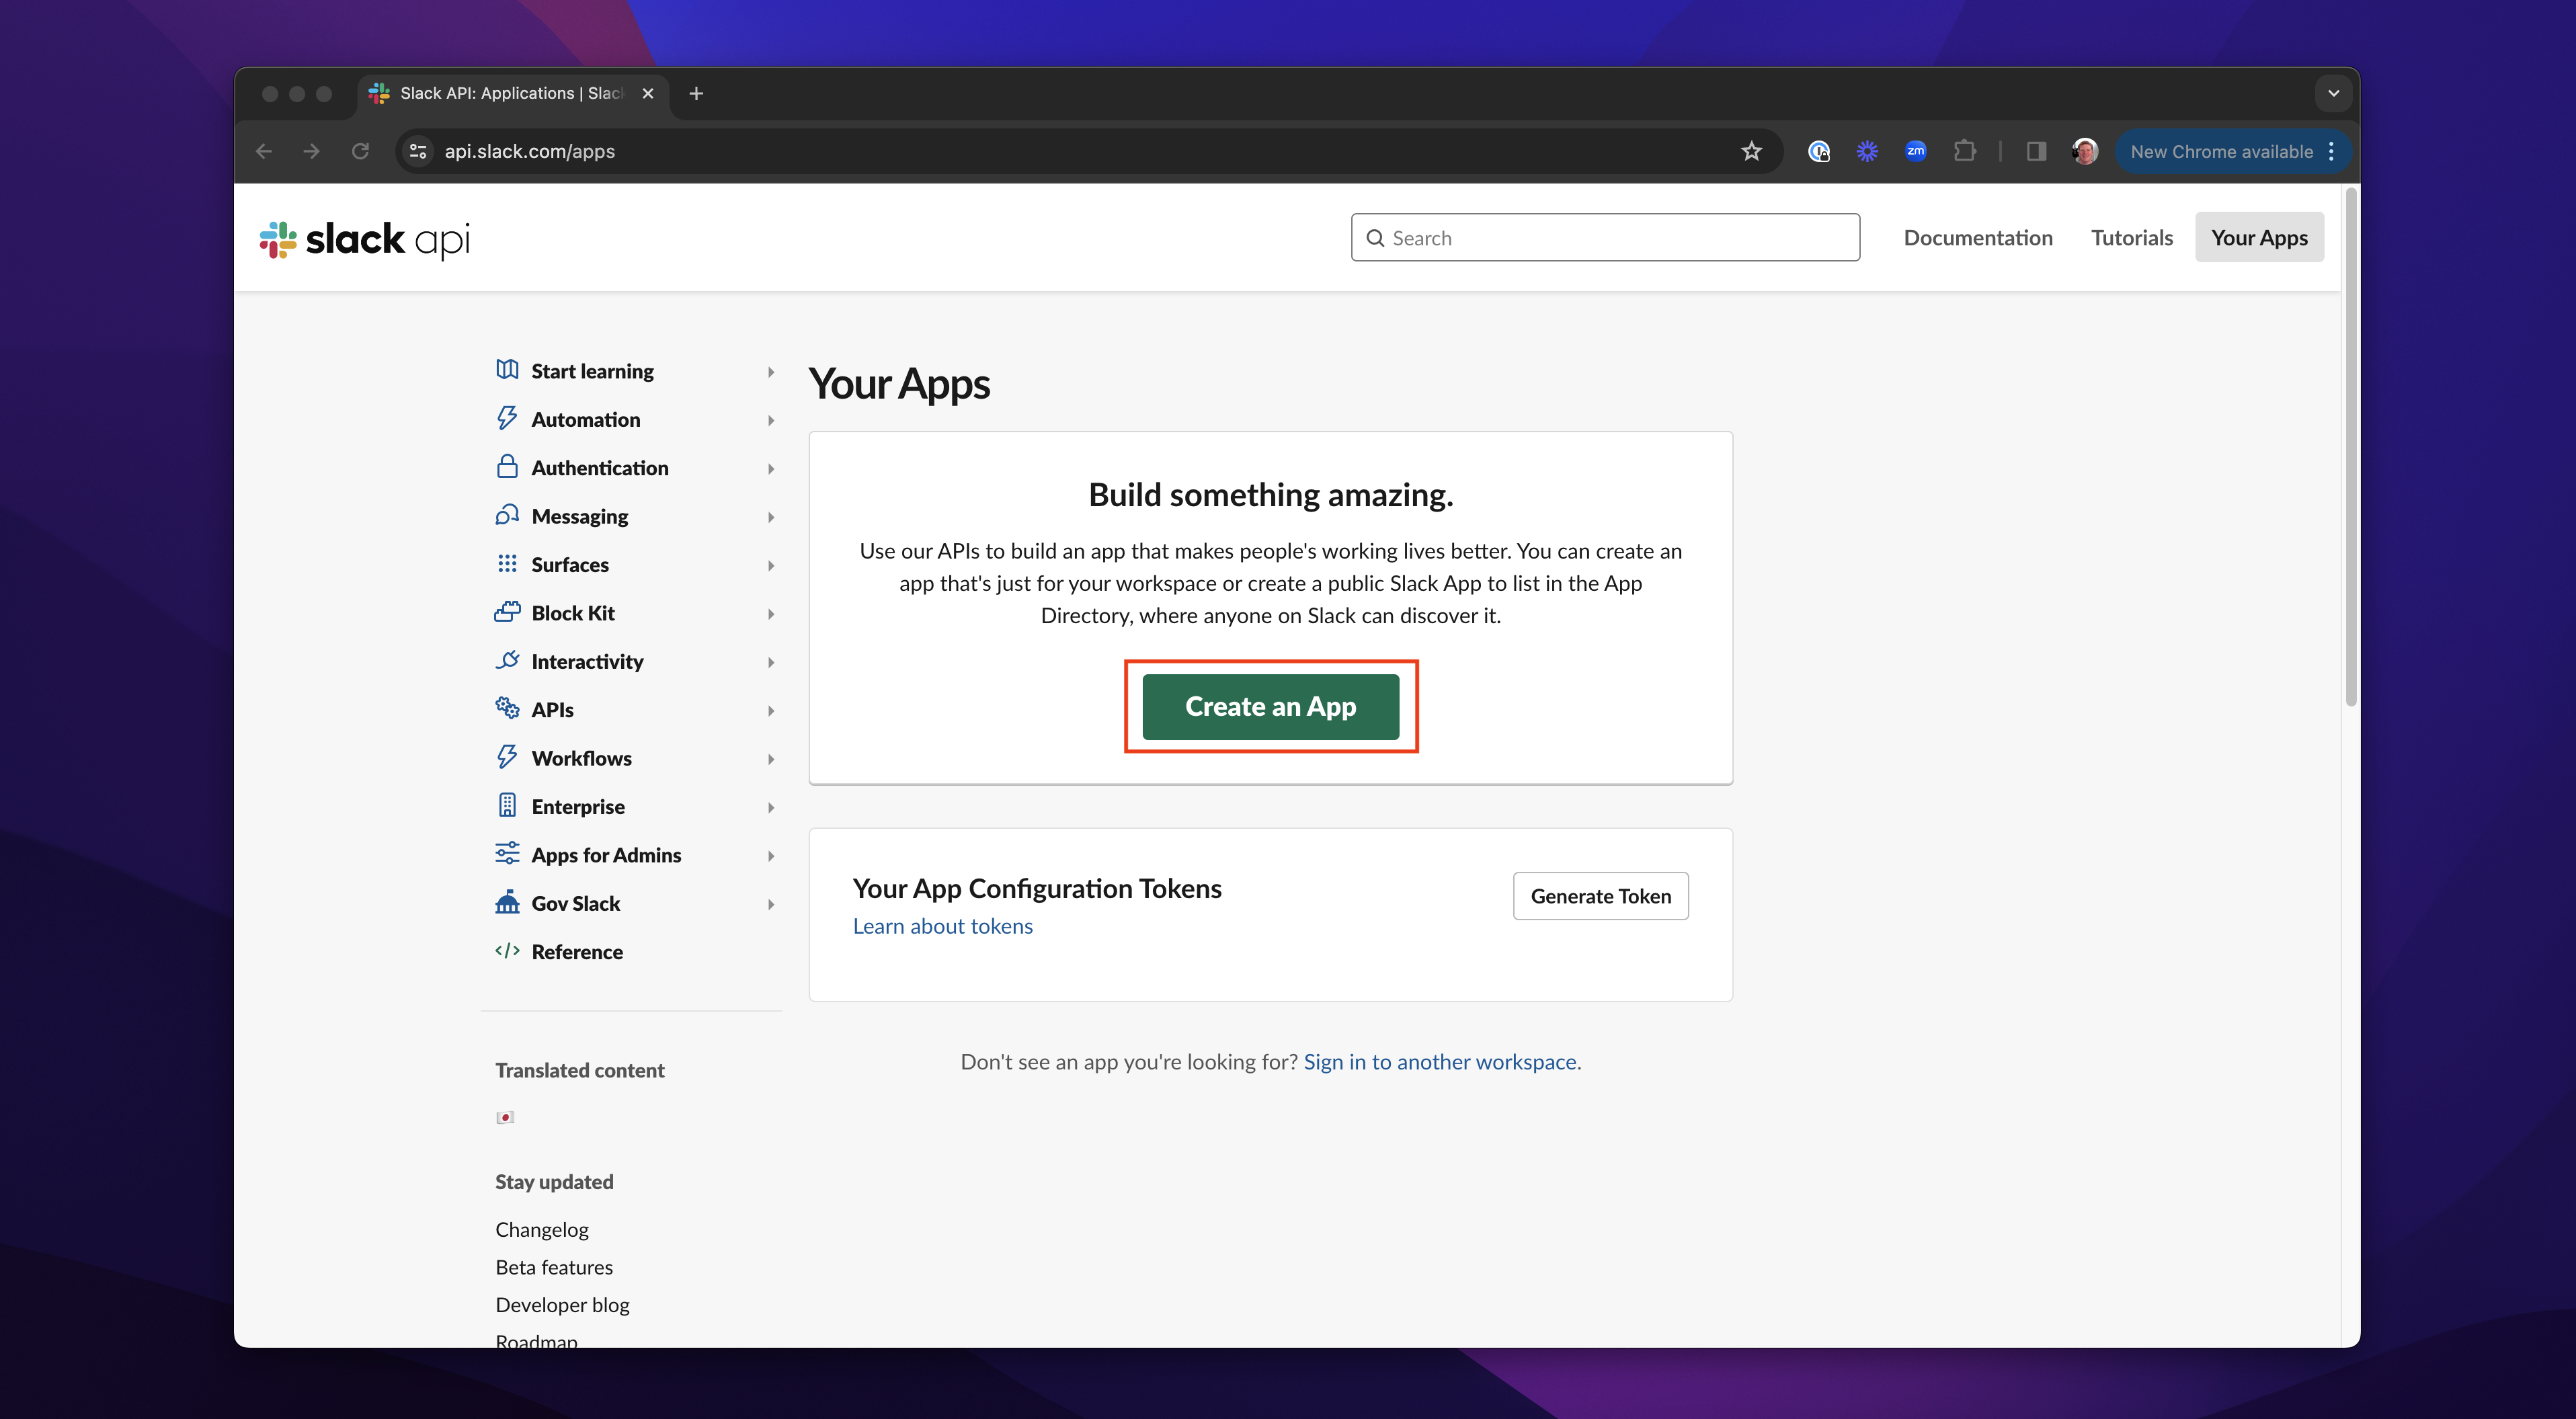
It's quick and easy to get this information from Slack. Head to the Slack API Apps page and hit Create New App:
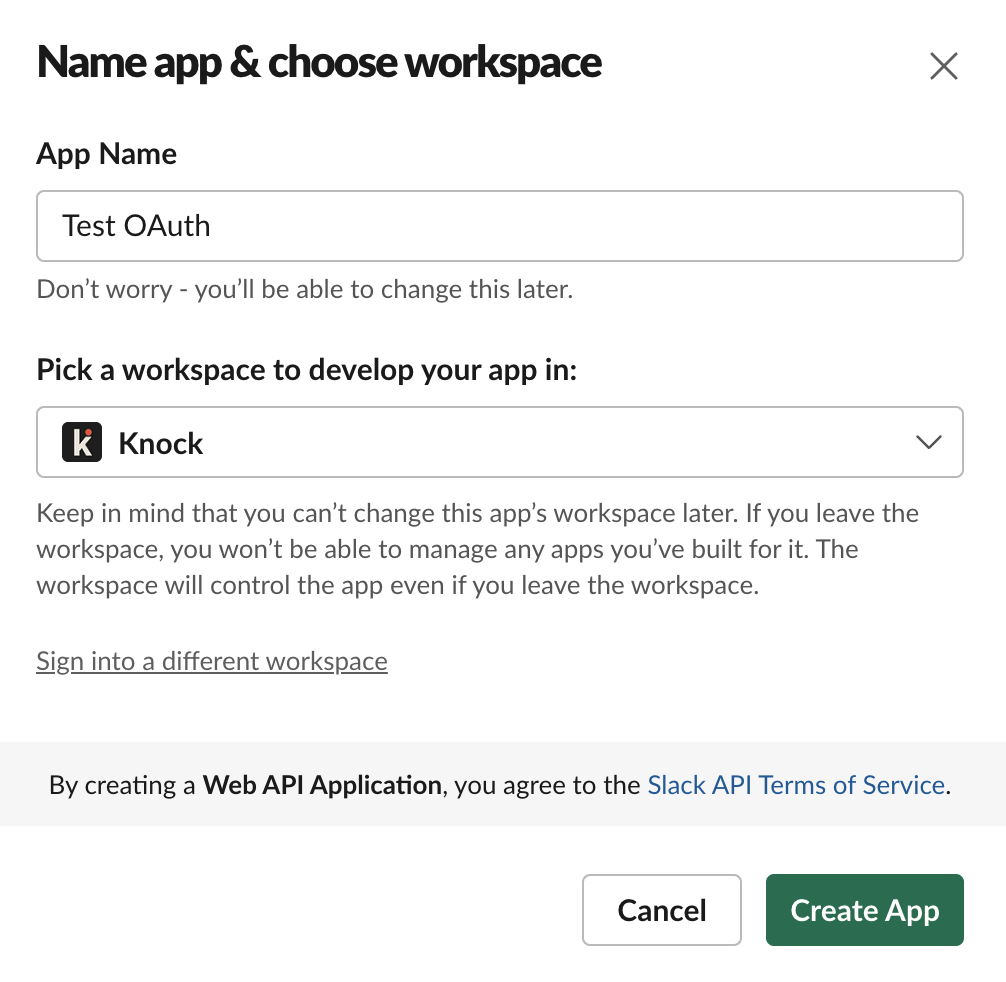
Choose “From Scratch,” then name your app and pick a workspace to develop it in:
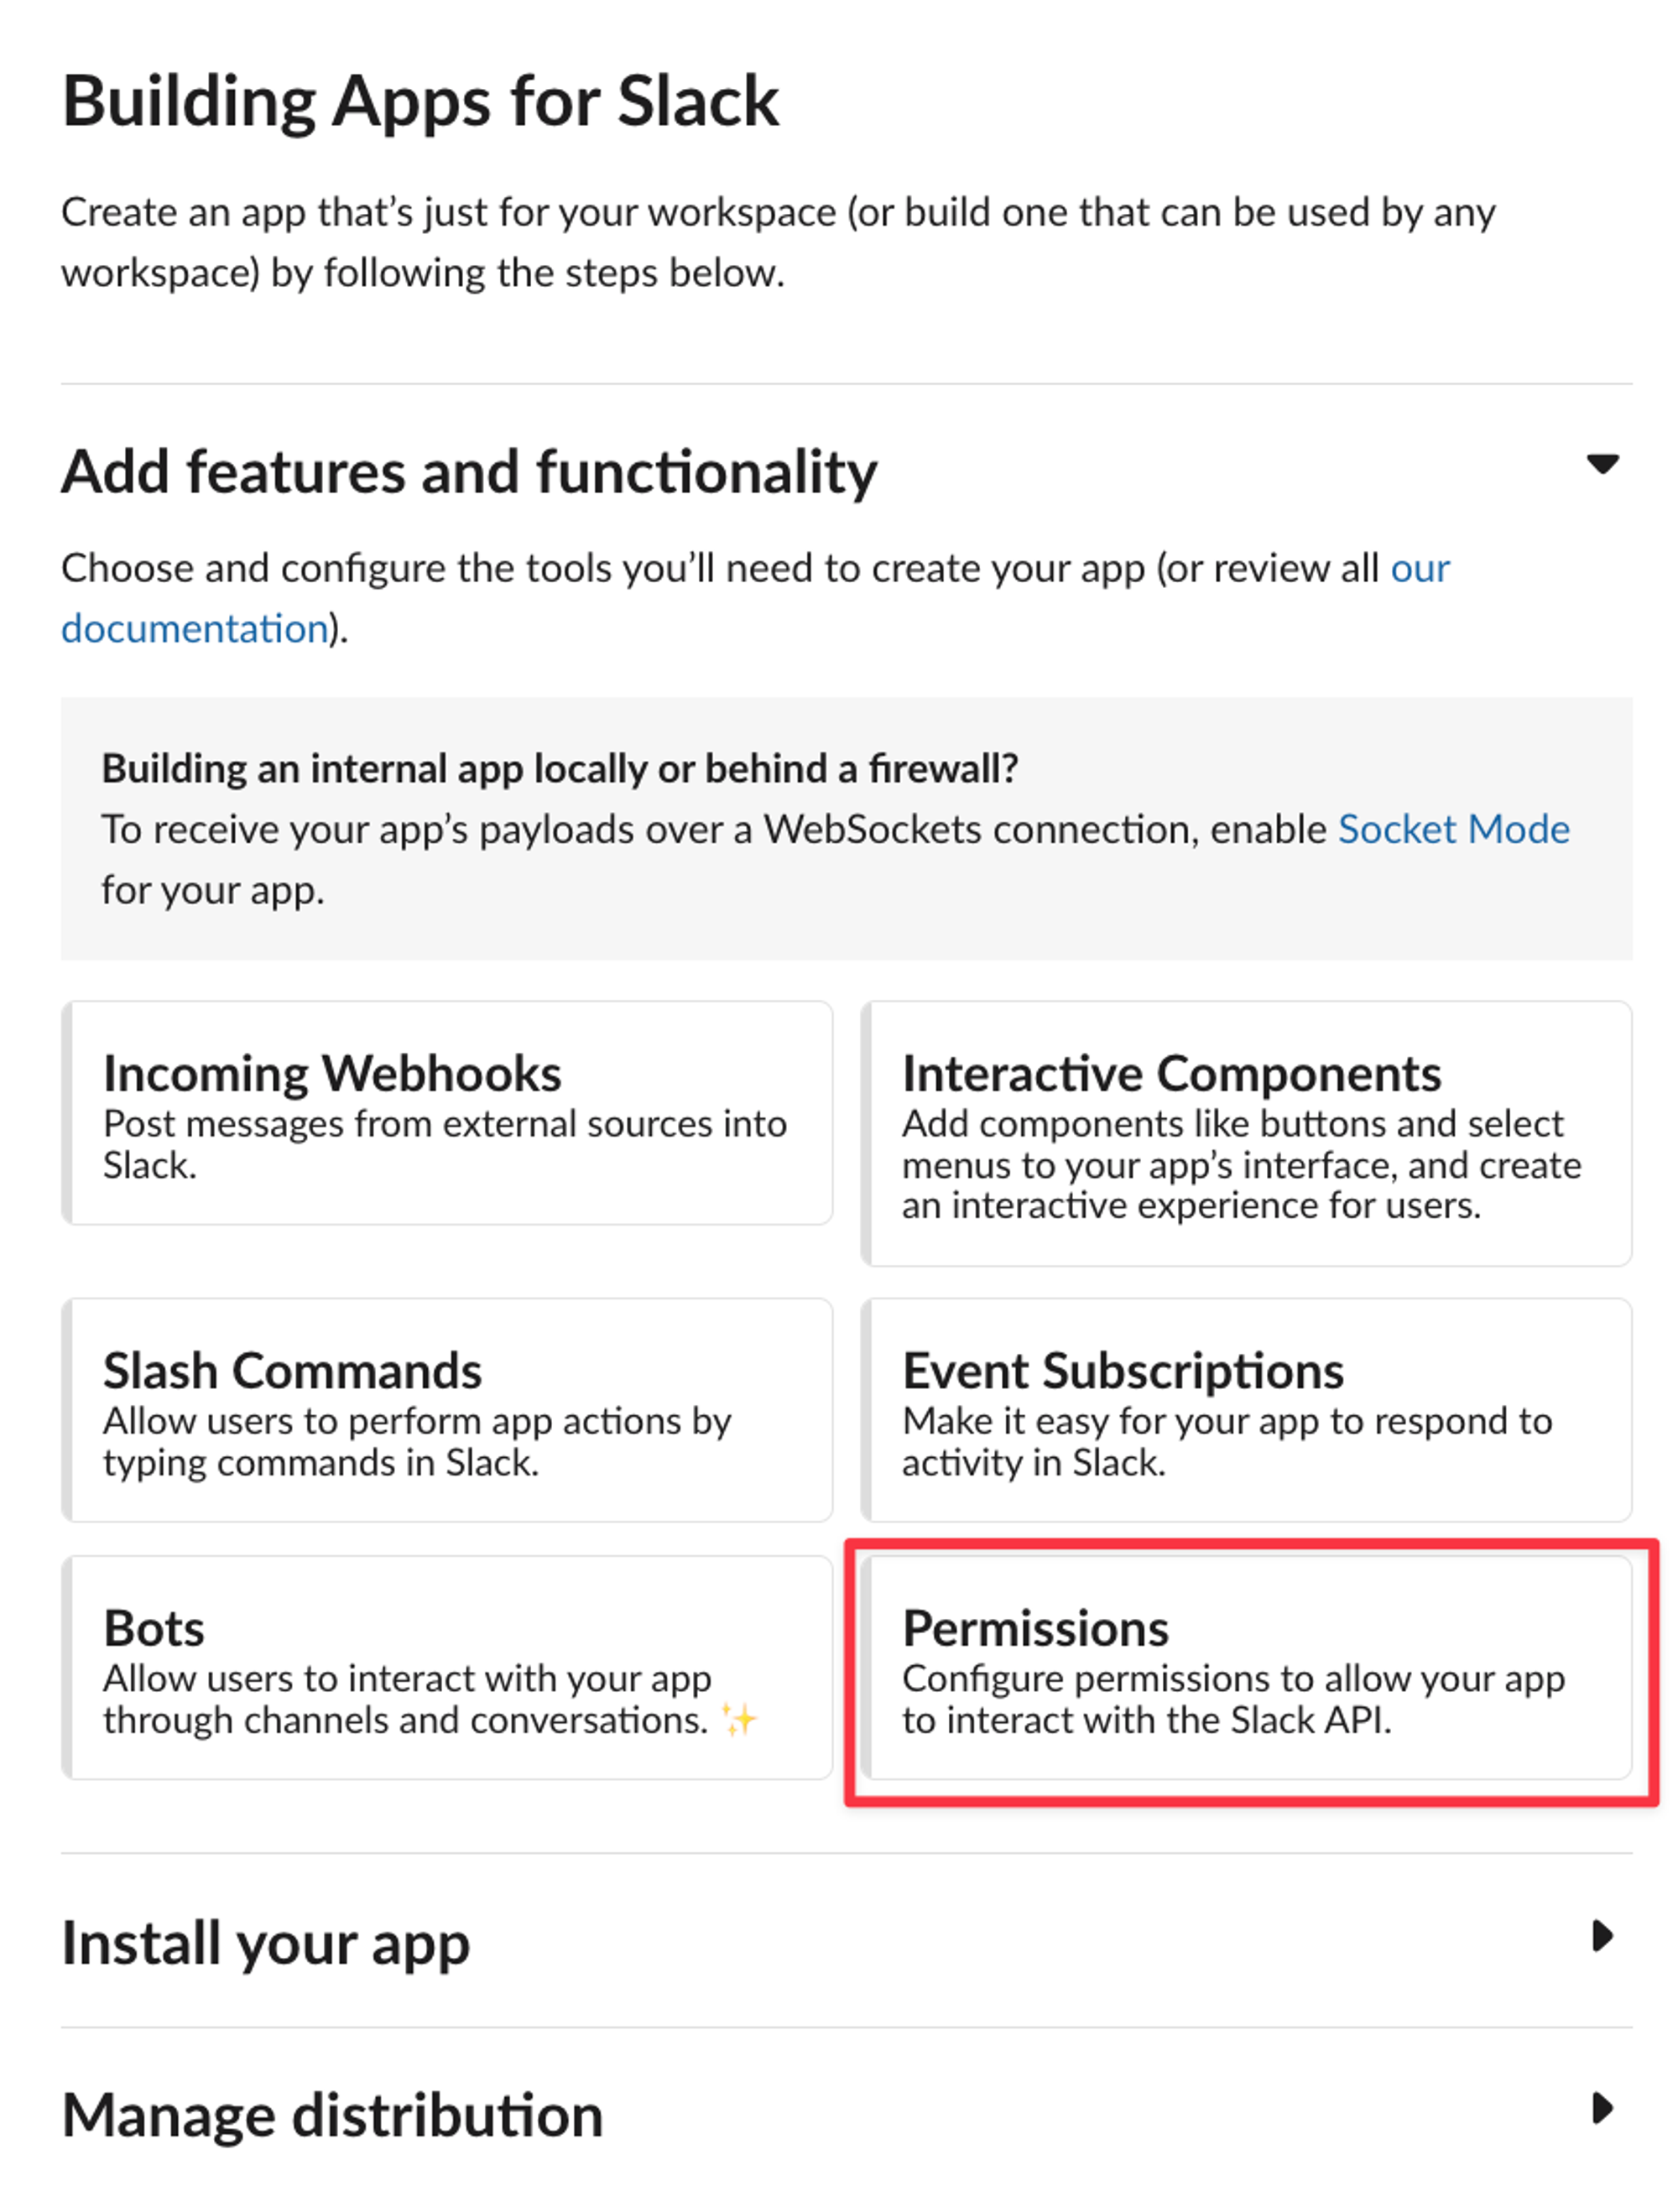
From there, the first thing we want to do is set our permissions:
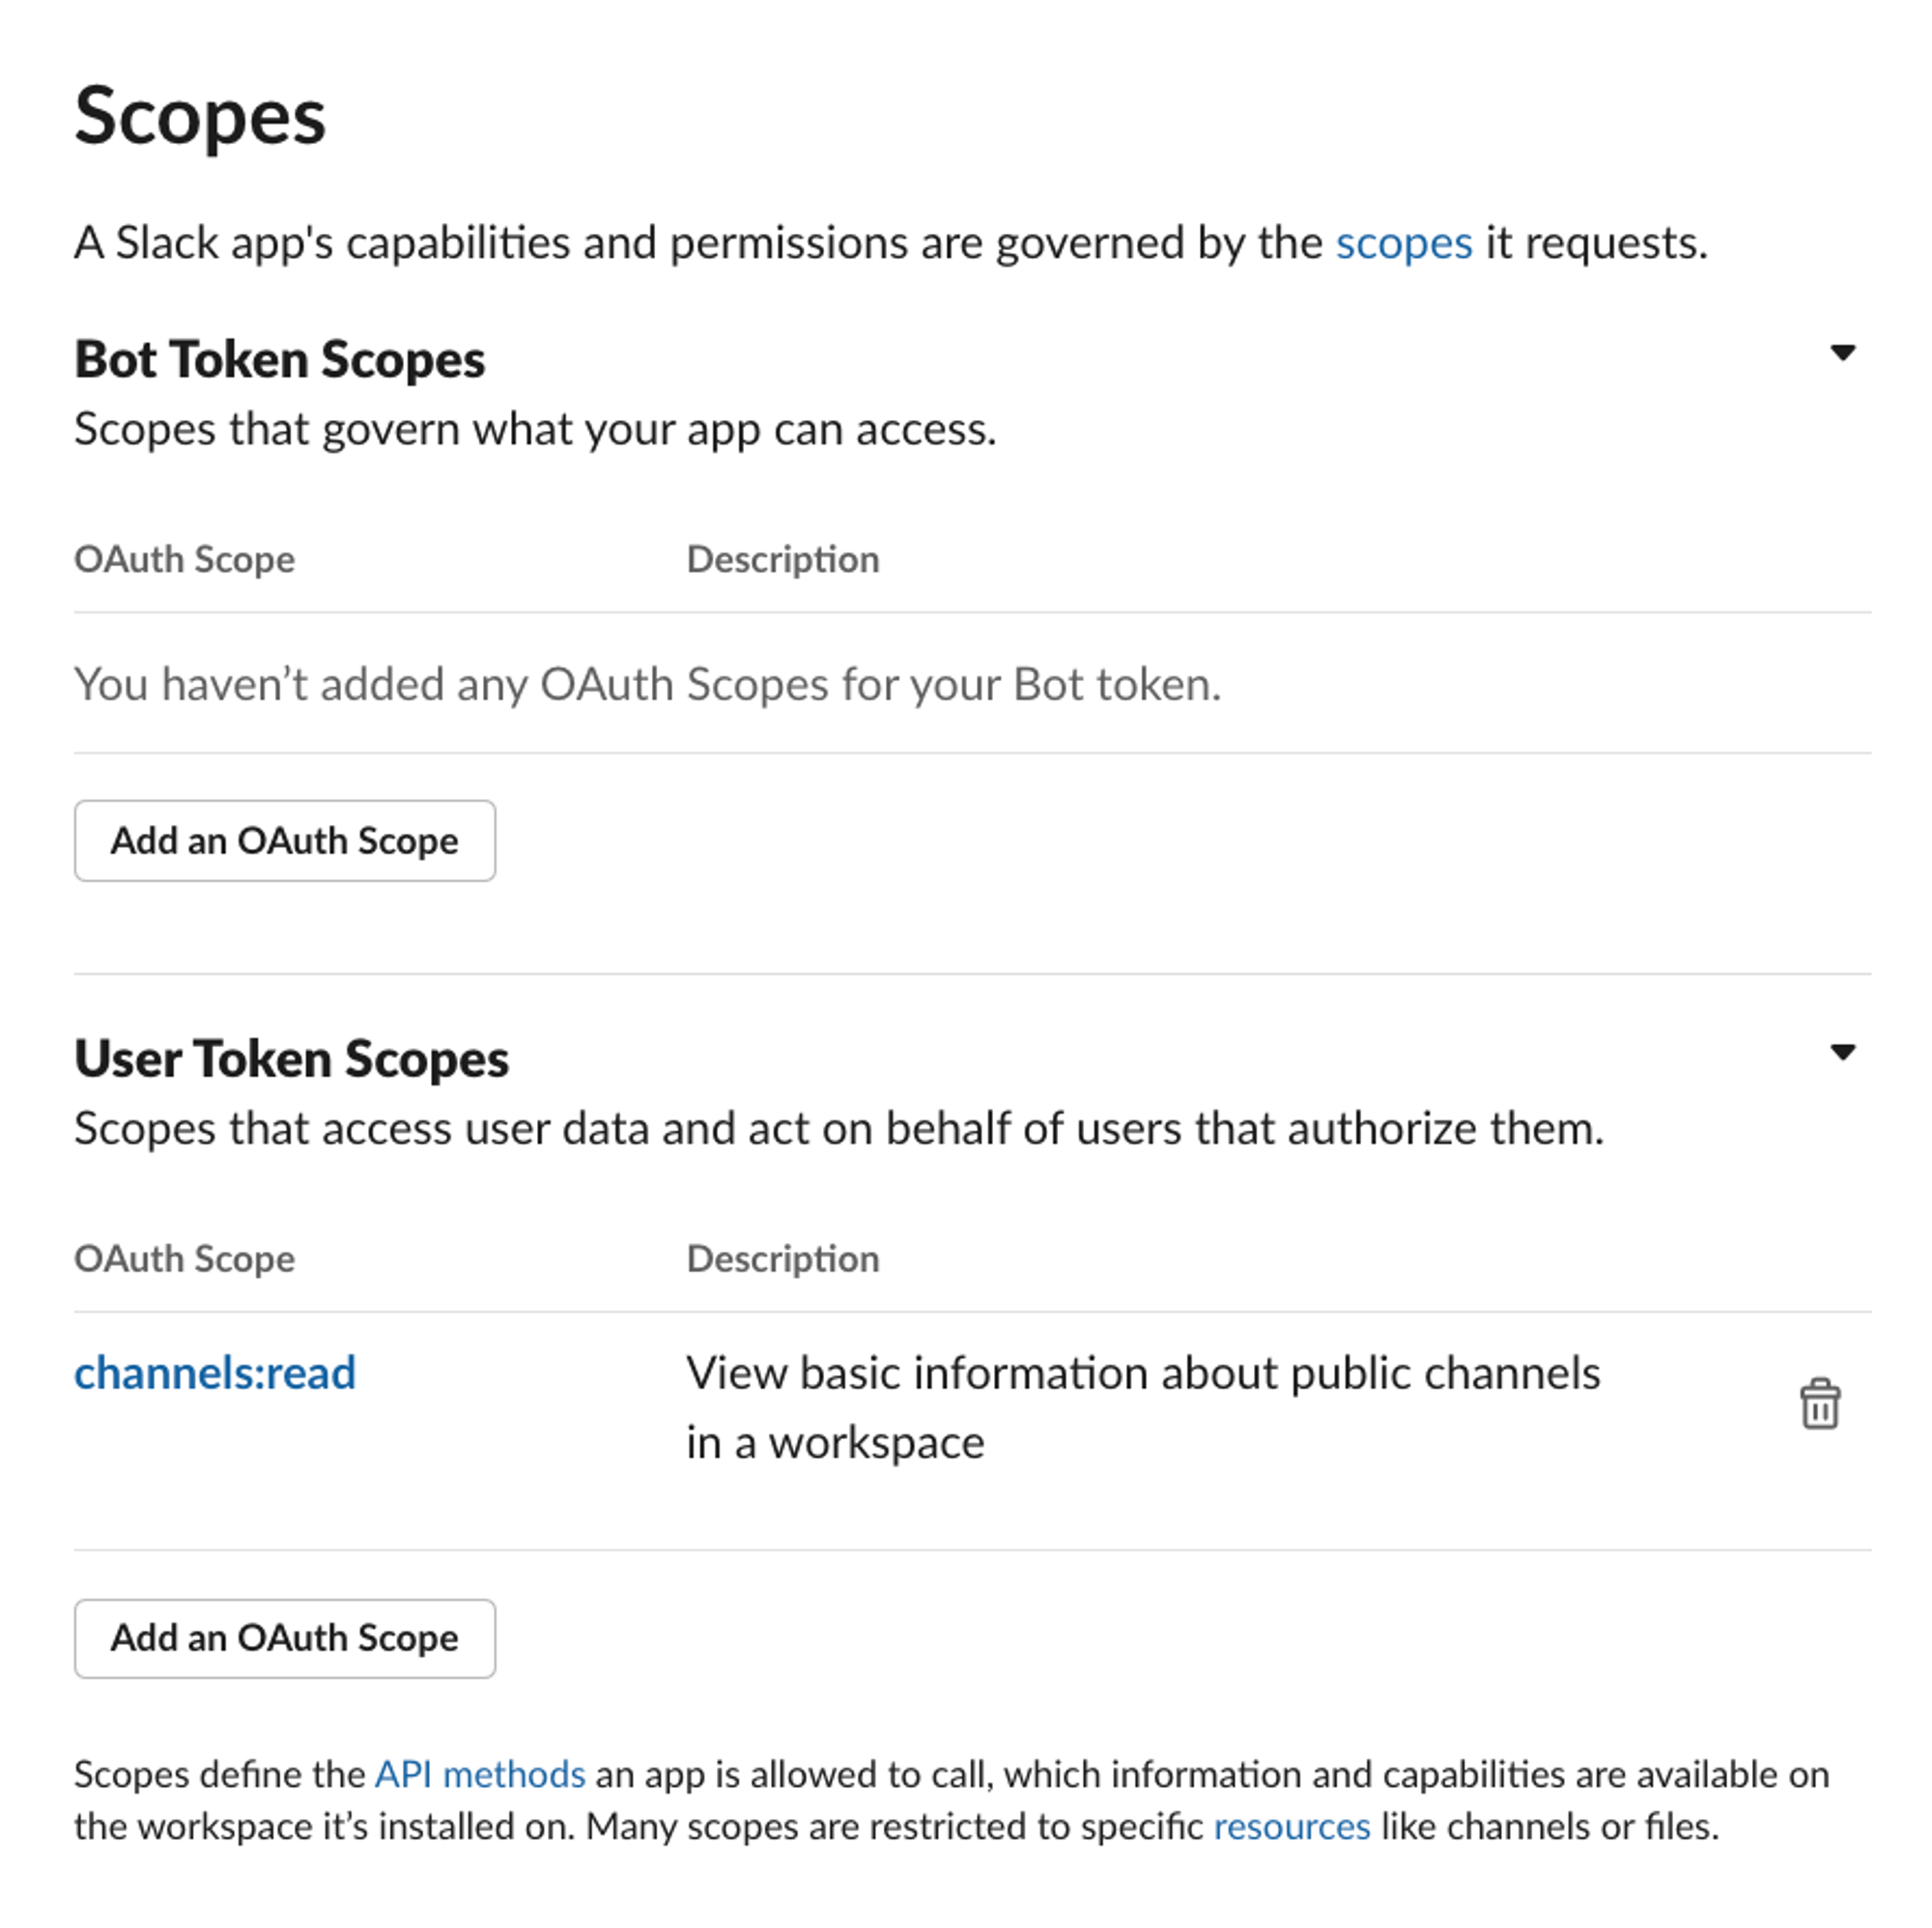
Scroll down until you see the 'Scopes' heading.
This is where we will set the scopes that we used in the code above. Here, we're just using channels:read as a user token scope, but you need to select the correct permissions for your application:
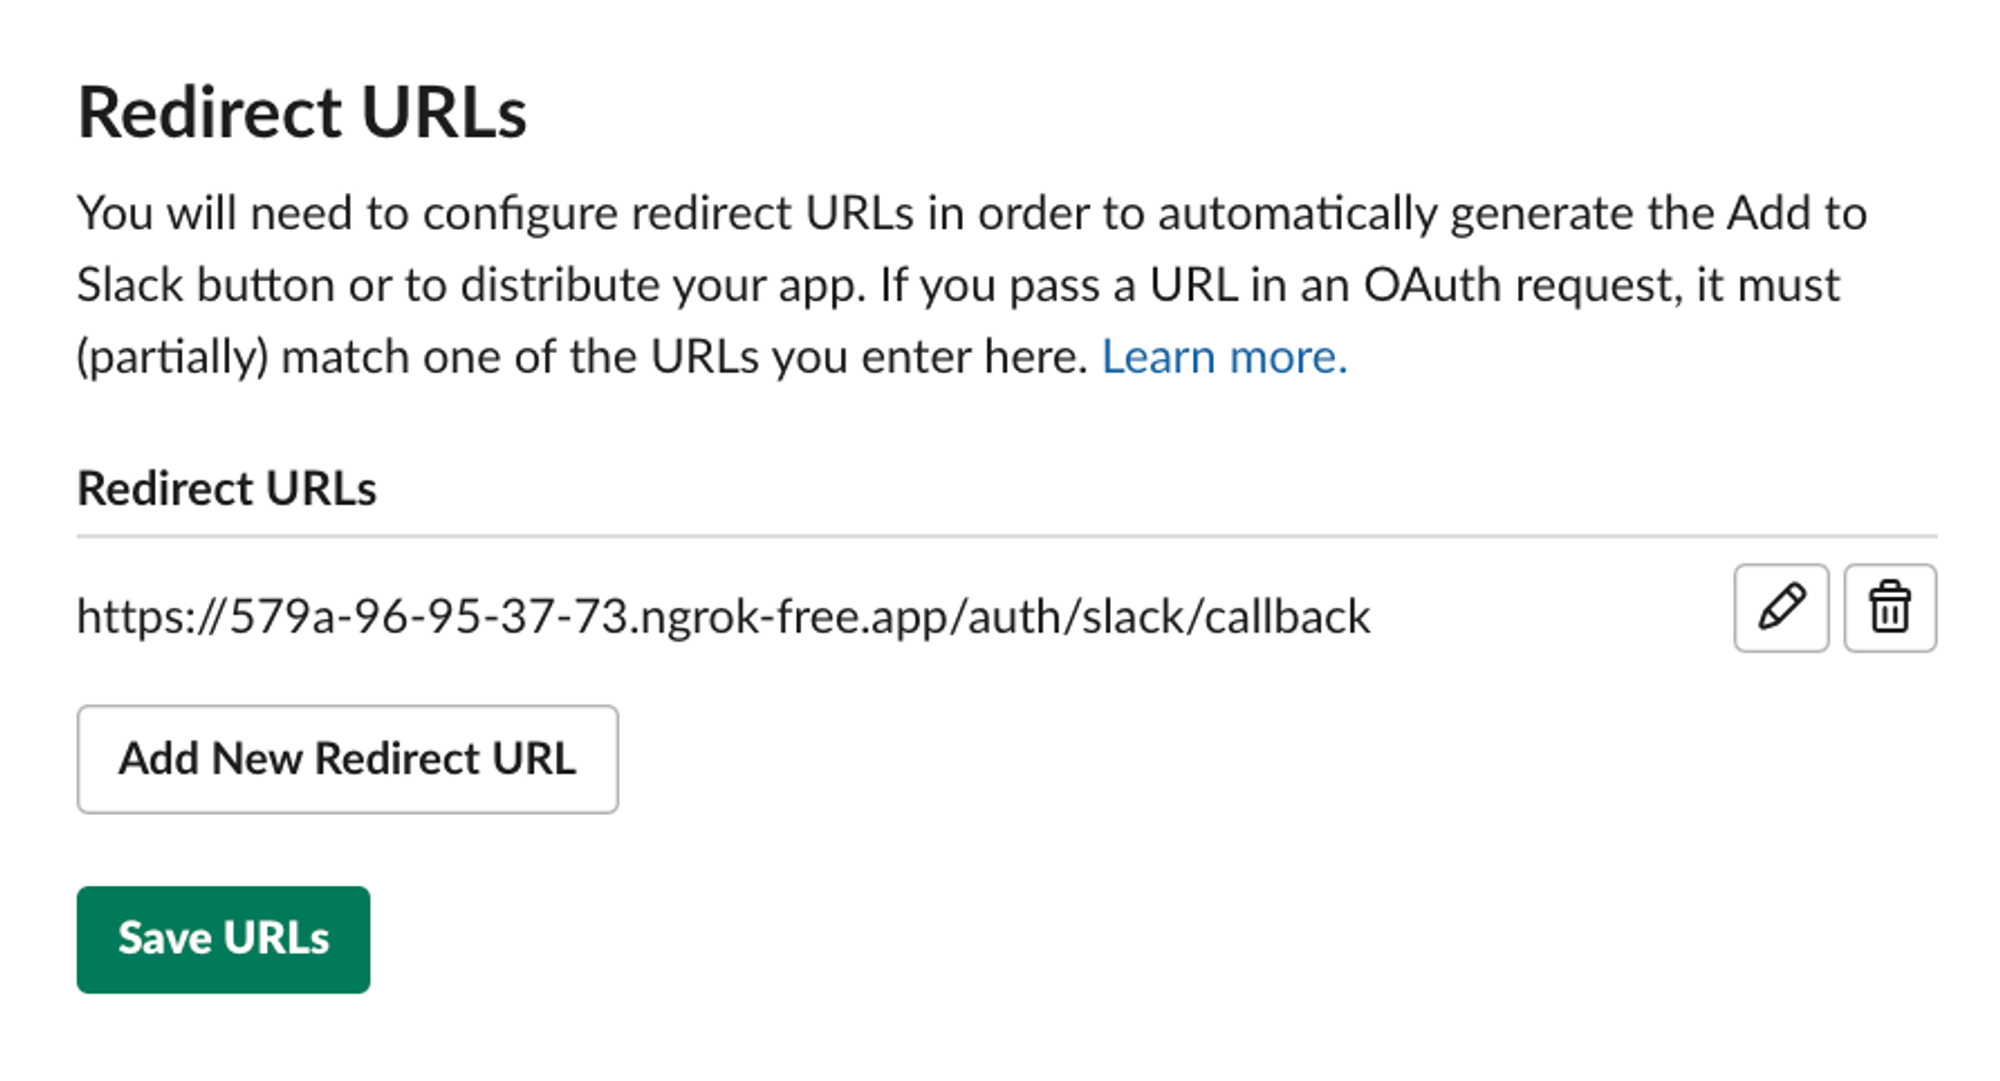
Next, we need to set the redirect URL. Because we are developing this locally for now, the full redirect URL from our code above would be http://localhost:3000/auth/slack/callback.
However, if we tried to add that to Slack, we'd get an error message because the HTTP protocol isn't secure. We could deploy our application to an online server, but instead, we can use ngrok. ngrok is an ingress controller that will give us an HTTPS URL for our localhost.
Development & testing only
ngrok opens a tunnel between the web and your local machine. It should only be used for the development and testing of this feature. In some cases, these local tunnels can be blocked by your network.
You can download and install ngrok using the instructions from the link above and then run it using:
ngrok http http://localhost:3000If ngrok is installed correctly, this command will print some data to your console that includes a 'Forwarding' URL. You can append the /auth/slack/callback path to this URL and then add it to Slack:
Finally, let's grab our client ID and secret from the 'Basic Information' screen in Slack:
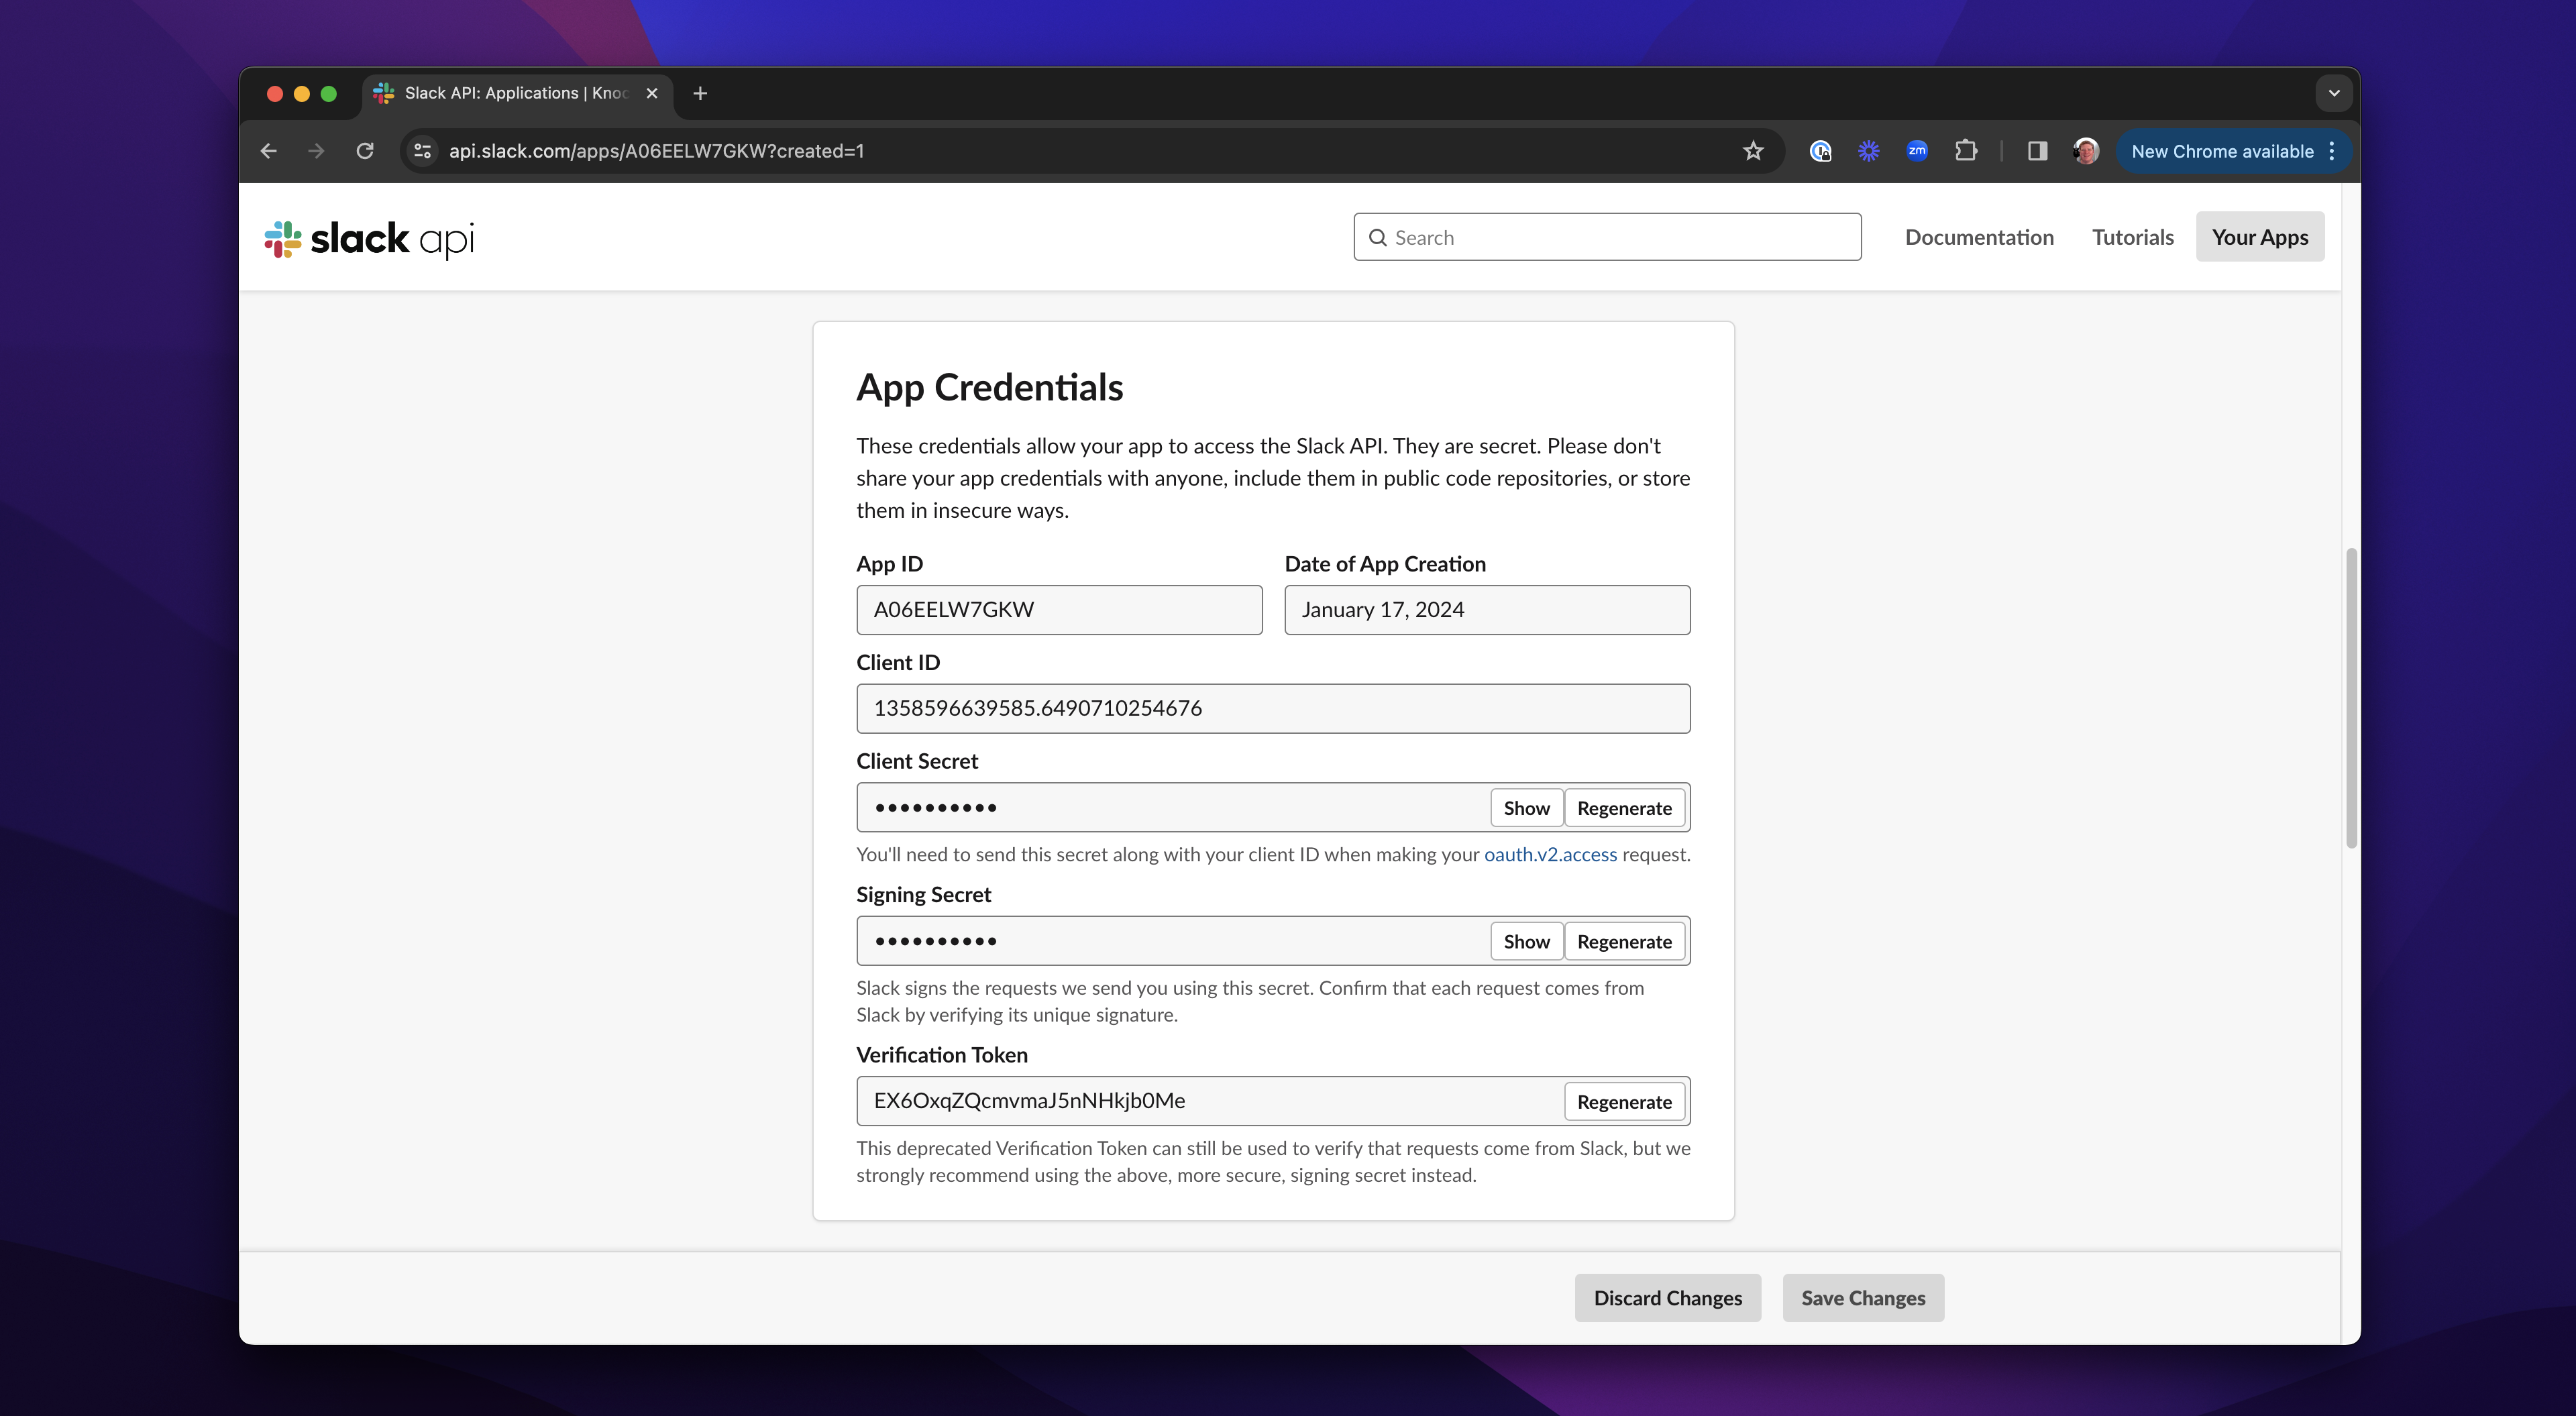
We can now add all those details to our .env file: the SLACK_CLIENT_ID, SLACK_CLIENT_SECRET, and SLACK_REDIRECT_URI. Now, we can run the app with:
node app.jsWe can access the application with our ngrok URL appended with /auth/slack. In some cases, firewalls or network settings may block ngrok's access to your local machine. If all is working correctly, you'll be redirected to Slack and see this page:

Click 'Allow,' Slack will then pass you back to the redirect URL. The code above will run to obtain the channel list, and you'll see this:
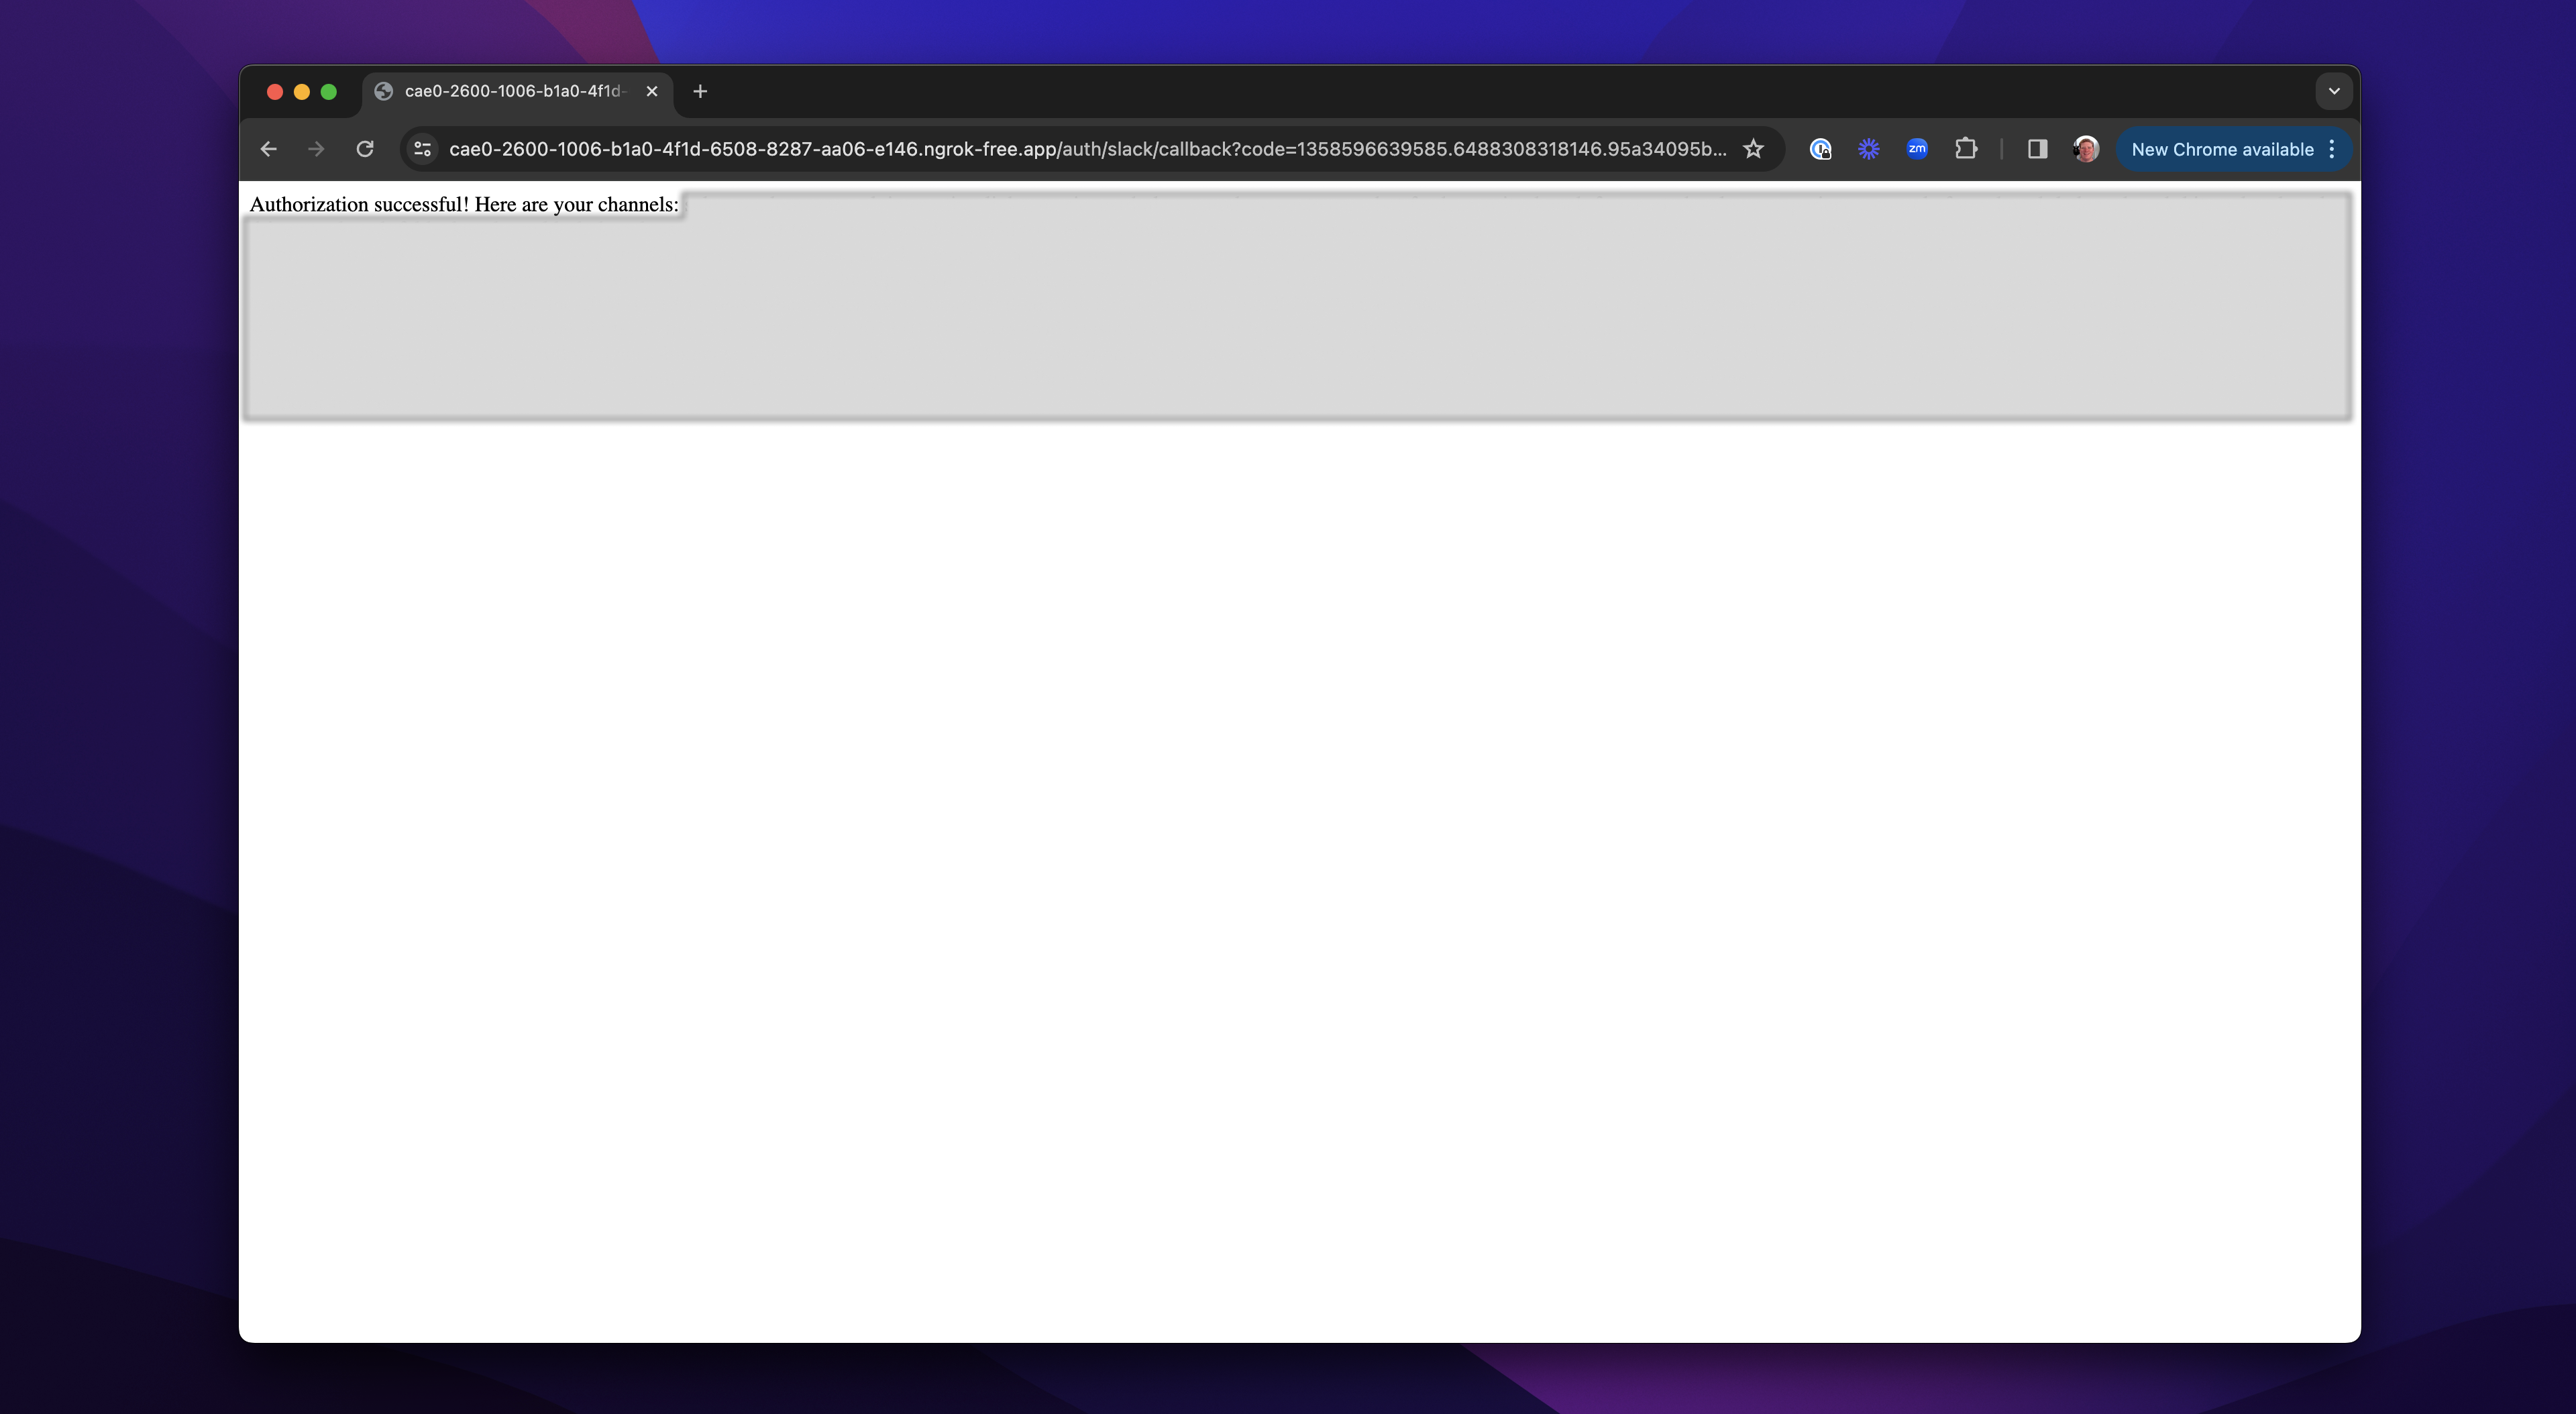
Congratulations, you've OAuthed into Slack. You can now build out that application to use the Slack functionality and data as needed.
Depending on your product, a Slack integration can be a valuable addition to your feature set. At Knock, we're focused on helping developers leverage Slack as a notification channel, so here are a few additional posts we've written on using Slack:
- How to think about Slack as a notification channel for your app
- The developer's guide to Slack's Markdown formatting
- Taking a deep dive into Slack's Block Kit
- The product manager's guide to designing Slack notifications
OAuth simplifies authorization
More and more services are defaulting to OAuth as their authentication mechanism. It is secure and allows developers and users to control both access and data using clear scopes. It is straightforward for developers to implement and users to use, as they don't have to use new passwords.
You can integrate your OAuth flow with Knock so that the access, scopes, and data received can be used in your notifications. This means that all you need for extensive Slack notifications is the few lines of code above, and then Knock can take care of the rest.
If you want to add Slack notifications to your application, you can sign up for Knock or reach out to us on Slack to chat.