In this post, we'll explore how to build a custom in-app feed using the Knock JavaScript client and Nuxt, the full-stack Vue framework. We'll use shadcn/vue to build out the interface.
We'll look at how to configure an in-app channel and workflow in Knock, fetch a user's feed from the Feed API, and update message engagement statuses as a user marks things as read and archived. Finally, we'll explore some of the small UI details that help create good activity feed experiences for your users.
Video walkthrough
If you prefer to learn with video, watch it here.
Getting started
Before we get started, let's take a look at what we'll build in this tutorial:
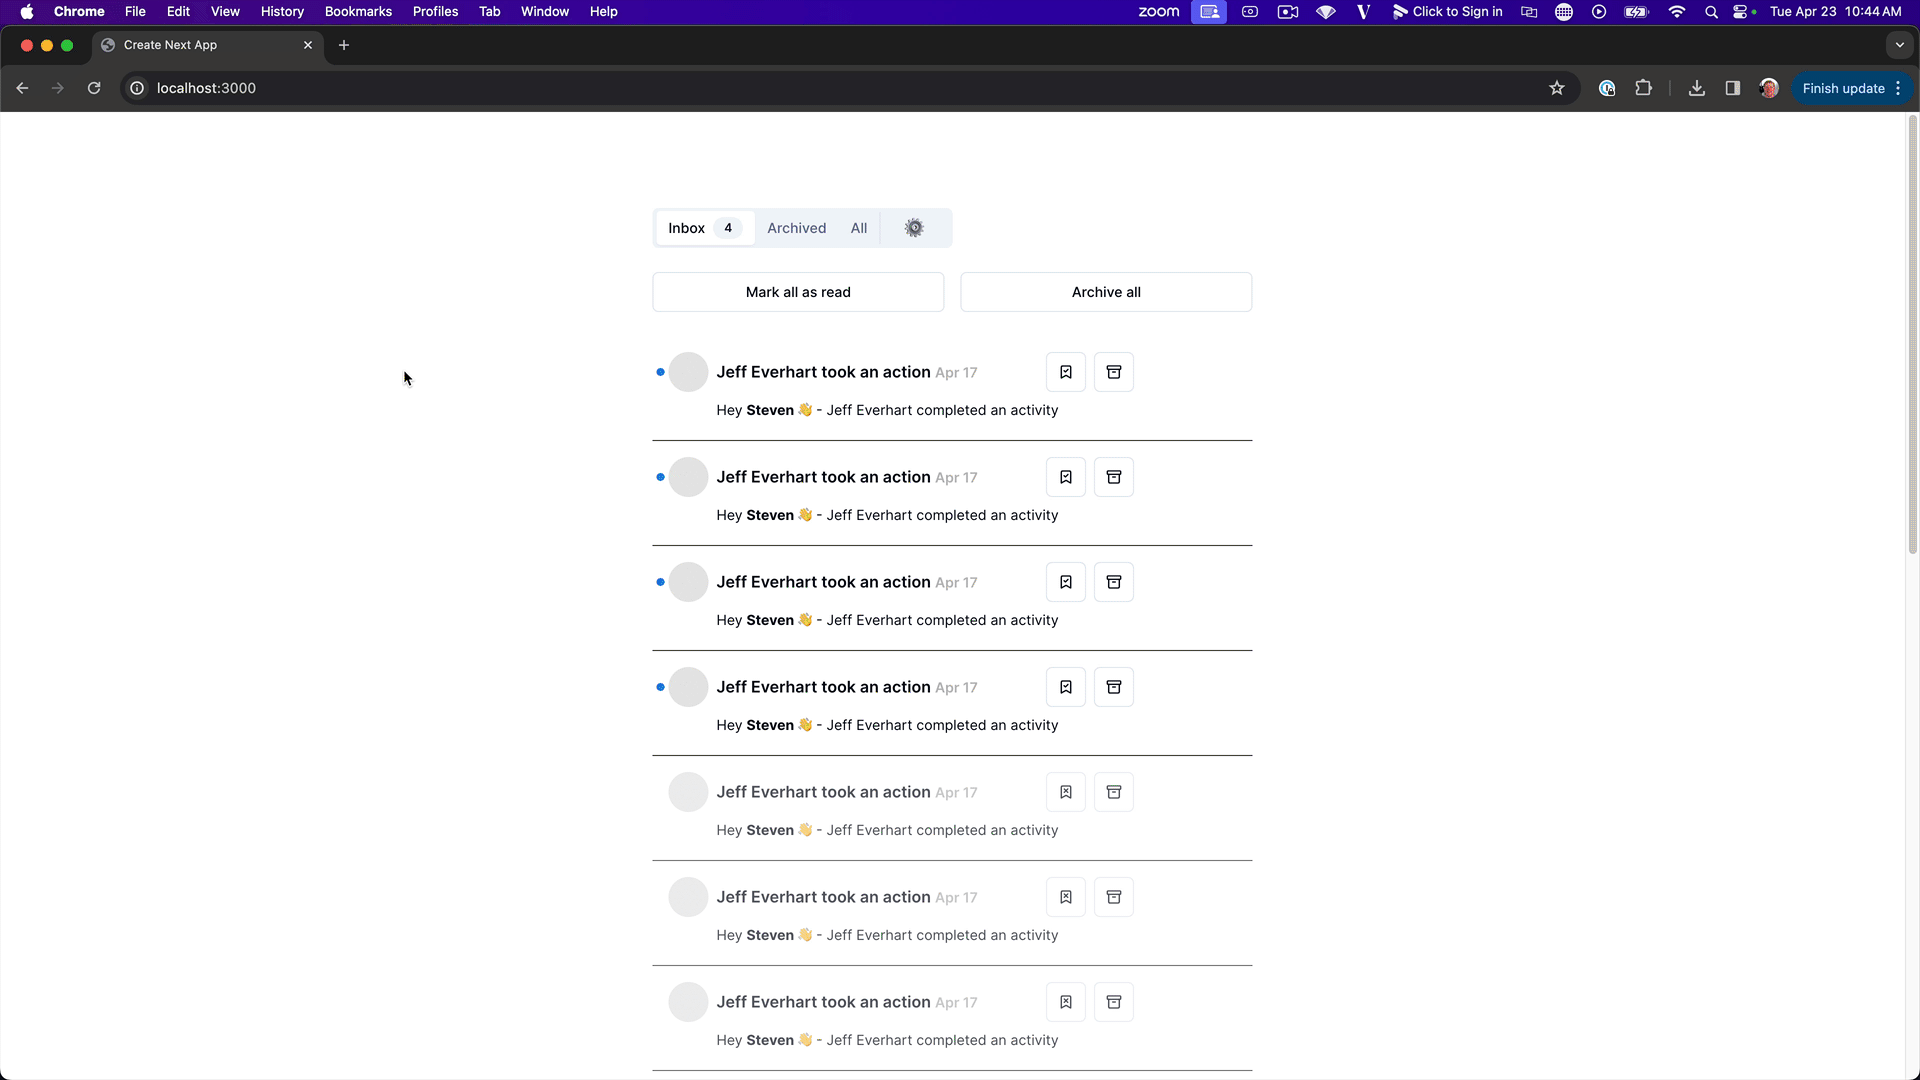
We'll create a tabbed feed where users can mark things as read, archive them, and switch between different views of the feed. This whole example project can be downloaded from the Knock GitHub account in the nuxt-feed-example repo. It has two branches:
main: The finished versionstart: What we'll be starting with for this project
We'll cover adding the functionality to read from the Feed API and update message engagement statuses.
Cloning the repository
First, you'll want to clone the repository from the GitHub repo using this command:
git clone https://github.com/knocklabs/nuxt-feed-example.gitNext, install the dependencies and make a copy of the .env.sample file:
npm install
cp .env.sample .env
Then, we can open the project in a code editor and see what variables we need, as there are a few values we'll need to retrieve from the Knock dashboard:
- Knock User ID
- Knock Feed Channel ID
- Public API Key
Let's head into the Knock dashboard to grab those values.
Configuring the Knock client
The first thing we'll grab is our public API key. Under the "Developers > API Keys" heading, we can copy the public key and paste it into our .env file.
Next, we'll need a Feed Channel ID for the in-app channel we want to use. If you go to "Integrations" and find the in-app channel feed that gets created automatically (or another one you've created for your own projects), you can copy that ID and paste it into your environment file as well.
Lastly, we'll need a user ID. Go ahead and copy a user ID and paste it into the .env file. If you don't have a user, you can create one from the dashboard under "Users."
Now we should be all set, as long as we've installed the project's dependencies. We can start the development server with the following command:
npm run devThis should start a local server on localhost:3000. If we click the link to open it, we should see a project that looks like this:
Right now, there's nothing in either of the tabs, and the inbox says we don't have any messages. That's what we'll be adding in the next steps.
Seeding messages
Before we dive into the code, let's hop back into the Knock dashboard and take a look at an in-app workflow.
Creating a workflow
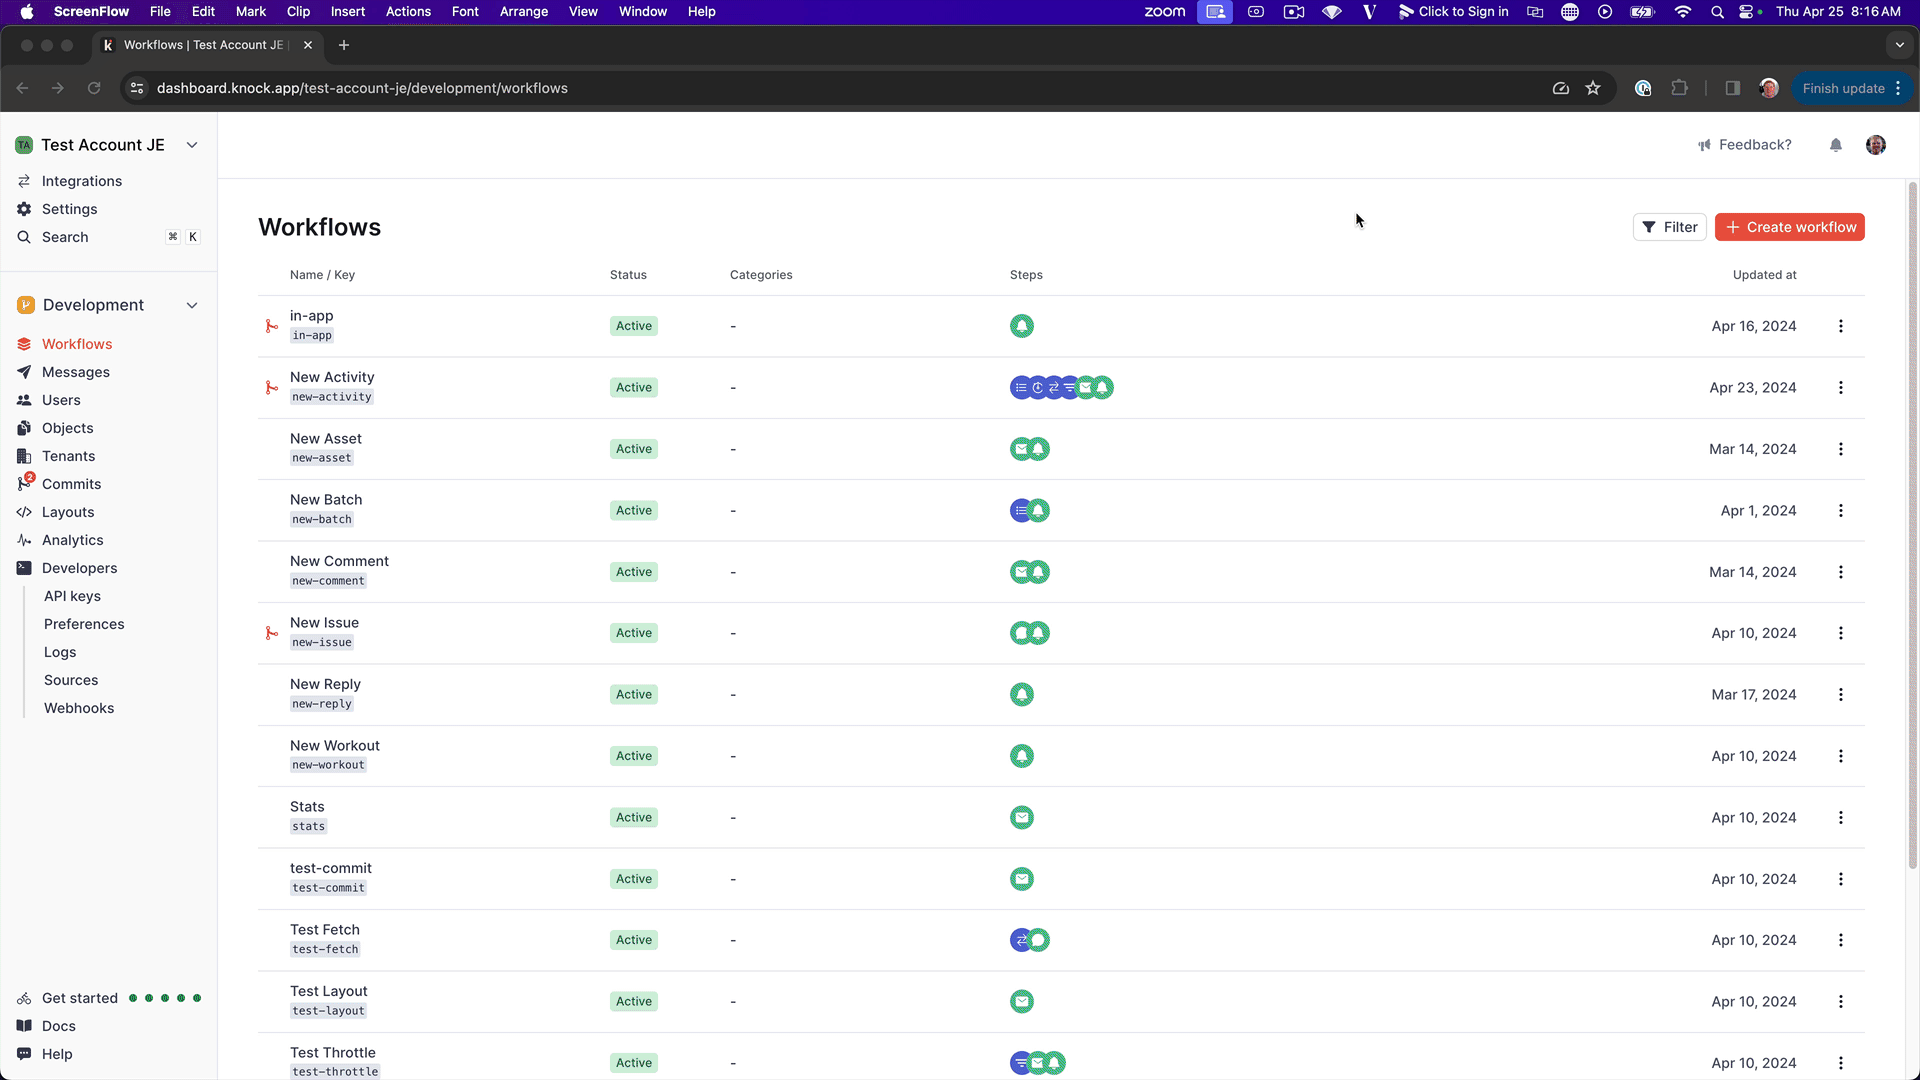
If you don't have one already, you can create one on the 'Workflows' screen of the dashboard. Then you can use the in-app channel that's created automatically when you create an account by dragging it onto the workflow canvas. You'll need to save your changes and commit them to the development branch.
Sending test messages
For this project, we've got a really basic in-app workflow with a single step:

If we click into the workflow itself and go to the workflow editor canvas, we can see that we've got a simple message template. Let's go ahead and seed a few messages by clicking "Run a test."
You can pick a user ID, select an actor, and we'll pass in a different message as our message property in our data payload.
Click "Run test" a couple of times to seed that user's in-app feed with a few test messages.
It's worth noting that this example app doesn't actually go through the sending or triggering of workflows. It's just showing you how to read from an in-app feed. You can explore our docs on triggering workflows to build that into your project.
Now that we have a couple of example messages in this in-app feed for our user, let's open the code editor and start reading from that user's Feed API.
Nuxt project structure
Let's take a quick look at the project's structure. Most of our work will be in the components directory, particularly within the ActivityFeed.vue file. This file contains the different tabs for our feed views and is where we'll render the feed items.
If you open up the app.vue file, which is the root of this application, you'll notice that we're wrapping the ActivityFeed with a ClientOnly Nuxt component. This avoids unnecessary data loading on the server.
Configuring the Knock client in Nuxt
Next, open up the ActivityFeed.vue component. We'll configure a new instance of the Knock client. We can see that we're already importing Knock from the @knocklabs/client package, which should have been installed as a project dependency.
Right below that, we create a new variable to access our Nuxt runtimeConfig values, which include the values from our .env file.
After we import those values, we can create a new constant variable called knockClient. This will store a new configured instance of the client that accepts our public API key as a parameter:
const knockClient = new Knock(runtimeConfig.public.knockPublicApiKey);Below that, since we've created a new instance of the Knock client, we also need to authenticate it by passing a user ID. If you're using enhanced security mode, which is recommended for production deployments, this method would take a token as a second argument with more general options object as a third. We can omit those for this project:
knockClient.authenticate(runtimeConfig.public.knockUserId, undefined, {});Now that we've created a new instance of the client and authenticated, we'll initialize a new feed using the feed channel ID:
const knockFeed = knockClient.feeds.initialize(
  runtimeConfig.public.knockFeedChannelId,
  {
    page_size: 20,
    archived: "include",
  },
);
This ties the feed to the channel ID we identified in the first step. The second argument, which is optional, are feed client options. We're including two things:
page_size: How many items it will grab at one time (set to 20)archived: Set to'include'so we get the most recent 20 items of our feed and include archived items as well
In the next step, we'll look at how we can actually fetch items from that feed and tie those into the user interface.
Fetching feed items
To begin the process of fetching, let's create a new variable called feed and initialize that to a reactive ref with an initial state of an empty object literal:
const feed = ref({});This ref is what Vue and Nuxt use to create reactive state variables. As we update the state of the knockFeed we'll also update the value of this reactive variable, which will then update the state of our interface.
Below that, we'll use the async fetch method on knockFeed to make an initial query to the Knock feed API, and then we'll call getState to get the state store representation of the user's feed. The knockFeed does a great job of reconciling its own internal state as feed items are added or updated, so we'll lean into this:
await knockFeed.fetch();
const feedState = knockFeed.getState();
feed.value = feedState;
knockFeed.listenForUpdates();
Once we have the feedState stored in a variable, we'll set the value of our feed reactive variable to the initial feedState.
From there, we'll also call the listenForUpdates method on the knockFeed which will open a WebSocket connection with the Feed API to listen for real-time updates.
Let's take a recap of what we're doing here:
- We create a local state variable called
feedfor theActivityFeedcomponent. - We
fetchthe feed, get the state that we get back, and set it to our localfeedcomponent state. - After we load the initial
feedState, we're asking theknockFeedclient to listen for real-time updates.
There's one additional thing we need to do: add event listeners to the knockFeed so that when we get those real-time updates from listenForUpdates() or make changes to the status of messages, we can reconcile those updates with our local state:
knockFeed.on("items.received.*", ({ items }) => {
  feed.value = knockFeed.getState();
});

knockFeed.on("items.*", () => {
  feed.value = knockFeed.getState();
});
The Knock feed does a good job of keeping track of its own internal state. When there are changes to that internal state, we're just going to reconcile those with the state in Vue by resetting feed.value and overriding whatever feed was in that local variable.
Now we've got a handle on getting those items from the API. In the next step, we'll make those items available to the interface so we can render some different components.
Rendering feed items
Before we proceed, let's make sure we have event handlers for both 'items.received.*' and 'items.*'. This captures a wider array of changes that can happen to the Knock feeds that deal with both message statuses and receiving new messages.
Even as we start updating the message engagement statuses on these items, we'll see that reflected when this event trigger fires, helping us reconcile our state as we make different changes to the feed.
If we reference back to our user interface, we can see that we've got a couple of different options:
- Inbox: Things that aren't archived
- Archive: Archived items
- All: All items
We'll want to separate these things out and create different arrays for these different types of items. We'll use the computed properties in Vue to compute some of these values for us every time the feed array changes:
const feedItems = computed(() => {
  return feed.value.items.filter((item) => !item.archived_at);
});
const archivedItems = computed(() => {
  return feed.value.items.filter((item) => item.archived_at);
});
We create two arrays using these computed functions:
feedItems: Items that haven't been archived yetarchivedItems: Items that have been archived
Now, let's implement the list of regular feed items (what we would find in the user's inbox). If we scroll down to our tabbed content, we can see that we're going to implement that here:
<div v-if="feedItems.length > 0">
  <FeedItemCard
    v-for="item in feedItems"
    :key="item.id"
    :feedItem="item"
    :knockFeed="knockFeed"
  >
  </FeedItemCard>
</div>
We do a conditional check to make sure feedItems has a length greater than 0. If it does, we use the v-for attribute to map through feedItems and return a FeedItemCard for each one, passing in the item and knockFeed as props.
Head back into your interface and double-check that everything's working as expected now. You should see FeedItems displaying in your inbox tab.
Let's do something similar with our archived items tab:
<FeedItemCard
  v-if="archivedItems.length > 0"
  v-for="item in archivedItems"
  :key="item.id"
  :feedItem="item"
  :knockFeed="knockFeed"
>
</FeedItemCard>
If you go back to the interface, you should see any archived items there. If you archive an item, it should update and move to the "Archived" tab.
It's worth noting that message engagement statuses in
Knock are
mutually inclusive, meaning they can be in multiple different states at the
same time. For example, an item can be both unread and archived. This
gives you a lot of flexibility as the developer in how you want to model these
engagement statuses in your own application.
The FeedItemCard component
The FeedItemCard component is doing a lot of the heavy lifting in this example app. Let's explore that component next.
It takes two props, item (the feed item) and knockFeed. Inside the component, we do a number of things:
- Extract the different blocks attached to the feed item (like the
body, which is the message template we created as part of our workflow). - Loop through the item's actors (the people generating the notification by triggering the workflow in Knock) and create the heading.
- Render the date using the
toLocaleDateStringfunction and theitem.inserted_atproperty. - Handle message engagement statuses.
For the message engagement statuses, we conditionally render different buttons based on whether the item has been read or not:
<Button
  v-if="feedItem.read_at === null"
  variant="outline"
  size="icon"
  class="mx-1"
  @click="knockFeed.markAsRead(feedItem)"
></Button>
We pass the knockFeed client into the component so we can attach each of those @click handlers to a particular method on knockFeed, like markAsArchived, markAsUnarchived, markAsRead, markAsUnread, etc.
When we call these methods, the Knock feed updates for us locally inside our ActivityFeed component because of the event listener we set up in our setup script. We told knockFeed to listen to any of those lower-level item changes and then reset our feed state in a previous step.
Additional functionality
There are a couple of other pieces of functionality we want to build into this, like the "Mark all as Read" and "Archive All" buttons in our inbox experience.
The markAllAsRead and markAllAsArchived functions use special bulk methods on the knockFeed to make status updates to all FeedItems in the current scope.
Then, we can add @click handlers to our buttons that call these functions:
<Button
variant="outline"
class="w-full mr-2"
@click="knockFeed.markAllAsRead()"
>
Mark all as read
</Button>
<Button
variant="outline"
class="w-full ml-2"
@click="knockFeed.markAllAsArchived()"
>
Archive all
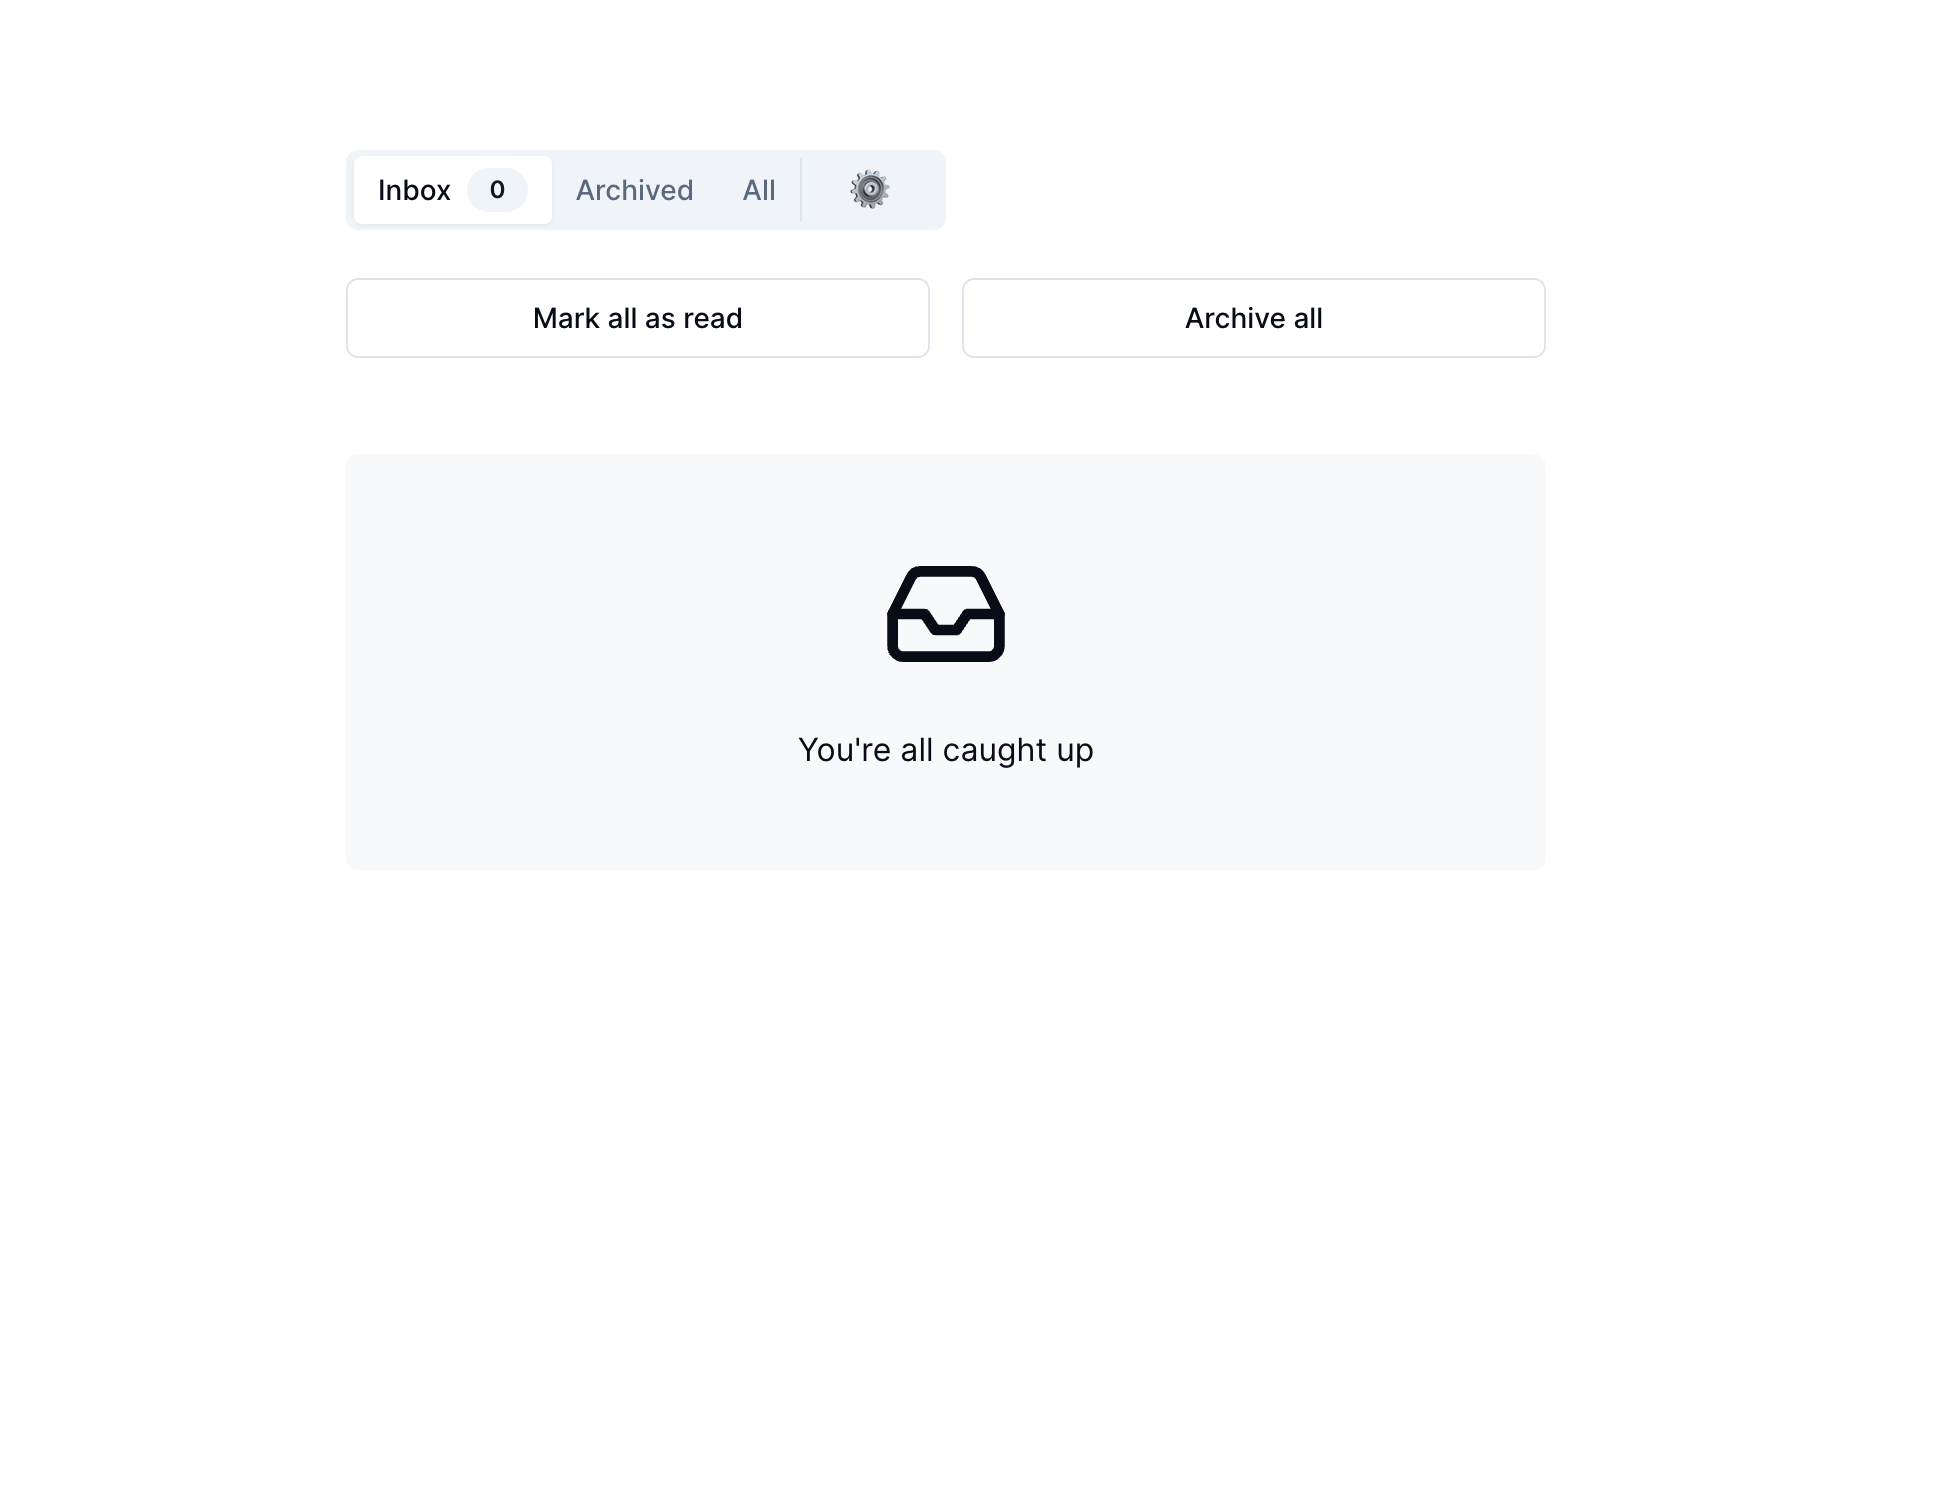
</Button>If you go back to the interface, these buttons should work as expected, allowing you to quickly clear out our notification feed.
Polish and finishing touches
When building this UI, we modeled it after the Notion in-app feed. There are a couple of things that Notion does that add an extra layer of polish to the in-app feed experience.
The "New" unread icon
If we look at our FeedItemCard component, we can see that we're conditionally rendering a NewItemIcon component based on whether the item has been read or not:
<NewItemIcon v-if="!feedItem.read_at"></NewItemIcon>This is just a div with some additional styling applied to it. In the example app, we apply these styles with a scoped style tag, but this is what a CSS class may look like:
.new-icon {
  height: 8px;
  width: 8px;
  background: rgb(35, 131, 226);
  position: absolute; /* ... */
}
These styles come one-to-one from the Notion UI, with a few tweaks to the left and top properties because the avatar size was a little different using shadcn/vue.
This is just one of those really nice features that calls attention to an unread item in a feed.
Opacity treatment for read items
There's another treatment that Notion applies to feed items that is really classy. If we look at our FeedItemCard component, we can see that we're applying a 70% opacity to the element whenever it's marked as read:
<div :class="feedItem.read_at ? 'opacity-70' : ''"></div>When we look at the interface, we can see how this de-emphasizes the things we've already interacted with and makes the unread items stand out much more. We've got this double encoding of the unread status:
- The "New" item icon
- 100% opacity (vs. 70% for read items)

When you compare these things against each other, they both stand out really well. These are really tasteful affordances that Notion builds into their in-app feed experience.
Wrapping up
Awesome! Thanks so much for reading. In this post, we covered how to build a Notion-style in-app feed experience using Knock's Vanilla JavaScript client.
We looked at:
- Creating an in-app feed channel and workflow
- Fetching items from a user's feed
- Managing engagement statuses on feed messages
The feed client gives developers pretty much unlimited flexibility in the types of experiences they can create, so we're excited to see what you'll build.
You can get started with Knock for free by signing up here. Knock on.