Slack apps can get complicated. You have to consider not only the content of your messaging but the channel and users you are sending it to, the interactivity of your message, and how these elements integrate with your product. This includes mapping out how Slack events and messages trigger processes or workflows within your product and ensuring smooth data flow between Slack and your application's backend. Additionally, managing user permissions and data security is crucial when dealing with a core component of a user’s working environment like Slack.
This is one of the reasons we built Knock. We want to make messaging across different channels, not just Slack, easy for product and engineering teams.
For Slack, we have to think about modeling Slack concepts a bit differently than other channels. We have to think about:
- How does your product interact with users in Slack?
- How does your product interact with channels in Slack?
- How do you build out your messaging?
- How do you gain access to a user's Slack workspace?
Knock helps you address some of these questions by providing clear abstractions that let you treat Slack as just another notification channel and a message authoring environment that moves templates out of application code.
In this tutorial, we’ll demonstrate how to create a simple integration using Slack’s webhook functionality. While this method isn’t appropriate for all types of products, particularly multi-tenant SaaS where users expect to self-serve integrations for their Slack workspace, it does demonstrate the fundamental concepts you’d need in more advanced implementations.
In Knock, you model Slack as a channel
Each integration with a messaging provider in Knock is a channel. If you have email through Postmark, that is one channel. If you have SMS through Twilio, that is another channel. If you have push notifications through Expo, that is another channel.
With Slack, this is more confusing because Slack also has channels, so the term ‘channels’ can get overloaded quickly. But as we’ll see in a moment, we model those differently in Knock. To add Slack as a channel in Knock, head to “Integrations > Create channel.” Then choose “Chat” and then “Slack.” At this point, all you need to do is give the channel a name and a key:
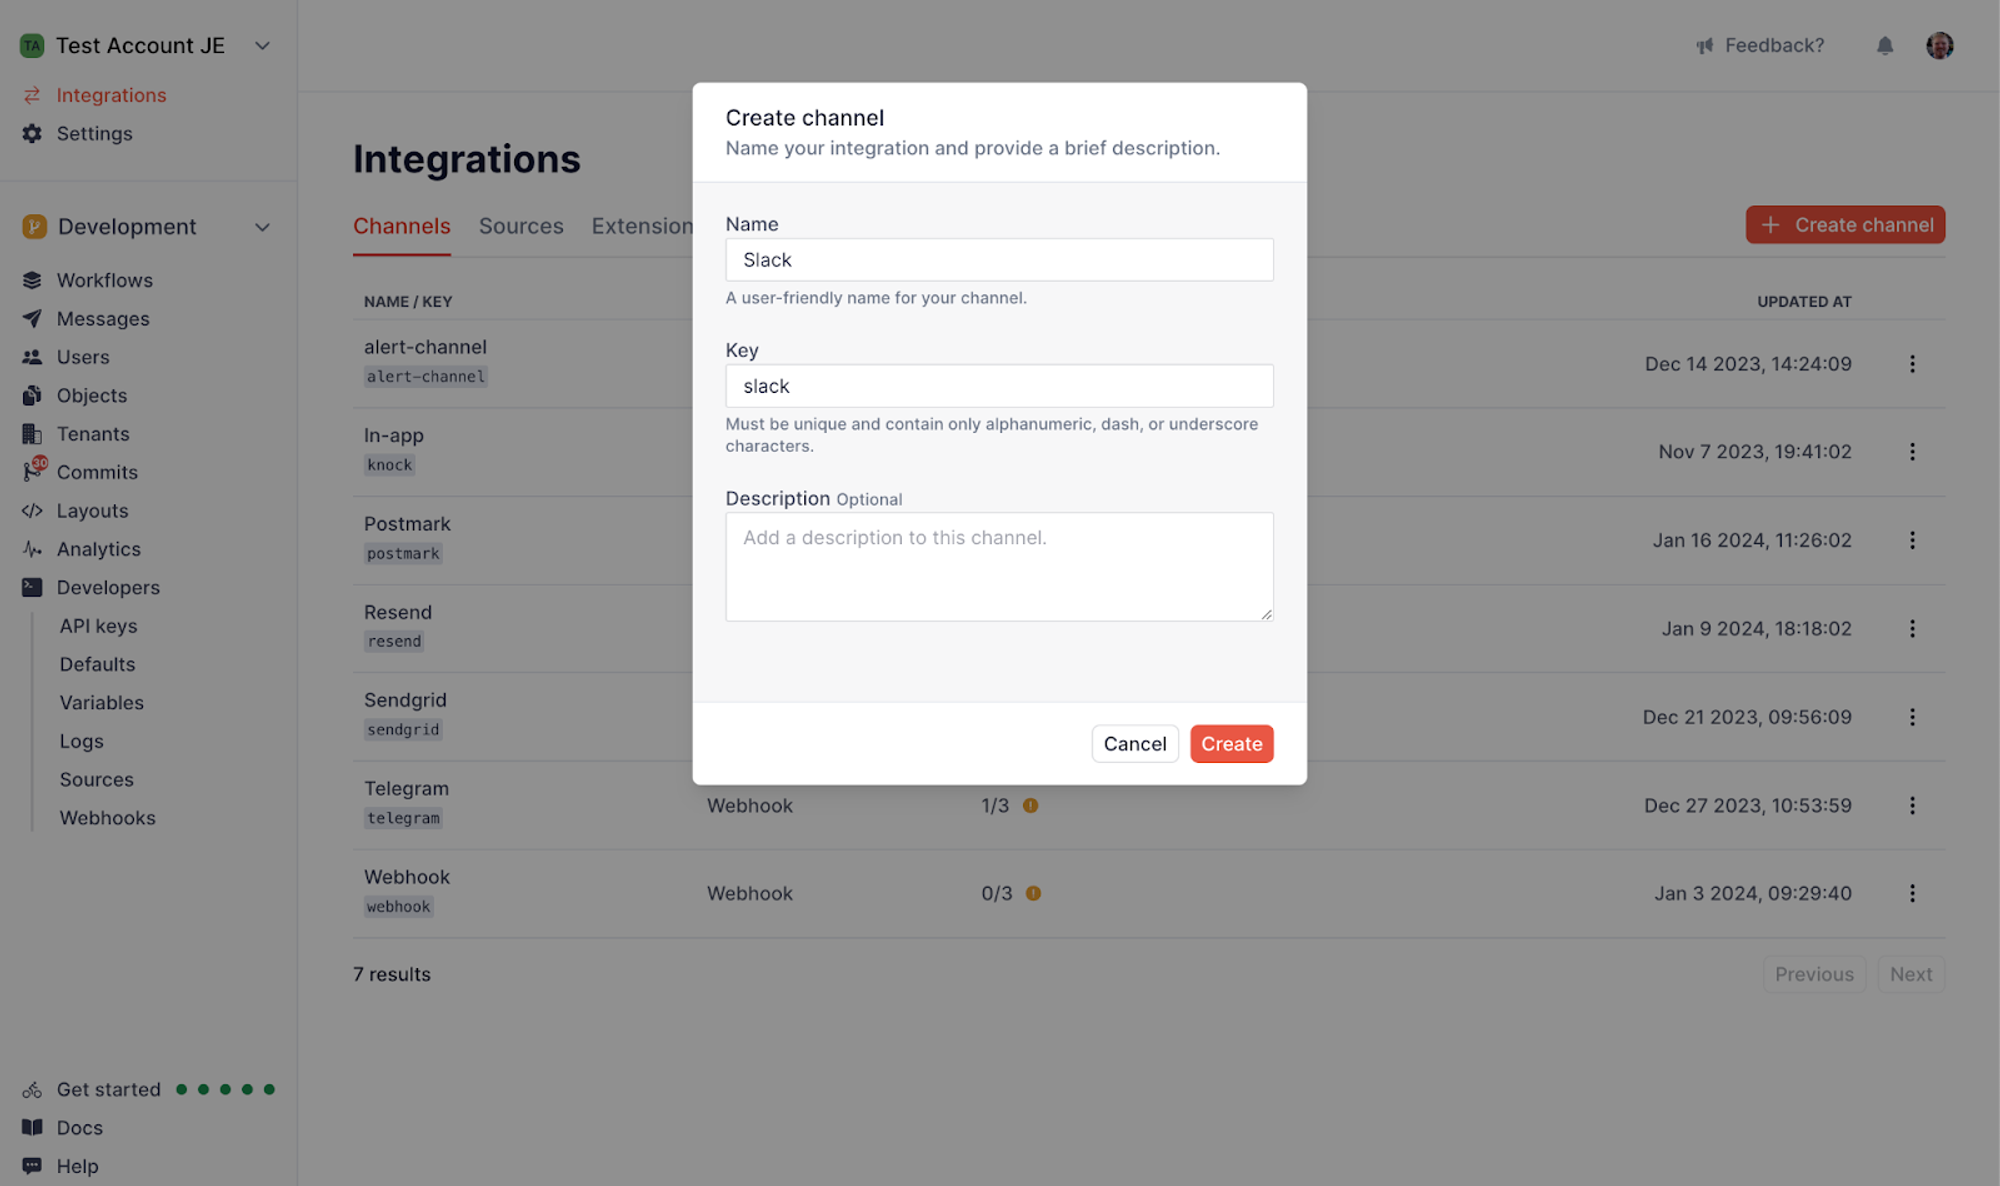
Hit “Create,” and you’ll have a Slack channel set up. Once you’ve done that, click on the new channel in the “Integrations” dashboard and go to “Manage configuration.” Within there, you want to add your Slack app ID, Slack client ID, and Slack client secret:
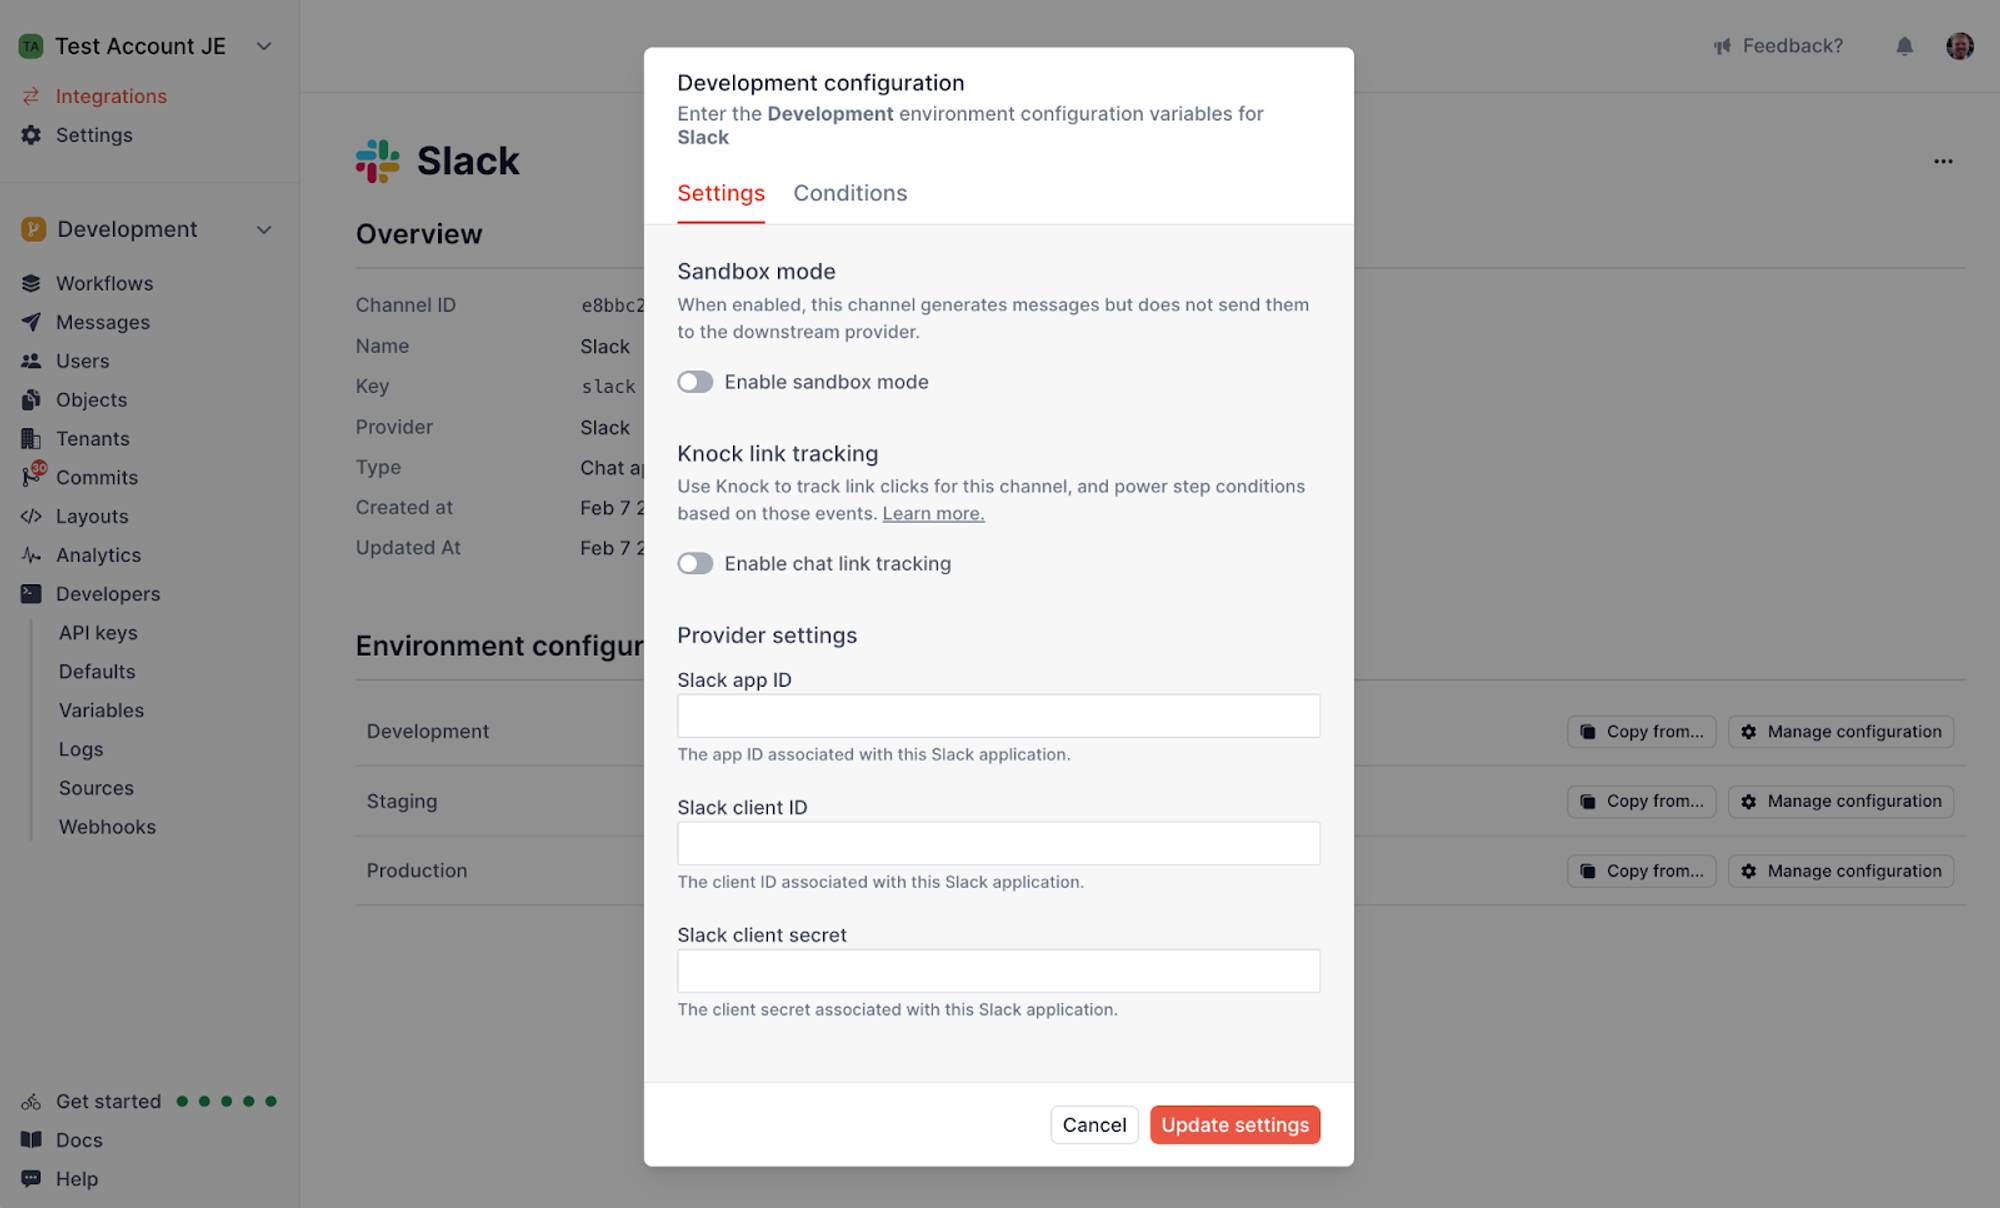
If you already have a Slack app, you can get these credentials from your Slack app dashboard under App Credentials. If you need to create one, this Slack app quickstart guide is a good resource. Once you’ve clicked "Update settings," your Slack app channel is ready to use with Knock.
In Knock, Slack channels are connections on Objects
So, if Slack channels aren’t channels in Knock, what are they? In Knock, we model Slack channels as connections on objects. Objects allow you to model any resource in your system within Knock and their primary purpose is to act as non-user recipients, but are very flexible abstractions.
An overview of Objects
Individual objects exist within a collection and always have a unique ID or key within that collection. The object itself can store any number and type of properties as key-value pairs. You can see some examples of possible object structures in the official documentation on setting object data.
Let’s say you are building a devtool product like GitHub, and want to set up Slack notifications whenever someone comments on an issue within a repository. First, you’ll want to create an object to model your repository as part of the repositories collection:
import { Knock } from "@knocklabs/node";
const knockClient = new Knock(process.env.KNOCK_API_KEY);

await knockClient.objects.set("repositories", "repo-1", {
  name: "My repo",
});
Once you have a repository object created, you can add the channel data for Slack as a connection on the object.
Objects as workflow recipients
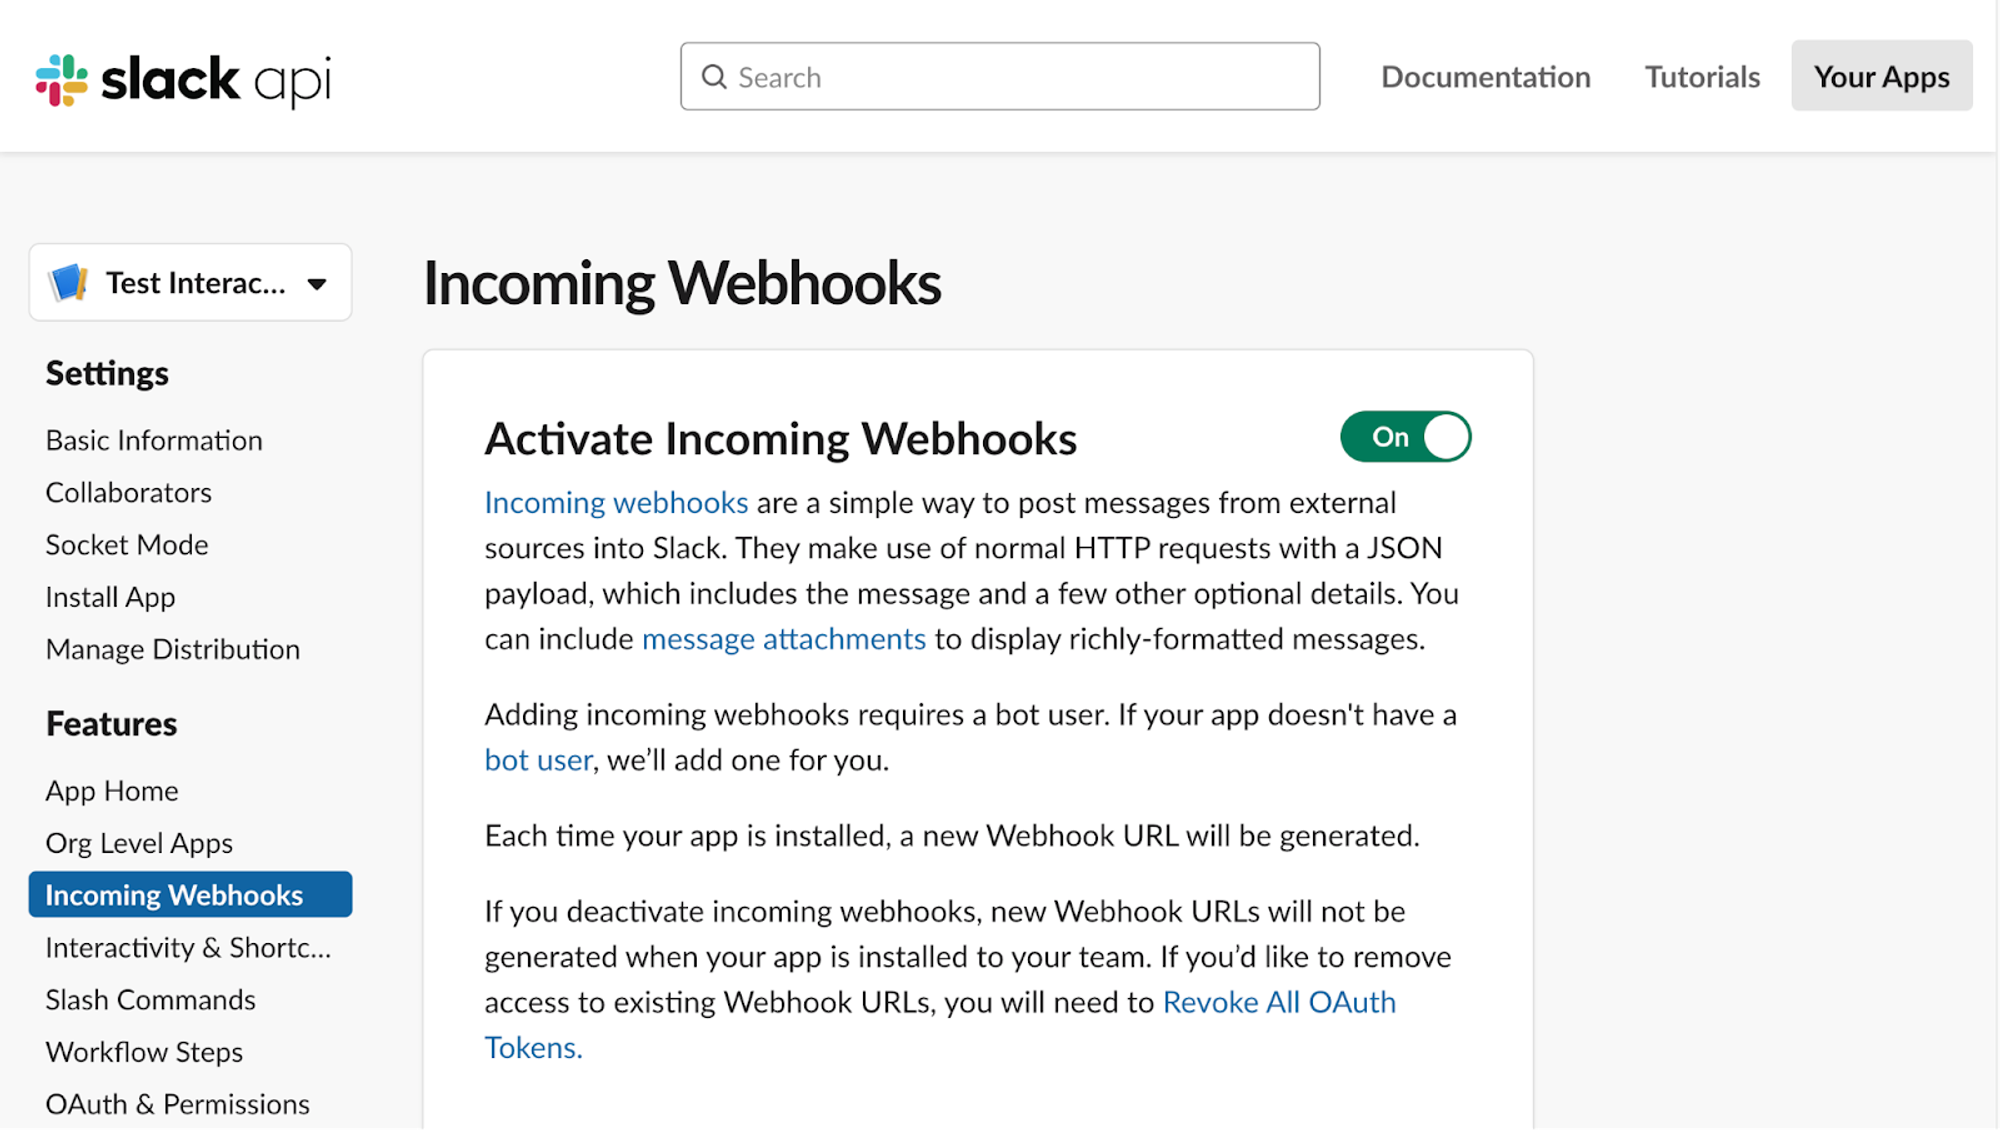
To add channel data, we’ll set up an incoming webhook in Slack. To get the url-from-slack, you can go to “Incoming Webhooks” within your dashboard and toggle the "Activate Incoming Webhooks" feature. If you’ve already installed your app into a workspace, you will be asked to reinstall it and select a channel the app will post messages to.
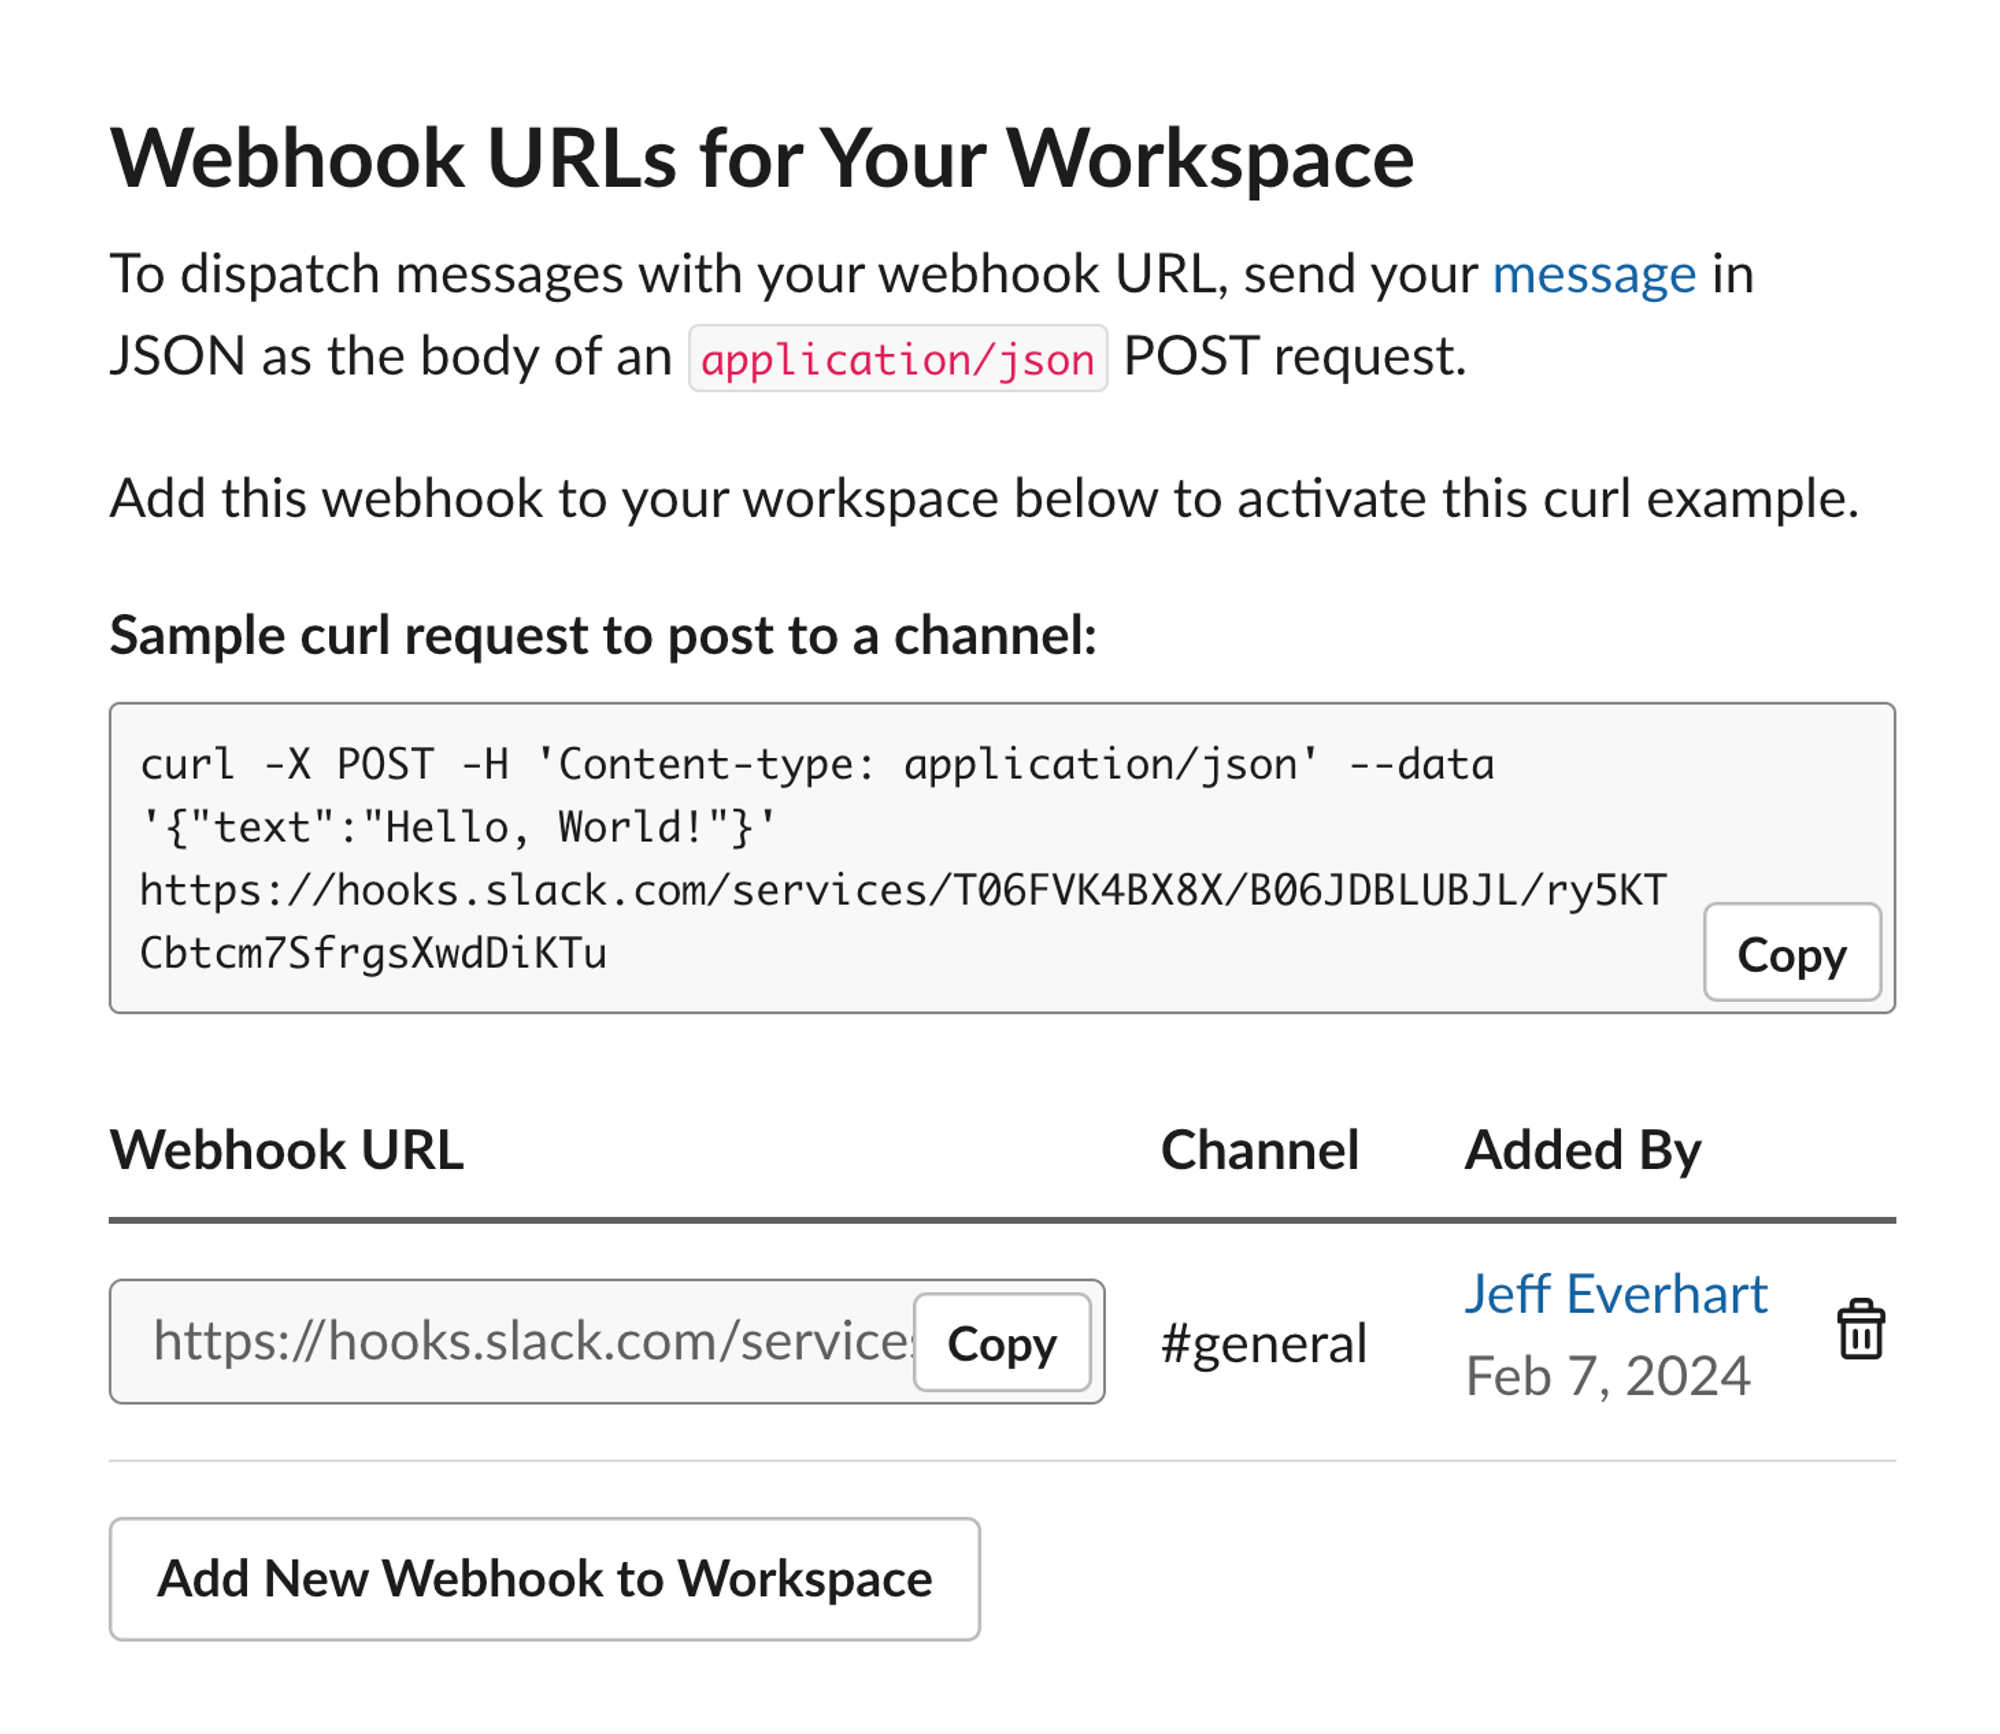
To generate a new webhook, scroll to the bottom of the page where you see the “Add New Webhook to Workspace” button. If you connected an initial channel, you can copy your webhook, or you can connect another channel and then copy the webhook URL:
Set the webhook as channel data
Now that you have the webhook URL, we’ll store that webhook as a special property on the repository object called channel data. Channel data is both channel and recipient-specific data stored for use with particular channels, like a token used for push notifications or webhooks stored for chat apps like Slack, Teams, and Discord. Both users and objects can store channel data.
In the code example below, we’ll use the knockClient.objects.setChannelData method to update the channel data for our repository object.
import { Knock } from "@knocklabs/node";
const knockClient = new Knock(process.env.KNOCK_API_KEY);

await knockClient.objects.setChannelData(
  "repositories",
  repository.id,
  process.env.KNOCK_SLACK_CHANNEL_ID,
  {
    connections: [
      {
        incoming_webhook: { url: "url-from-slack" },
      },
    ],
  },
);
Here, you’ll also need your KNOCK_SLACK_CHANNEL_ID as the third parameter, which is the channel ID for Slack within Knock, so that Knock can reference that channel when it processes workflows that use it. The last parameter is an object of a specific format that varies based on the type of message provider.
Trigger a workflow with an object recipient
With the channel data in place, you can add Slack as a workflow step in any workflow. For this example, we’ll create a new-issue workflow that pings users in our connected Slack channel whenever someone adds a new issue.
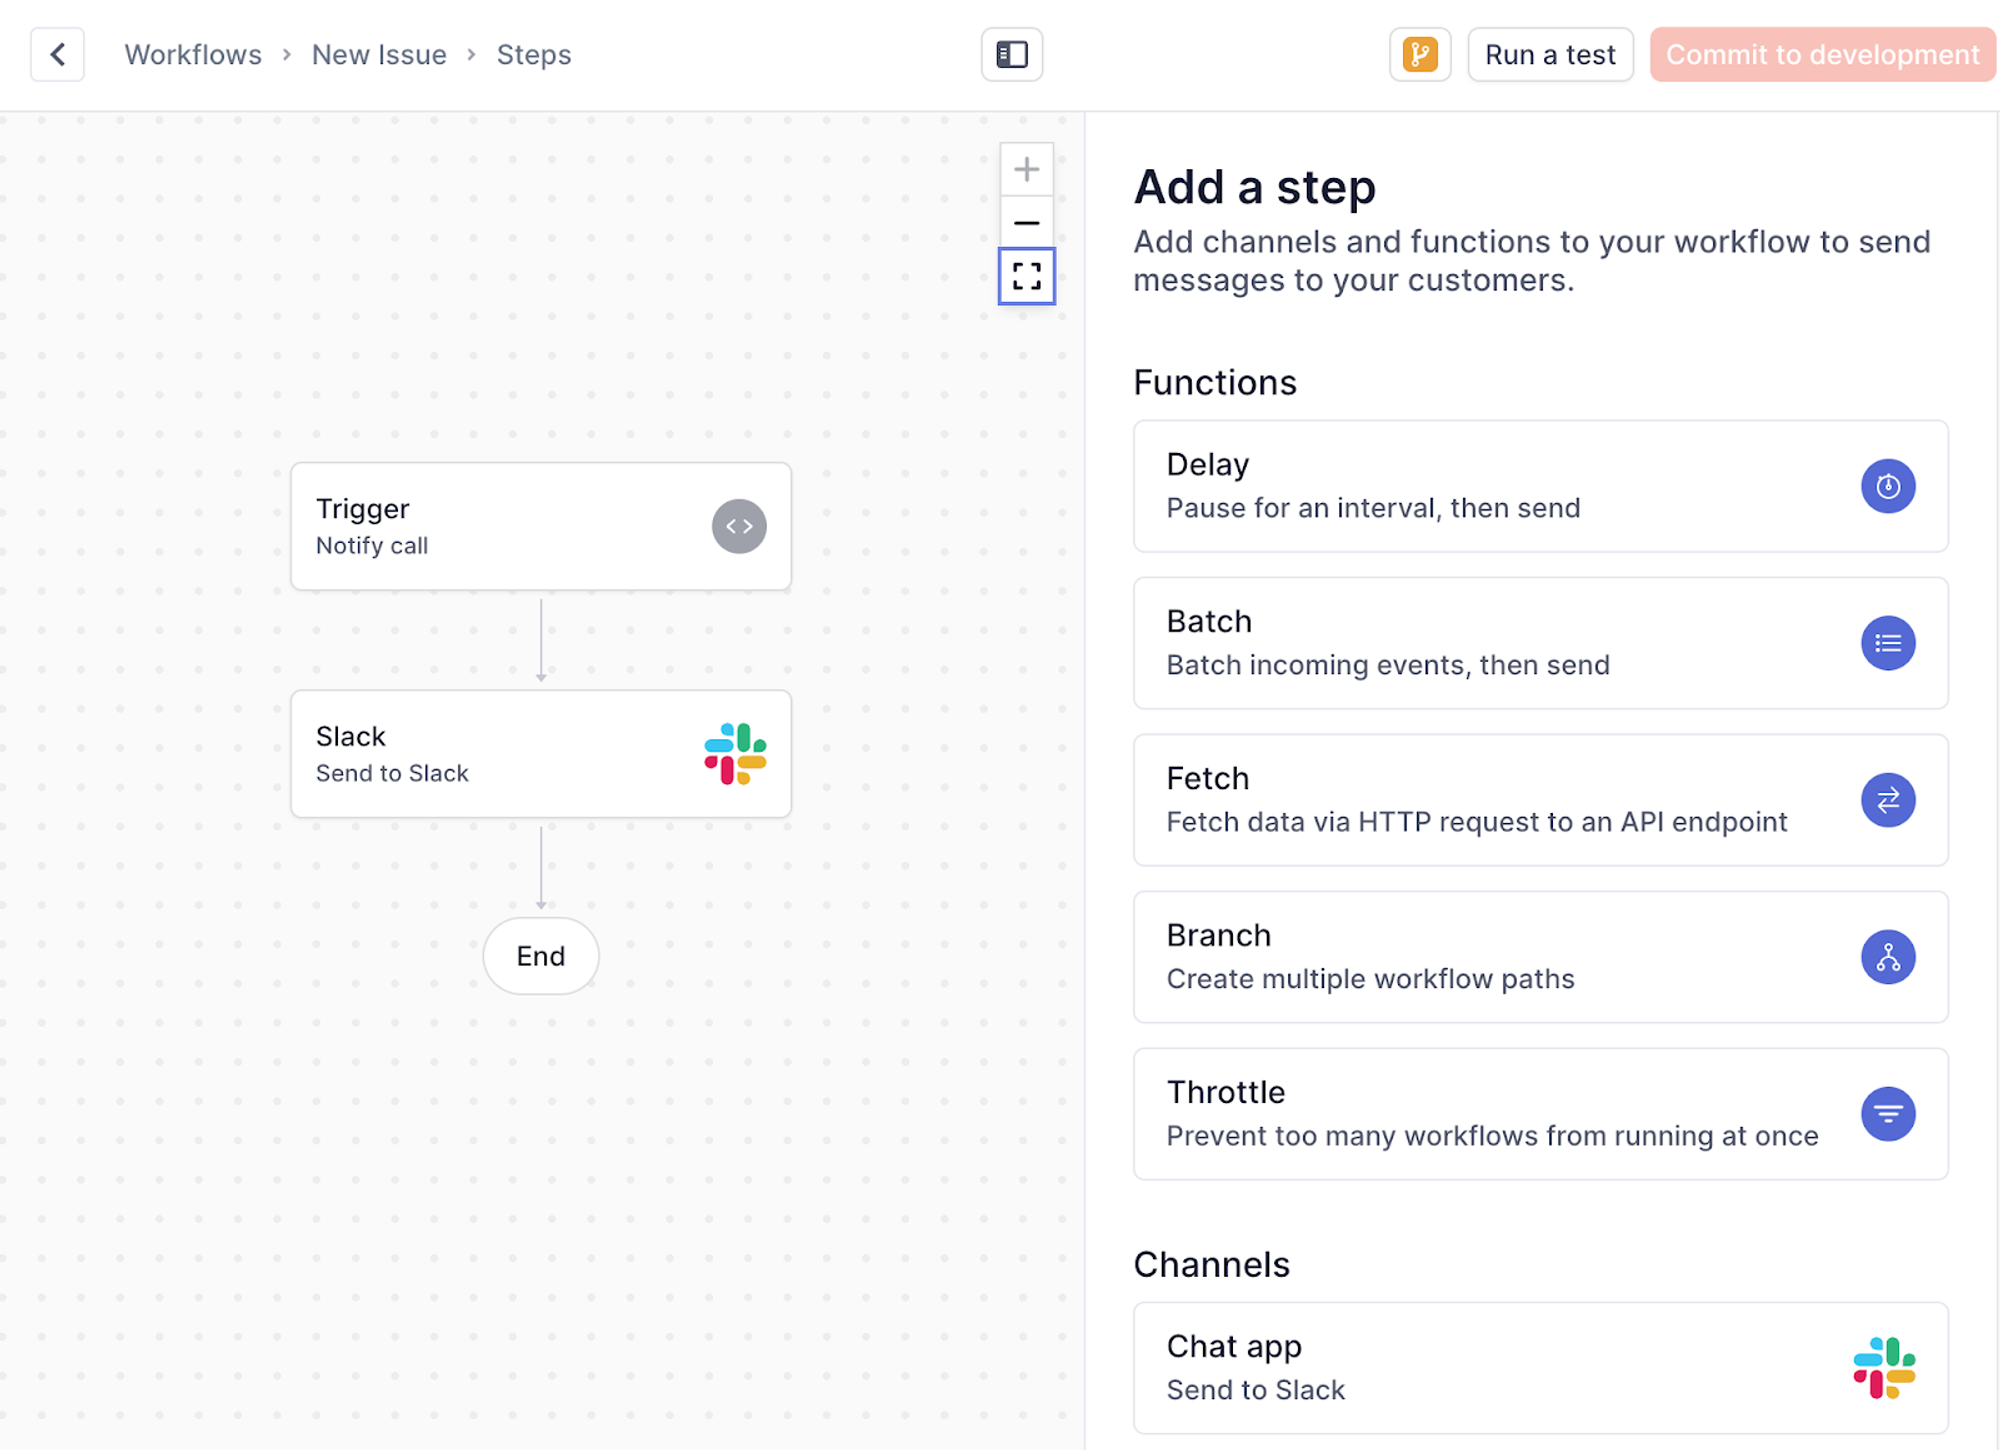
As you create your message template, remember that in this case the repository object is the recipient. That means any properties you reference on your liquid template tags need to exist as properties of the object as well:
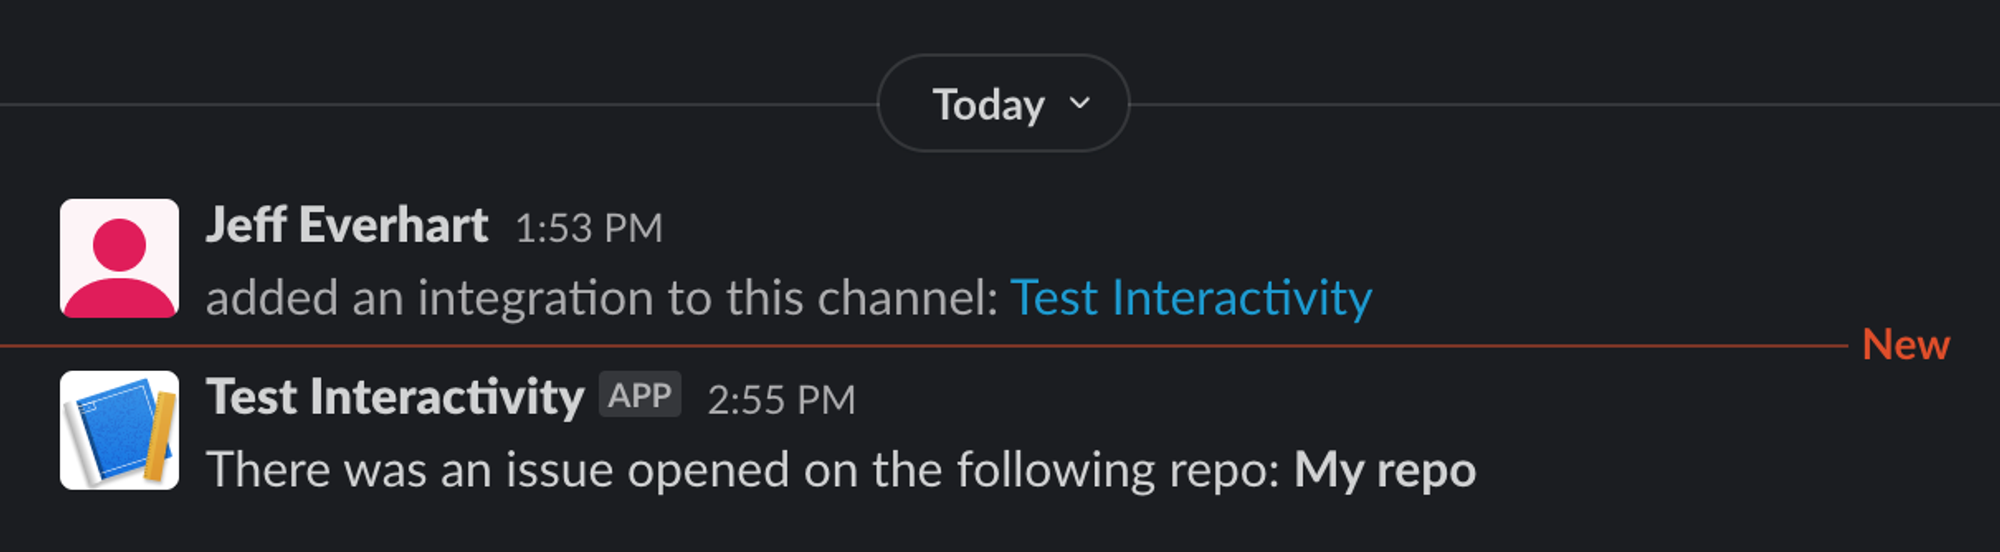
There was an issue opened on the following repo: **{{ recipient.name }}**Important note: As we said, objects are used for non-user Slack channels. You can’t DM individuals using this approach. We’ll see how to do that in a moment.
Finally, we’ll add the workflow trigger to our code and add the repository object details as a recipient.
With that, you should see a message in your selected Slack channel:
Users are users in both Slack and Knock
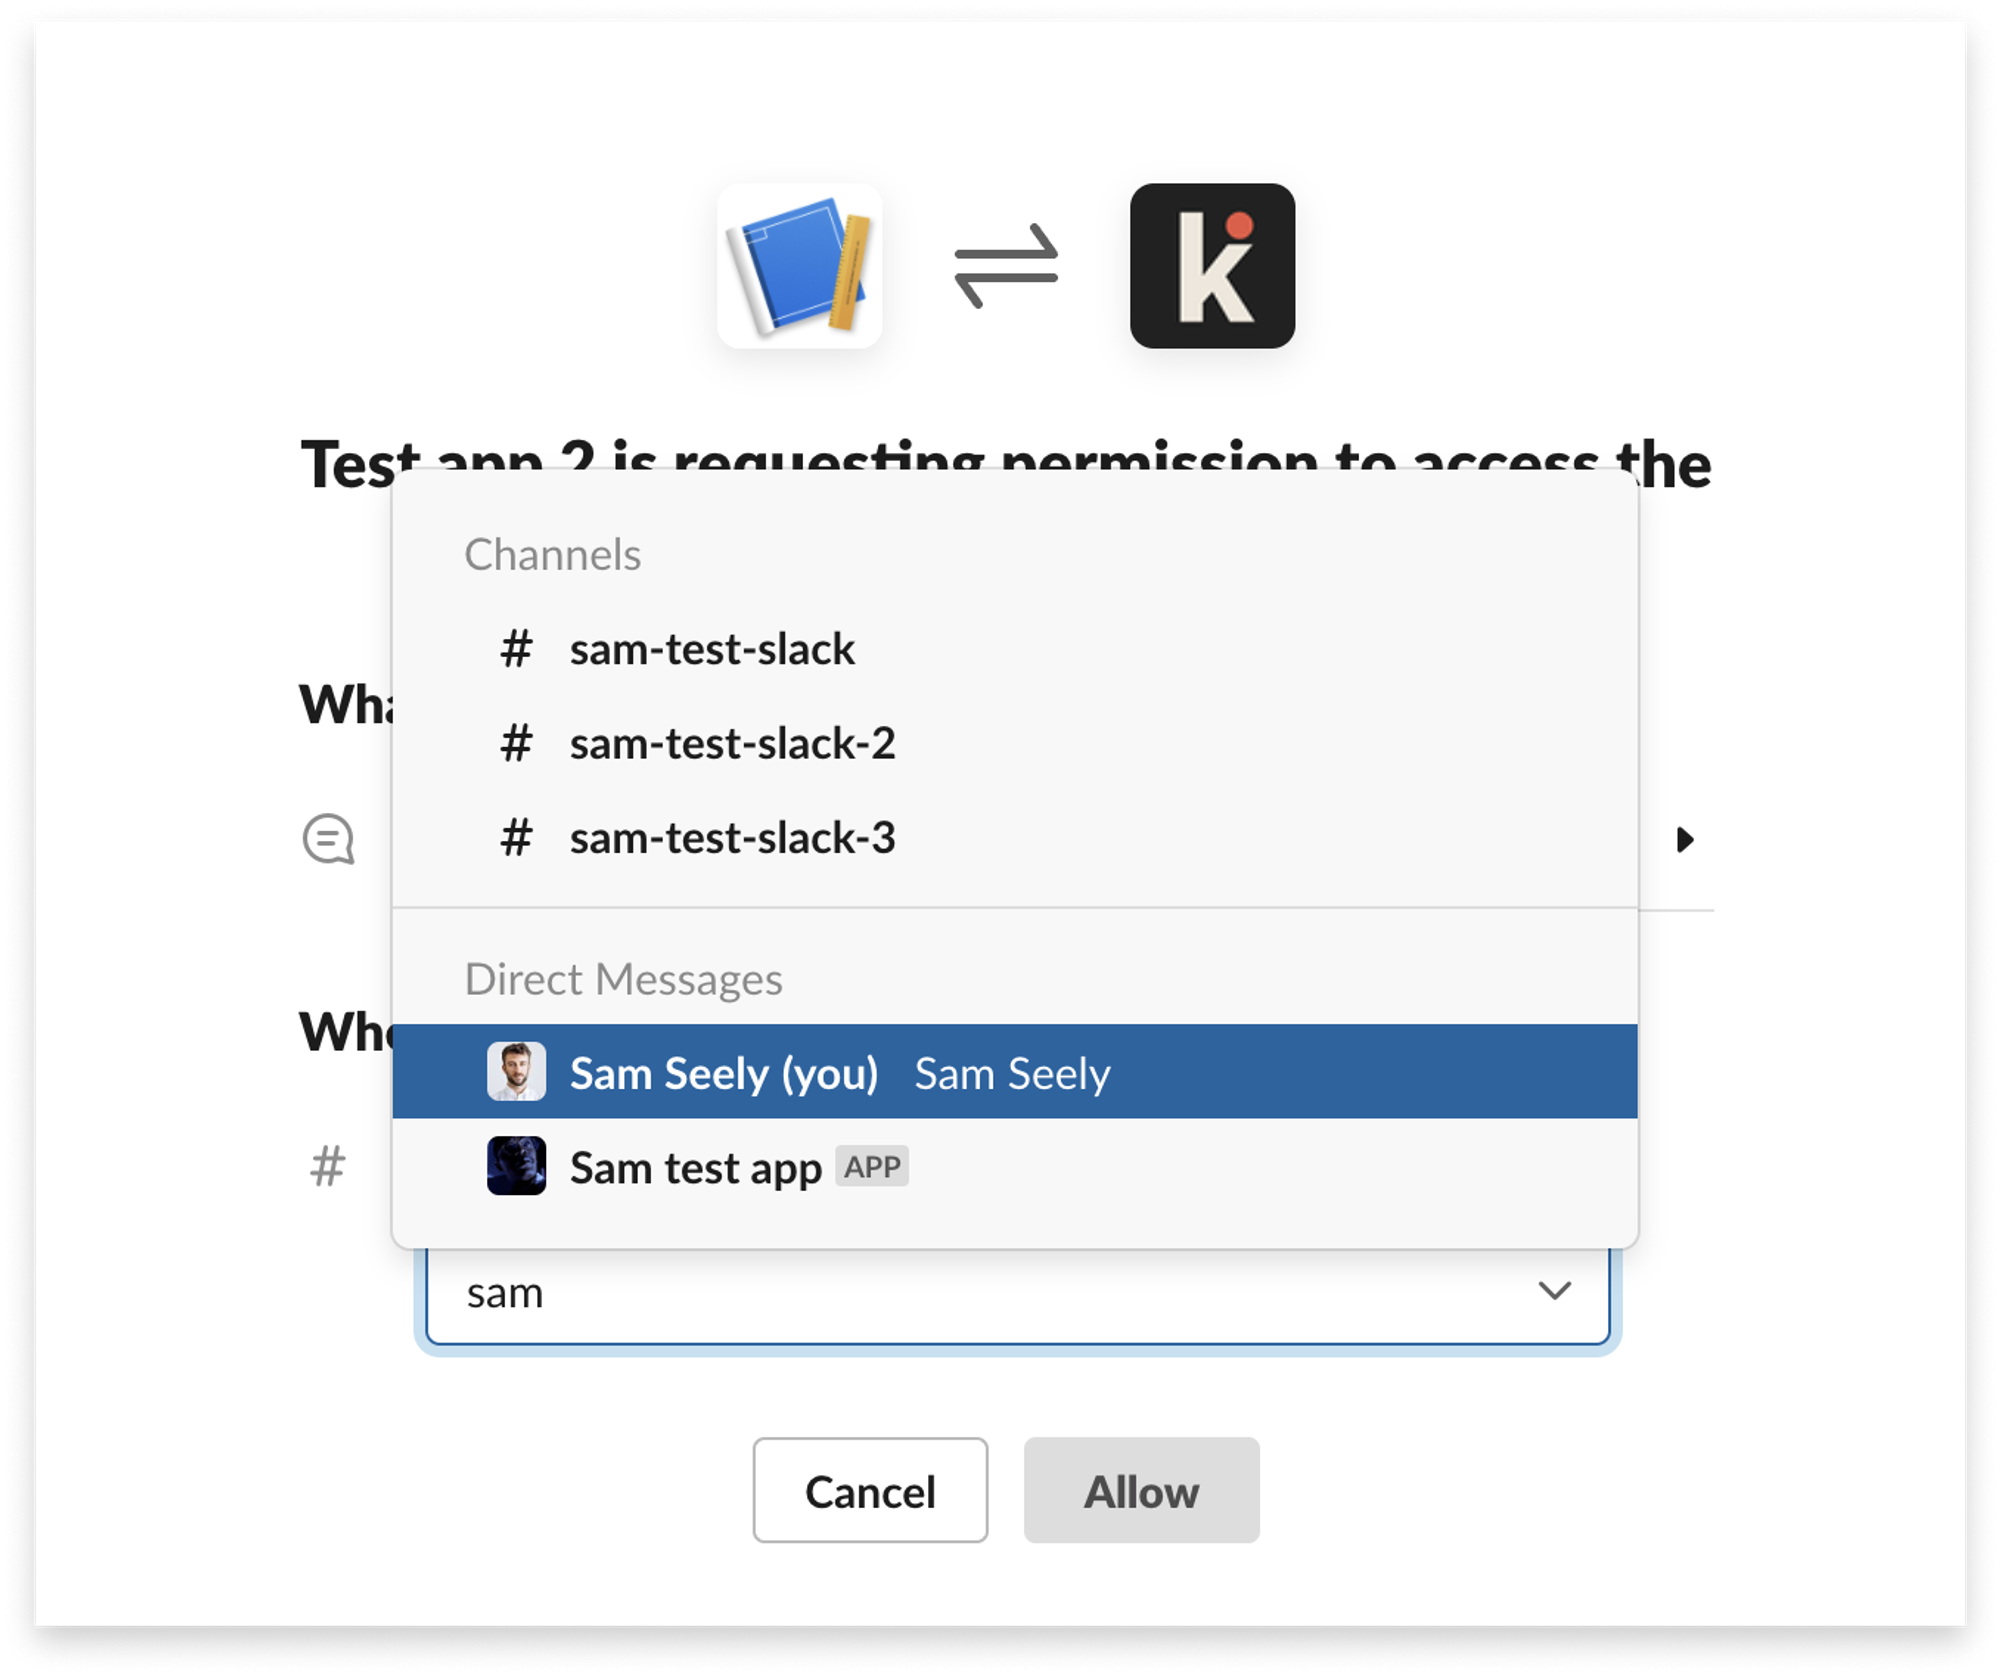
If you want to send messages to individual users within Slack, you can use the Users model to store channel data specific to that user. A user in Slack is someone who will receive a notification. If you send an email or SMS notification, this is as simple as a user signing up for your product, and you can ask for their email address and phone number.
With Slack, you need to access their Slack ID and explicitly ask permission to send them DMs. This flow isn’t different from the OAuth flow for accessing public or private channels, the user just has to add your Slack app to their direct channel instead of a public one.
Then, the way we model that is the same as we walked through in the example with object recipients. Users in Knock SDKs also have a setChannelData method allowing you to set data about a particular channel:
const { Knock } = require("@knocklabs/node");
const knockClient = new Knock(process.env.KNOCK_API_KEY);

await knockClient.users.setChannelData(
  "sseely",
  process.env.KNOCK_SLACK_CHANNEL_ID,
  {
    connections: [
      {
        incoming_webhook: { url: "url-from-slack" },
      },
    ],
  },
);
When you trigger the workflow, you can then use the user ID to determine who will receive the message:
const { Knock } = require("@knocklabs/node");
const knock = new Knock(process.env.KNOCK_API_KEY);

await knock.workflows.trigger("new-issue", {
  recipients: ["user_123"],
});
As Knock processes this workflow, it will look at the channel data when it reaches a channel step with a provider that requires it, like push or chat providers, and use that channel data to send the notification.
It’s worth calling out here that although Knock will use this channel data, it always assumes those tokens or webhooks are valid. If a token were to expire or a user removes webhook access for an app, those channel steps may fail.
Slack messages are modeled as templates in Knock
The final part is the actual messages you are sending. In Slack, notifications can be simple text, Slack’s mrkdwn language, or can be more sophisticated using Slack’s Block Kit.
In Knock, you have more opportunities within your messaging. We save your messages as templates within Knock. There are two main benefits of using templates within Knock:
- You can save each one, having a central repository for all your messaging.
- You can add variables dynamically using liquid markup language.
You can use basic markdown with Knock (Knock converts markdown to Slack’s mrkdwn for you). Then, you can add liquid tags within the markdown to dynamically add variables or include control statements to define what part of the notification is shown to the user:
Hi **{{ recipient.name | split:" " | first }}**,

There are {{ total_activities }} comments left on {{ page_name }}.

{% for activity in activities %}

- From **{{activity.actor.name}}**: "{{activity.comment.body}}""
  {% endfor %}

[**View page**]({{vars.base_url}}/{{account_id}}/pages/{{ page_id }})
You can also use liquid within Block Kit JSON in Knock. If you already have Block Kit set up for your Slack notifications, you can pull the entire JSON block into the Knock JSON template editor and continue to work from there:
{
	"blocks": [
		{
			"type": "header",
			"text": {
				"type": "plain_text",
				"text": "Users marked for onboarding",
				"emoji": true
			}
		},
		{
			"type": "section",
			"text": {
				"type": "mrkdwn",
				"text": "Hi John,\n\n The following users have been assigned to you for onboarding today:"
			}
		},
		{% for activity in activities %}
		{
			"type": "section",
			"text": {
				"type": "mrkdwn",
				"text": "*{{activity.assigned_user.name}}* \n {{activity.assigned_user.email}} \n _{{activity.assigned_user.title}}_"
			},
			"accessory": {
				"type": "image",
				"image_url": "{{activity.assigned_user.avatar_url}}",
				"alt_text": "avatar image"
			}
		},
		{
			"type": "divider"
		},
		{% endfor %}
		{
			"type": "actions",
			"elements": [
				{
					"type": "button",
					"text": {
						"type": "plain_text",
						"text": "View in dashboard",
						"emoji": true
					},
					"value": "{{dashboard_url}}"
				}
			]
		}
	]
}
An easier way to work with Slack
Slack as a notification channel is powerful but complicated. As they have built out the platform, understanding all the nuances of the API and platform has become increasingly difficult. At Knock, we aim to remove some of the complexity of working with Slack while making it easy to use Slack alongside other notification channels.
Knock’s SlackKit integration allows you to easily track users, channels, and messages, and take advantage of link tracking and advanced interactivity.
This post gives you the mental model to transfer how Slack works to how Knock works. If you want to start working with Slack in Knock today, sign up for a free account, and you can connect your Slack app in minutes.