When a startup begins to move upmarket and serve enterprise-level customers, new features start coming up on product discovery calls. The usual suspects: role-based access control, audit logs, SAML single sign-on.
For early-stage, ambitious startups (such as Knock 😇), building support for the features mentioned above can be a challenge. For each enterprise-ready feature, there’s a new domain to learn outside of your core product and a lot of nuances to get right on the way to delivering a great customer experience.
Take single sign-on (SSO). When you build SSO you have to deal with:
- Support and maintenance for multiple identity providers. Every new customer can mean a new identity provider that you need to support in your SSO implementation.
- Handling multiple authentication flows gracefully. When you introduce an SSO authentication flow you need to make sure it’s not degrading the auth experience for any non-SSO users.
- Giving your admins an easy SSO configuration experience. Ideally, you give your customers a self-service way to setup SSO so your customer admins can get started without needing help from your customer support team.
Our team had experience dealing with all of the above at previous startups where we decided to build SSO in-house, so this time around at Knock we decided to look for a product we could use to make implementing SSO easier.
Enter WorkOS
WorkOS is a set of building blocks for quickly adding enterprise features to your app. There were a few things about workOS that we immediately liked:
- Instant support for many identity providers. You implement WorkOS once and immediately get support for all of the identity providers they support. We knew that if we onboarded a future customer with an identity provider WorkOS didn’t support (very unlikely) that they’d be able to do so soon.
- It was much faster to implement than if we’d built it in-house. We estimated that it’d take around a month to build support for the major identity providers, update our auth flow to include SSO, and build any admin-facing SSO features. With workOS we realized we’d be able to do all of this in less than a week.
- A great admin-facing setup flow. We loved the self-service admin portal that WorkOS provides and that we could use it to enable our enterprise customers to get their Knock account started with SSO in a few minutes.
Given the points above, it was an easy decision to buy WorkOS vs. build SSO in-house.
Implementing WorkOS
Here’s more detail on the WorkOS implementation we put in place at Knock.
Our SSO support consists of two main parts:
- The admin flow: how our admins enable SSO for their account
- The sign-up and sign-in flow: how our users auth into Knock using SSO
SSO setup
The admin implementation was straightforward. We create an organization on WorkOS and generate an admin portal URL for it.
Here’s how this ended up looking in the Knock UI:
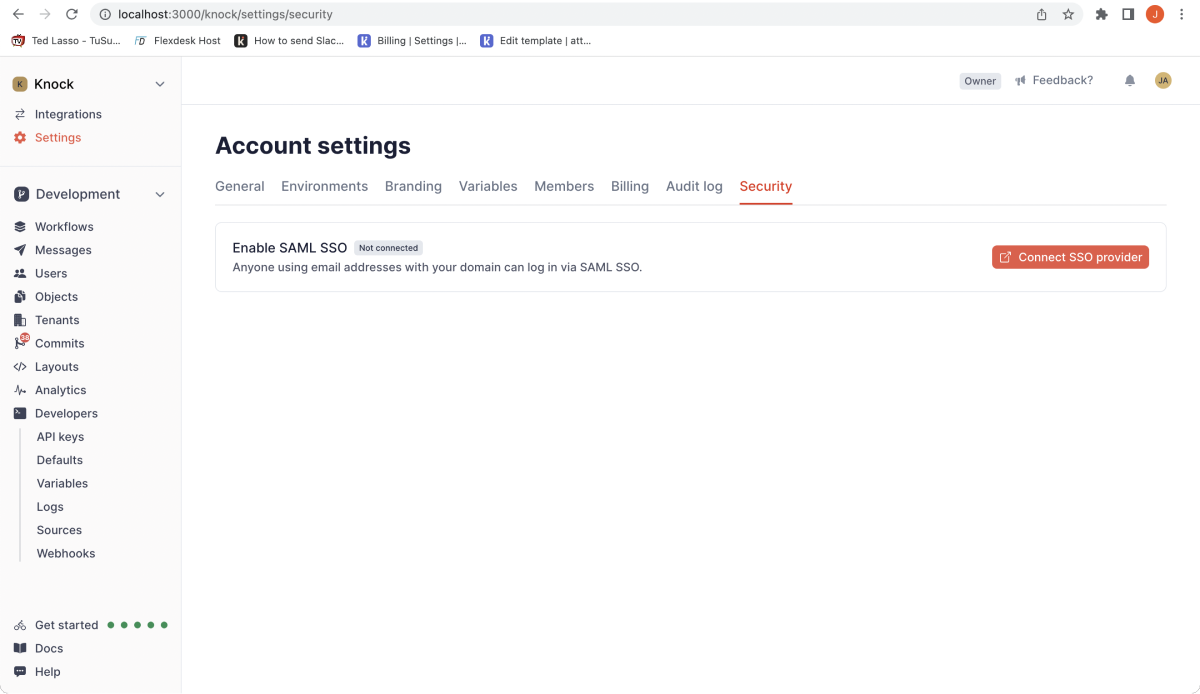
The “Connect SSO provider” calls our backend to generate a WorkOS admin portal URL for the account.
Here’s what this looks like in our backend:
account = Repo.get(Account, account_id)

# You should store the response organization's id on your database for future use
{:ok, %{"id" => workos_org_id}} = WorkOS.Portal.create_organization(%{
	name: account.name,
	domains: [account.domain]
})

# This return url will be used by WorkOS to allow the user to go back
# to your app
return_url = "#{app_host}/#{account.slug}/settings/sso"

{:ok, %{"link" => link}} = WorkOS.Portal.generate_link(%{
	intent: "sso",
  organization: workos_org_id,
  return_url: return_url
})

link
The frontend redirects the user to the generated WorkOS admin portal URL where the admin can configure their SSO provider. When the user finishes configuring their provider on the WorkOS admin’s portal, they are redirected back to Knock.
We implemented WorkOS connection webhooks to sync the connection information the user configures back to Knock, which we use to redirect account members to the configured provider SSO URL during sign-in.
Sign up and sign in flow
Implementing our sign-up and sign-in flows was a bit more complex, but still pretty straightforward.
The most complex part of this process was designing how we wanted to incorporate SSO authentication into our existing auth flow. We leaned on WorkOS’s UX guide for SSO-related auth a lot during this process; we can’t recommend it highly enough.
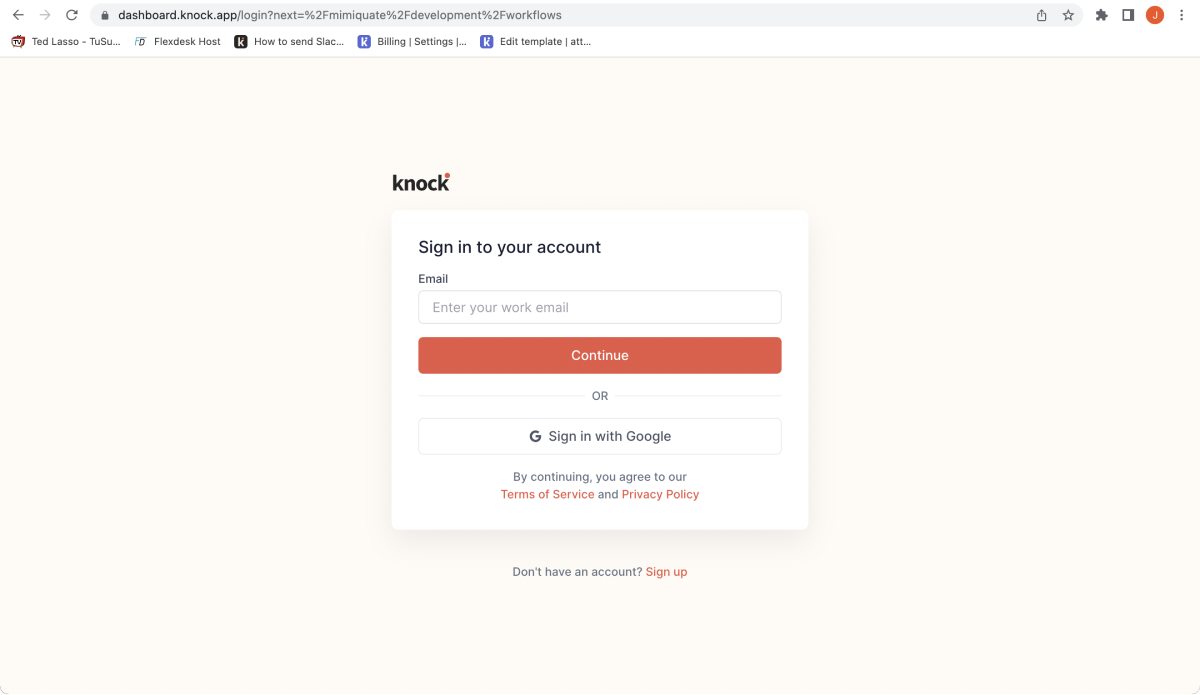
We decided to keep a single email field upfront to initiate SSO-based authentication for our SSO-enabled customers. When a user inputs their email and continues, we look to see if their email domain is connected to an account with SSO configured. If it is, we route to the identity provider. If it’s not, we route them to our normal magic link authentication flow. (A side note: this is a nice bonus of passwordless authentication, you don’t need to worry about how you’ll send users with a password to a different part of your authentication flow. You just need the single email field.)
When the user clicks on “Continue” after writing their email address, the backend will check if the email domain matches the domain of an account that has set up SAML single sign-on. You can see what this looks like in the snippet below:
account = Repo.get_by(Account, domain: domain)

if account do
  connection_id = account.workos_connection_id

  {:ok, url} = WorkOS.SSO.get_authorization_url(%{
    state: state,
    connection: connection_id,
    redirect_uri: auth_redirect_uri()
  })

  url
else
  # Handle non-SSO sign in flow
end
When the frontend gets the URL, the user will be redirected to the account’s SSO provider login screen where they will be able to use their credentials. Once the authentication step is completed, they will be redirected back to your app to finish the flow. Here the implementation is again pretty simple: WorkOS sends a code parameter you can use to fetch the user’s profile information and create the user:
with {:ok, %{"profile" => %{"name" => name, "email" => email}}} <- WorkOS.SSO.get_profile(code) do
  user_attrs = %{
    name: name,
    email: email,
    last_login_at: DateTime.utc_now()
  }

  %User{}
  |> User.create_changeset(user_attrs)
  |> Repo.insert(
	  on_conflict: {:replace, [:name, :email, :last_login_at, :updated_at]},
    conflict_target: [:email],
    returning: true
  )
end
You then generate a session for the user as you do with your other authentication methods and that’s it.
In Knock’s case, we support two other authentication mechanisms, including magic links and Google Sign-in. For each option we use WorkOS to power them, with all options using the exact same code path, making our authentication logic simple and easy to follow.
Conclusion
Building features for enterprise-level customers can be challenging. Luckily there are alternatives to building them in-house that can help you get them built faster. We’re ultimately glad we chose to look elsewhere for SSO support instead of building it in-house; we know that our SSO flow is in good hands and we can focus on our core product.