Push notifications are a pivotal feature for modern applications, serving as a direct communication channel to users. They provide timely and efficient delivery when you need to notify users of new content, updates, or other relevant alerts. With the advent of browser push notifications, websites and applications can now send notifications to the user at the system level, just like native mobile applications.
In this guide, we will go through how to set up browser push notifications for a Node.js web application. The steps we’re going to take are:
- Set up a notifications server using Express
- Creating a client-side script to send a subscription request to our notifications server
- Creating a service worker to handle the push notifications in the background of our browser
- Creating a frontend to allow a user to subscribe to push notifications
Video walkthrough
If you prefer to learn with video, watch it here.
Setting up our notifications server with Express
If you don’t already have Node.js installed, that should be the first thing to do. Once installed, we’ll create a new project directory, enter it, and add our dependencies:
mkdir push-notifications && cd push-notifications
npm install express node-pushnotifications
For this guide, we’re using the node-pushnotifications library to streamline sending our web push notifications and interacting with the underlying push services.
The application's core element will be an Express server that sends the web push notifications. When a client sends its subscription details to a /subscribe endpoint, the server sends back a push notification as a response.
We’ll create a server.js file in our directory and add this code:
const express = require("express");
const webpush = require("web-push");
const bodyParser = require("body-parser");
const path = require("path");
const PushNotifications = require("node-pushnotifications");

const app = express();

// Set static path
app.use(express.static(path.join(__dirname, "client")));

app.use(bodyParser.json());
app.use(function (req, res, next) {
  // Website you wish to allow to connect
  res.setHeader("Access-Control-Allow-Origin", "*");

  // Request methods you wish to allow
  res.setHeader(
    "Access-Control-Allow-Methods",
    "GET, POST, OPTIONS, PUT, PATCH, DELETE",
  );

  // Request headers you wish to allow
  res.setHeader("Access-Control-Allow-Headers", "*");

  // Set to true if you need the website to include cookies in the requests sent
  // to the API (e.g. in case you use sessions)
  res.setHeader("Access-Control-Allow-Credentials", true);

  // Pass to next layer of middleware
  next();
});

const publicVapidKey = "your-public-vapid-key"; // REPLACE_WITH_YOUR_KEY
const privateVapidKey = "your-private-vapid-key"; //REPLACE_WITH_YOUR_KEY

app.post("/subscribe", (req, res) => {
  // Get pushSubscription object
  const subscription = req.body;
  console.log(subscription);
  const settings = {
    web: {
      vapidDetails: {
        subject: "mailto:[email protected]", // REPLACE_WITH_YOUR_EMAIL
        publicKey: publicVapidKey,
        privateKey: privateVapidKey,
      },
      gcmAPIKey: "gcmkey",
      TTL: 2419200,
      contentEncoding: "aes128gcm",
      headers: {},
    },
    isAlwaysUseFCM: false,
  };

  // Send 201 - resource created
  const push = new PushNotifications(settings);

  // Create payload
  const payload = { title: "Notification from Knock" };
  push.send(subscription, payload, (err, result) => {
    if (err) {
      console.log(err);
    } else {
      console.log(result);
    }
  });
});

//Serve the frontend HTML and JS assets for our website
app.get("/", (req, res) => {
  res.sendFile(__dirname + "/index.html");
});
app.get("/main.js", (req, res) => {
  res.sendFile(__dirname + "/main.js");
});
app.get("/sw.js", (req, res) => {
  res.sendFile(__dirname + "/sw.js");
});

const port = 3000;

app.listen(port, () => console.log(`Server started on port ${port}`));
Let’s review this code piece by piece to understand what’s happening.
First, we have the imports.
const express = require("express");
const webpush = require("web-push");
const bodyParser = require("body-parser");
const path = require("path");
const PushNotifications = require("node-pushnotifications");
We installed express and node-pushnotifications. We’re also using some other modules:
- express: For building the web server.
- web-push: For web-based push notifications.
- body-parser: For parsing incoming request bodies.
- path: For handling file and directory paths.
- node-pushnotifications: An abstracted way to send notifications using various push services.
Next, we have to initialize an instance of the express application as app.
const app = express();After that, we need to set up some middleware with the .use() function from Express. Middleware allows you to intercept and process requests before they reach their intended route handlers (like /subscribe in this application) and enable functionalities such as parsing, request modification, error handling, and authentication.
The middleware here tells Express that the app is set to serve static files from a client folder within the current directory, and it uses bodyParser.json() to parse incoming request bodies in a JSON format.
Custom middleware is also set up to handle CORS (Cross-Origin Resource Sharing) settings. This ensures the server can handle requests from any domain (Access-Control-Allow-Origin is set to ``) and supports various HTTP methods and headers. It also indicates that cookies can be included in requests (Access-Control-Allow-Credentials is set to true).
// Set static path
app.use(express.static(path.join(__dirname, "client")));

app.use(bodyParser.json());
app.use(function (req, res, next) {
  // Website you wish to allow to connect
  res.setHeader("Access-Control-Allow-Origin", "*");

  // Request methods you wish to allow
  res.setHeader(
    "Access-Control-Allow-Methods",
    "GET, POST, OPTIONS, PUT, PATCH, DELETE",
  );

  // Request headers you wish to allow
  res.setHeader("Access-Control-Allow-Headers", "*");

  // Set to true if you need the website to include cookies in the requests sent
  // to the API (e.g. in case you use sessions)
  res.setHeader("Access-Control-Allow-Credentials", true);

  // Pass to next layer of middleware
  next();
});A quick note: setting up such a permissive CORS policy is problematic in a production environment. The above would allow almost all traffic to connect to this server and POST data. Always set CORS to only allow known clients to connect to your servers.
The following section defines two VAPID (Voluntary Application Server Identification) keys. These are used for application server identification with web push protocols.
const publicVapidKey = "your-public-vapid-key"; // REPLACE_WITH_YOUR_KEY
const privateVapidKey = "your-private-vapid-key"; //REPLACE_WITH_YOUR_KEY
You can generate VAPID keys here. This allows you to bypass standing up an entire messaging service such as Firebase Cloud Messaging or AWS SNS.
Another quick security note: In a real-world scenario, these keys should be kept secret and not hard-coded directly into your code.
The next part of the code is the critical part: the API endpoint for subscribing to notifications. When a POST request is made to this /subscribe endpoint, the server receives a push subscription object (we’ll see how this is generated when we look at the client-side code).
After receiving the subscription, the server configures push notification settings using the earlier defined VAPID keys and other settings (like the email, content encoding, and GCM key). It then attempts to send a push notification with a hardcoded title, "Notification from Knock."
If the push notification sending fails, it logs the error. If it succeeds, it logs the result.
app.post("/subscribe", (req, res) => {
  // Get pushSubscription object
  const subscription = req.body;
  const settings = {
    web: {
      vapidDetails: {
        subject: "mailto:[email protected]", // REPLACE_WITH_YOUR_EMAIL
        publicKey: publicVapidKey,
        privateKey: privateVapidKey,
      },
      gcmAPIKey: "gcmkey",
      TTL: 2419200,
      contentEncoding: "aes128gcm",
      headers: {},
    },
    isAlwaysUseFCM: false,
  };

  // Send 201 - resource created
  const push = new PushNotifications(settings);

  // Create payload
  const payload = { title: "Notification from Knock" };
  push.send(subscription, payload, (err, result) => {
    if (err) {
      console.log(err);
    } else {
      console.log(result);
    }
  });
});
Next, we'll add a few additional static routes to serve the frontend HTML and JS assets that will trigger our push notifications in the browser. We'll create these files in the next step:
//Serve the frontend HTML and JS assets for our website
app.get("/", (req, res) => {
  res.sendFile(__dirname + "/index.html");
});
app.get("/main.js", (req, res) => {
  res.sendFile(__dirname + "/main.js");
});
app.get("/sw.js", (req, res) => {
  res.sendFile(__dirname + "/sw.js");
});
Finally, the server starts and listens on port 3000, and a message is logged to the console once it's running.
const port = 3000;

app.listen(port, () => console.log(`Server started on port ${port}`));
We can run this server using:
node server.jsWhen running, you’ll see “Server started on port 3000.” It is now listening for that POST call from the frontend and will serve our index.html file. Let’s create that next.
Creating the client-side script to send the subscription request
Our browser will run some JavaScript that checks if the browser supports service workers and, if it does, register a service worker, subscribe that worker to push notifications, and then signal our server on localhost:3000 to send a push notification.
If you’re not familiar with service workers, they’re scripts that the browser runs in the background of a web page that don’t require user interaction. That means it’s perfect for processing asynchronous background requests, like registering for push notifications.
Create a main.js and add this code:
const publicVapidKey = "your-public-vapid-key"; // REPLACE_WITH_YOUR_KEY

// Check for service worker
if ("serviceWorker" in navigator) {
  send().catch((err) => console.error(err));
}

// Register SW, Register Push, Send Push
async function send() {
  // Register Service Worker
  console.log("Registering service worker...");
  const register = await navigator.serviceWorker.register("./sw.js", {
    scope: "/",
  });
  console.log("Service Worker Registered...");

  // Register Push
  console.log("Registering Push...");
  const subscription = await register.pushManager.subscribe({
    userVisibleOnly: true,
    applicationServerKey: urlBase64ToUint8Array(publicVapidKey),
  });
  console.log("Push Registered...");

  // Send Push Notification
  console.log("Sending Push...");
  await fetch("http://localhost:3000/subscribe", {
    method: "POST",
    body: JSON.stringify(subscription),
    headers: {
      "content-type": "application/json",
    },
  });
  console.log("Push Sent...");
}

function urlBase64ToUint8Array(base64String) {
  const padding = "=".repeat((4 - (base64String.length % 4)) % 4);
  const base64 = (base64String + padding)
    .replace(/\-/g, "+")
    .replace(/_/g, "/");

  const rawData = window.atob(base64);
  const outputArray = new Uint8Array(rawData.length);

  for (let i = 0; i < rawData.length; ++i) {
    outputArray[i] = rawData.charCodeAt(i);
  }
  return outputArray;
}
Again, we’ll step through this to see what is happening.
We first have to define our public VAPID key, which is used for push notification purposes. As this is a public key, adding to client-side code is OK.
const publicVapidKey = "your-public-vapid-key"; // REPLACE_WITH_YOUR_KEYWe then need to check whether the browser supports service workers.
This is done by verifying the existence of the serviceWorker property within the navigator object. If the serviceWorker property exists in navigator, the browser supports service workers.
Service workers are scripts running in the background, separate from the actual webpage, and enabling features like push notifications (offline capabilities and background syncing). Not all browsers, especially older ones, support service workers, so checking their availability is required before using them.
If service workers are supported, it calls the send() function. If there's an error during execution, it catches and logs the error to the console.
// Check for service worker
if ("serviceWorker" in navigator) {
  send().catch((err) => console.error(err));
}
send is an async function that does three main things:
- It first registers a service worker. This service worker will manage push notifications.
- After registering the service worker, it subscribes the service worker to push notifications. This step requires the public VAPID key, converted to the necessary format using a urlBase64ToUint8Array function.
With the push subscription details obtained from the previous step, it sends a POST request to the /subscribe endpoint running on localhost:3000. This request contains the subscription details the server needs to send a push notification.
// Register SW, Register Push, Send Push
async function send() {
  // Register Service Worker
  console.log("Registering service worker...");
  const register = await navigator.serviceWorker.register("./sw.js", {
    scope: "/",
  });
  console.log("Service Worker Registered...");

  // Register Push
  console.log("Registering Push...");
  const subscription = await register.pushManager.subscribe({
    userVisibleOnly: true,
    applicationServerKey: urlBase64ToUint8Array(publicVapidKey),
  });
  console.log("Push Registered...");

  // Send Push Notification
  console.log("Sending Push...");
  await fetch("http://localhost:3000/subscribe", {
    method: "POST",
    body: JSON.stringify(subscription),
    headers: {
      "content-type": "application/json",
    },
  });
  console.log("Push Sent...");
}
Finally, we have the urlBase64ToUint8Array function called by send(). This utility function converts a URL-safe base64 encoded string to a Uint8Array (an array of 8-bit unsigned integers). This conversion is necessary because the PushManager expects the VAPID key in the Uint8Array format, not as a base64 string.
function urlBase64ToUint8Array(base64String) {
  const padding = "=".repeat((4 - (base64String.length % 4)) % 4);
  const base64 = (base64String + padding)
    .replace(/\-/g, "+")
    .replace(/_/g, "/");

  const rawData = window.atob(base64);
  const outputArray = new Uint8Array(rawData.length);

  for (let i = 0; i < rawData.length; ++i) {
    outputArray[i] = rawData.charCodeAt(i);
  }
  return outputArray;
}
The service worker is vital to all this, so we must also create that.
Creating our service worker
This minimal service worker is solely focused on listening for and displaying push notifications. When the push notification arrives, it displays it with a specified title (from the incoming data) and body.
Create sw.js and add the below code:
console.log("Service Worker Loaded...");

self.addEventListener("push", (e) => {
  const data = e.data.json();
  console.log("Push Recieved...");
  self.registration.showNotification(data.title, {
    body: "Knock Knock",
  });
});
When loaded, the service worker logs the message "Service Worker Loaded..." to the console in the browser. This is useful for debugging to confirm that the service worker has been loaded successfully.
The service worker adds an event listener for the push event, which gets triggered when a push notification is received. Inside the event listener, it extracts the data from the received push event using e.data.json(), logs the message "Push Received..." and then uses the self.registration.showNotification method to display the push notification to the user. The notification's title is set to the title from the extracted data, and the body of the notification is set to "Knock Knock."
Here’s how all the console messages look in the browser console:
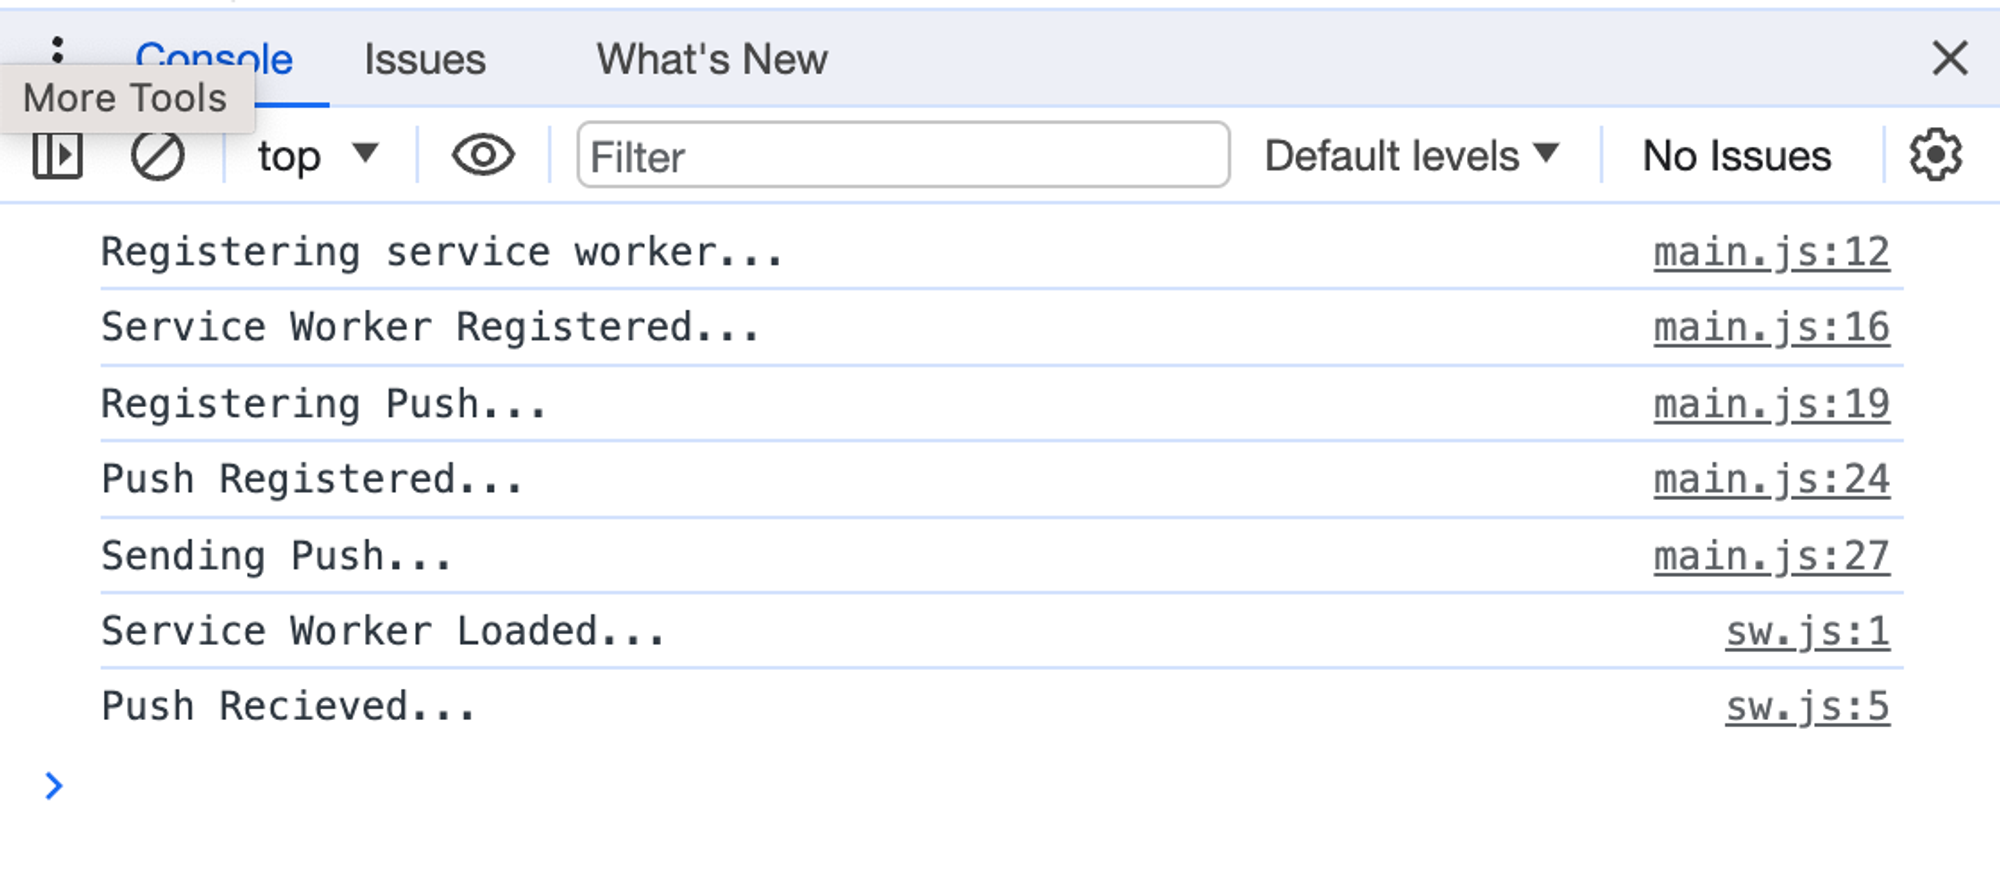
We now have all the logic set up to receive push notifications on our web page. Now we just need the web page.
Creating the frontend to subscribe
There is little to this page. It will call the main.js file as a <script>. When loaded, main.js will run the client-side logic to register the service worker and subscribe to push notifications.
Call this file index.html and add this code:
<!DOCTYPE html>
<html lang="en">
  <head>
    <meta charset="UTF-8" />
    <meta name="viewport" content="width=device-width, initial-scale=1.0" />
    <meta http-equiv="X-UA-Compatible" content="ie=edge" />
    <title>Push Notifications using Node.js and Node Push Notifications</title>
  </head>
  <body>
    <header>
      <h1>Web Push Notifications Demo</h1>
    </header>
    <script src="main.js"></script>
  </body>
</html>
Because we need the JavaScript to run, we can’t just open this file in the browser. We need it to be running on a server. The GET handlers in server.js will handle serving this file as well as its dependencies.
Start your server, then head to http://localhost:3000 and you should see this:
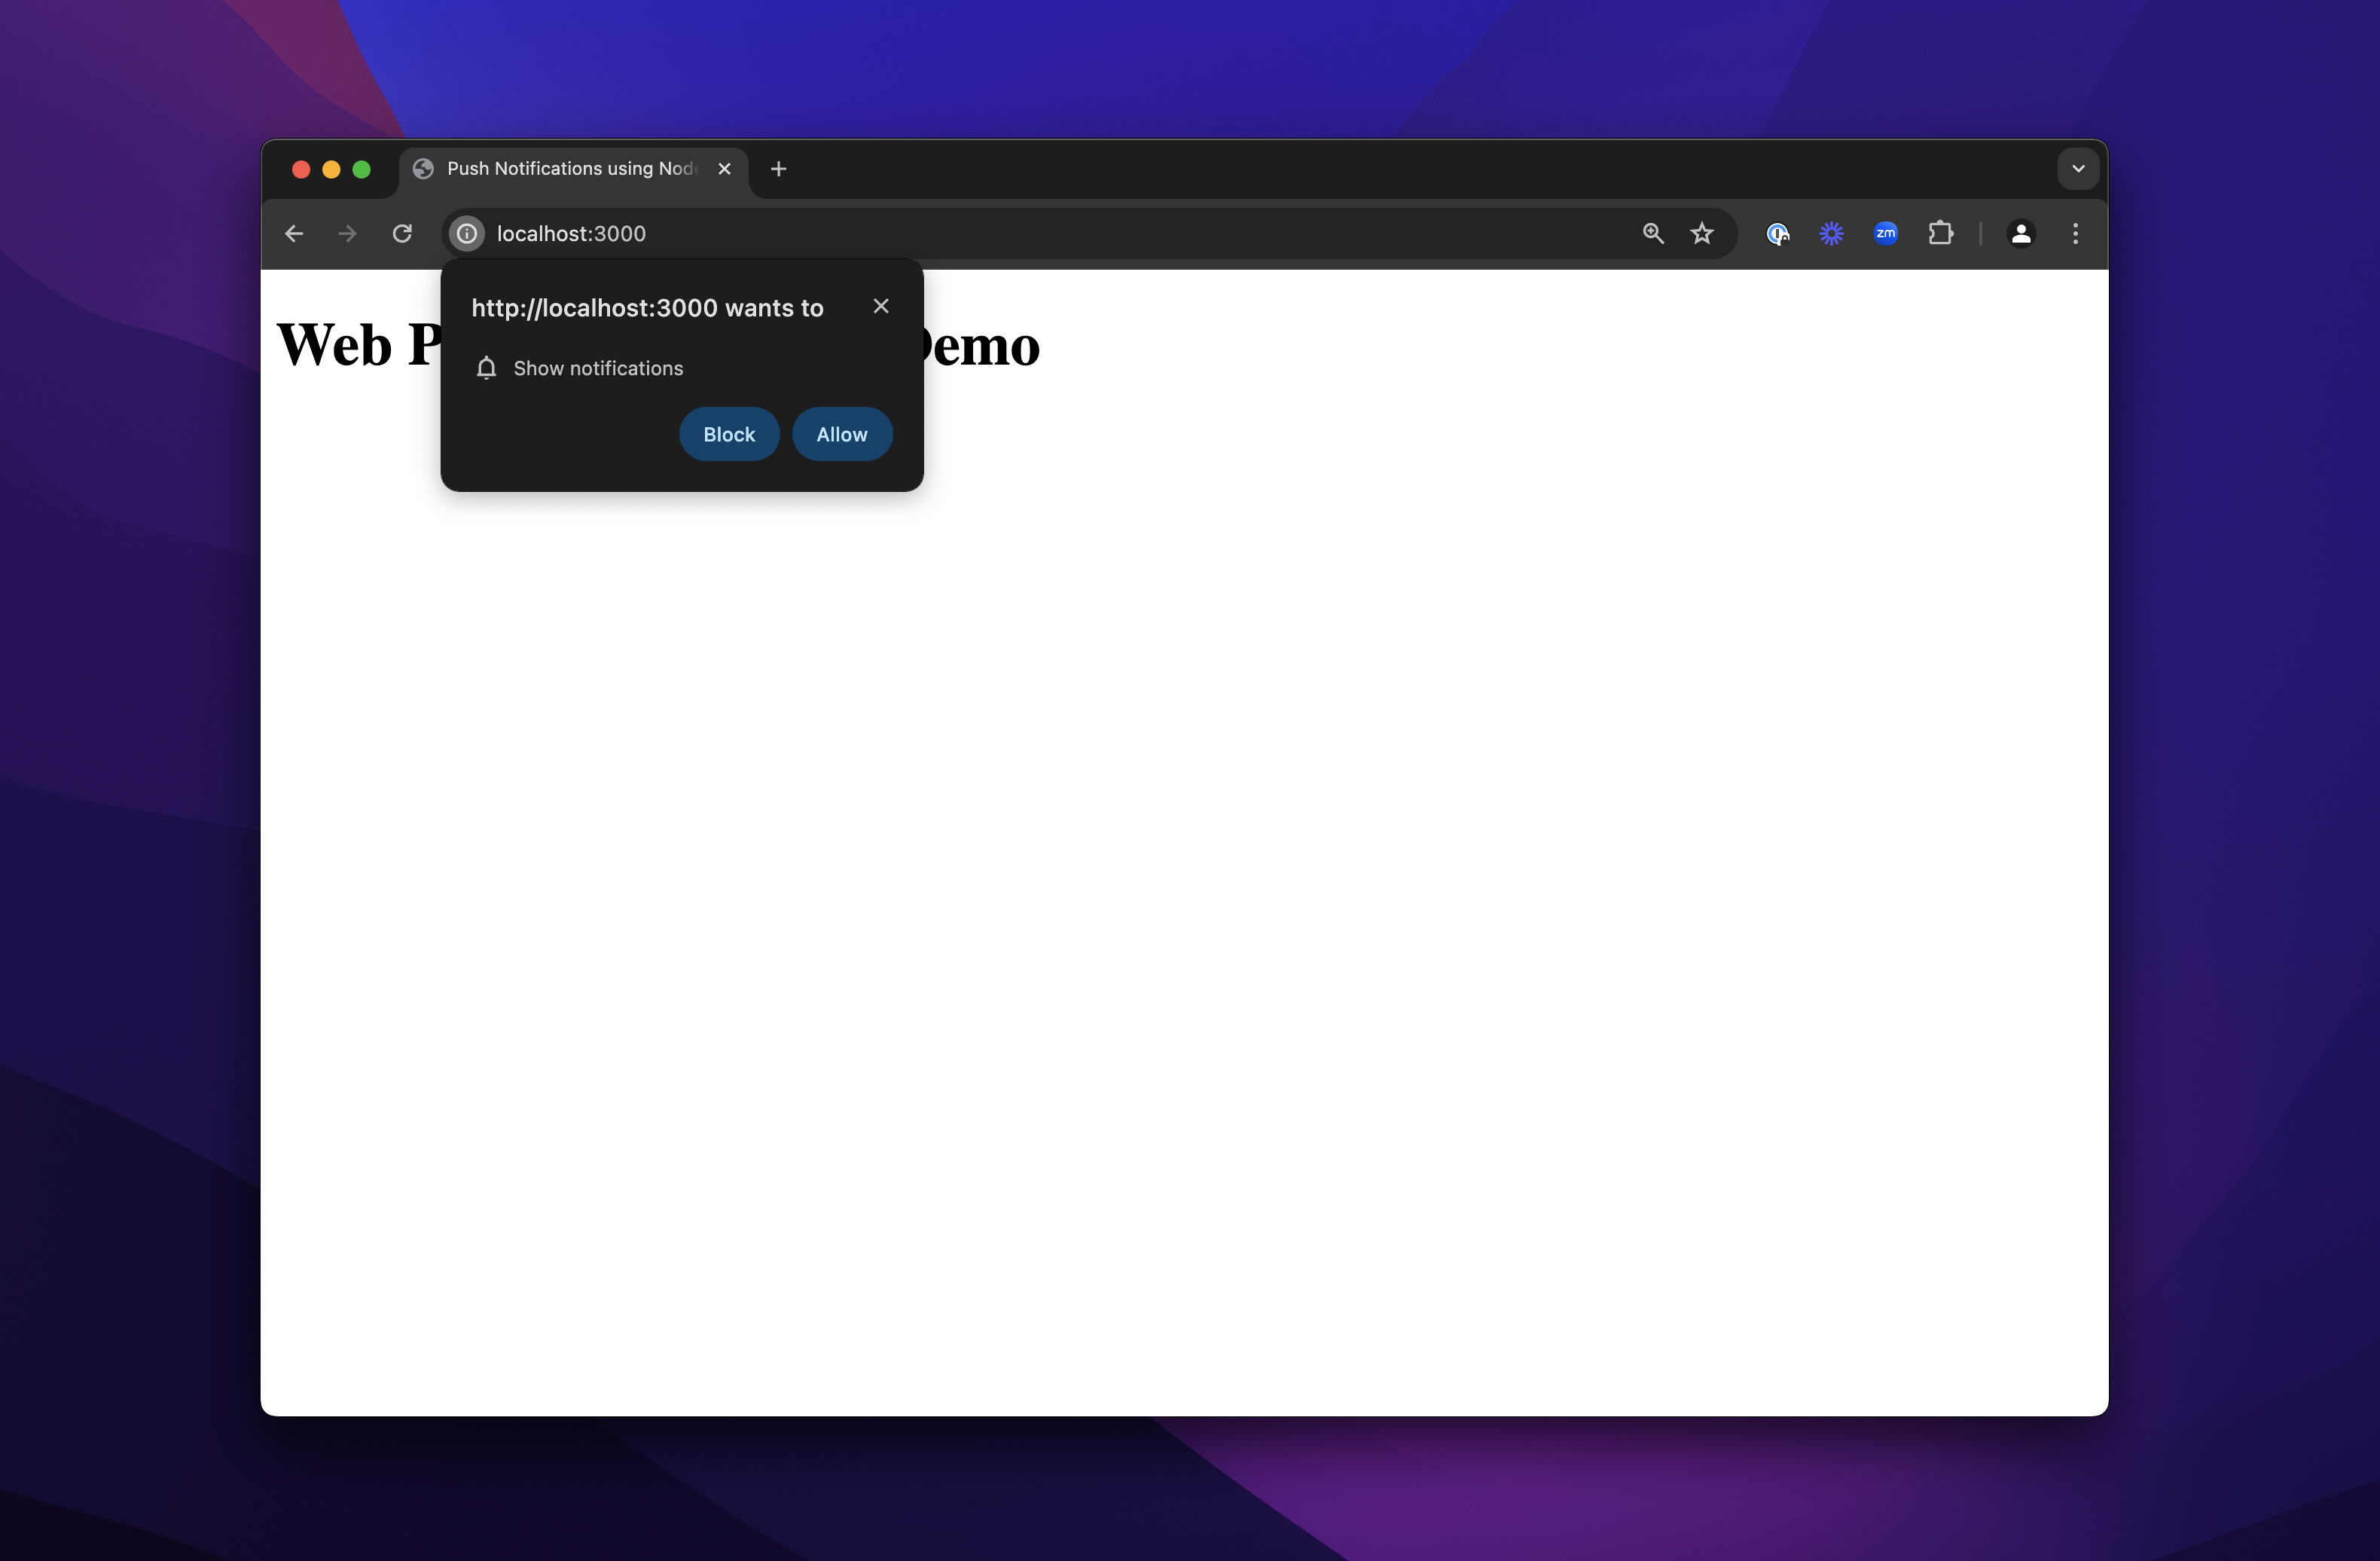
As with many browsers, Chrome asks you for permission if a site is trying to send you push notifications. Click “Allow,” and you should then see the notification fly in from the right side of the browser window:
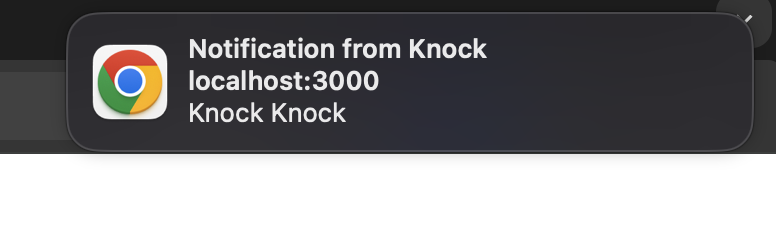
There we have it! Push notifications from Node.js.
Troublshooting tip: If you don't see the browser push
notificaton as shown above, but the browser console is logging a Push Recieved... message, then you may need to check your browser and operating
system settings to make sure notifications are allowed from the browser you
are using.
Building advanced push notifications
This is a simplified example of push notifications on the web. Here are a few things missing:
- Security. We’ve taken a lot of liberties with setting up our notification server. This is fine here because we are only running locally, but this would be a catastrophe in production. We’d need a secure notification server and have to deal with all the issues related to authentication, data validation, and the correct CORS settings.
- Design. We’ve hardcoded the messaging and design into our notification. In a production setting, the user and the message must come from a database, and we’d want that information presented better.
- Cross-channel communication. Rarely do you ever need just web-based push notifications. You need to send notifications to different channels depending on user presence and preferences. We’d need all the logic to incorporate these other channels and decisions.
If you want all of the above and don’t want to be creating your own service workers, there’s Knock.
With Knock, you can use our Node SDK to integrate our notifications platform into your application. You just build out workflows for your notifications and add your channels, and then we deal with cross-channel communication and the logic of when and how to notify each of your users.
The best place to start is to sign up for an account and read our docs. You can book a personalized demo today if you’d like to learn more.