Slack is a great notification platform for SaaS apps because it doesn't limit you to text or one-way communication. Users can receive notifications from your app and respond directly to the same message to trigger other events. This interactivity pattern uses affordances like buttons, dropdowns, and dialog boxes to enable users to take actions and make decisions more quickly and get more value out of applications that use them appropriately.
In this post, we'll create a bi-directional messaging app in Slack using the Bolt framework for Node.js that allows users to use buttons and a dropdown to make choices. Depending on their selections, we'll send a different message to the channel.
Regardless of your product, the patterns we use here will be the same: use Slack's Block Kit framework to craft interactive messages, listen to the events these blocks send back to your server, and then reply with a specific message depending on the event.
So, let's get started.
Setting up your local project
To get started, run the following commands in your terminal to create a new folder and initialize a node project:
mkdir slack-message-app
cd slack-message-app
npm init -y
From there, install the dependencies you'll need for this project:
npm install @slack/bolt dotenv
Next, create an index.js file to store our code and a .env file for your environment variables.
SLACK_BOT_TOKEN=xoxb-6539.....
SLACK_SIGNING_SECRET=14e3bb9fd.....
SLACK_APP_TOKEN=xapp-1-A070G.....
In the next step, we'll walk through how to create an app in Slack and obtain the values needed for your environment variables.
Creating your app in Slack
You can head over to this tutorial on Slack to find where you'll get all this information and how to set up a Slack app for interactivity, but we'll also outline the steps here.
Create a new app from scratch
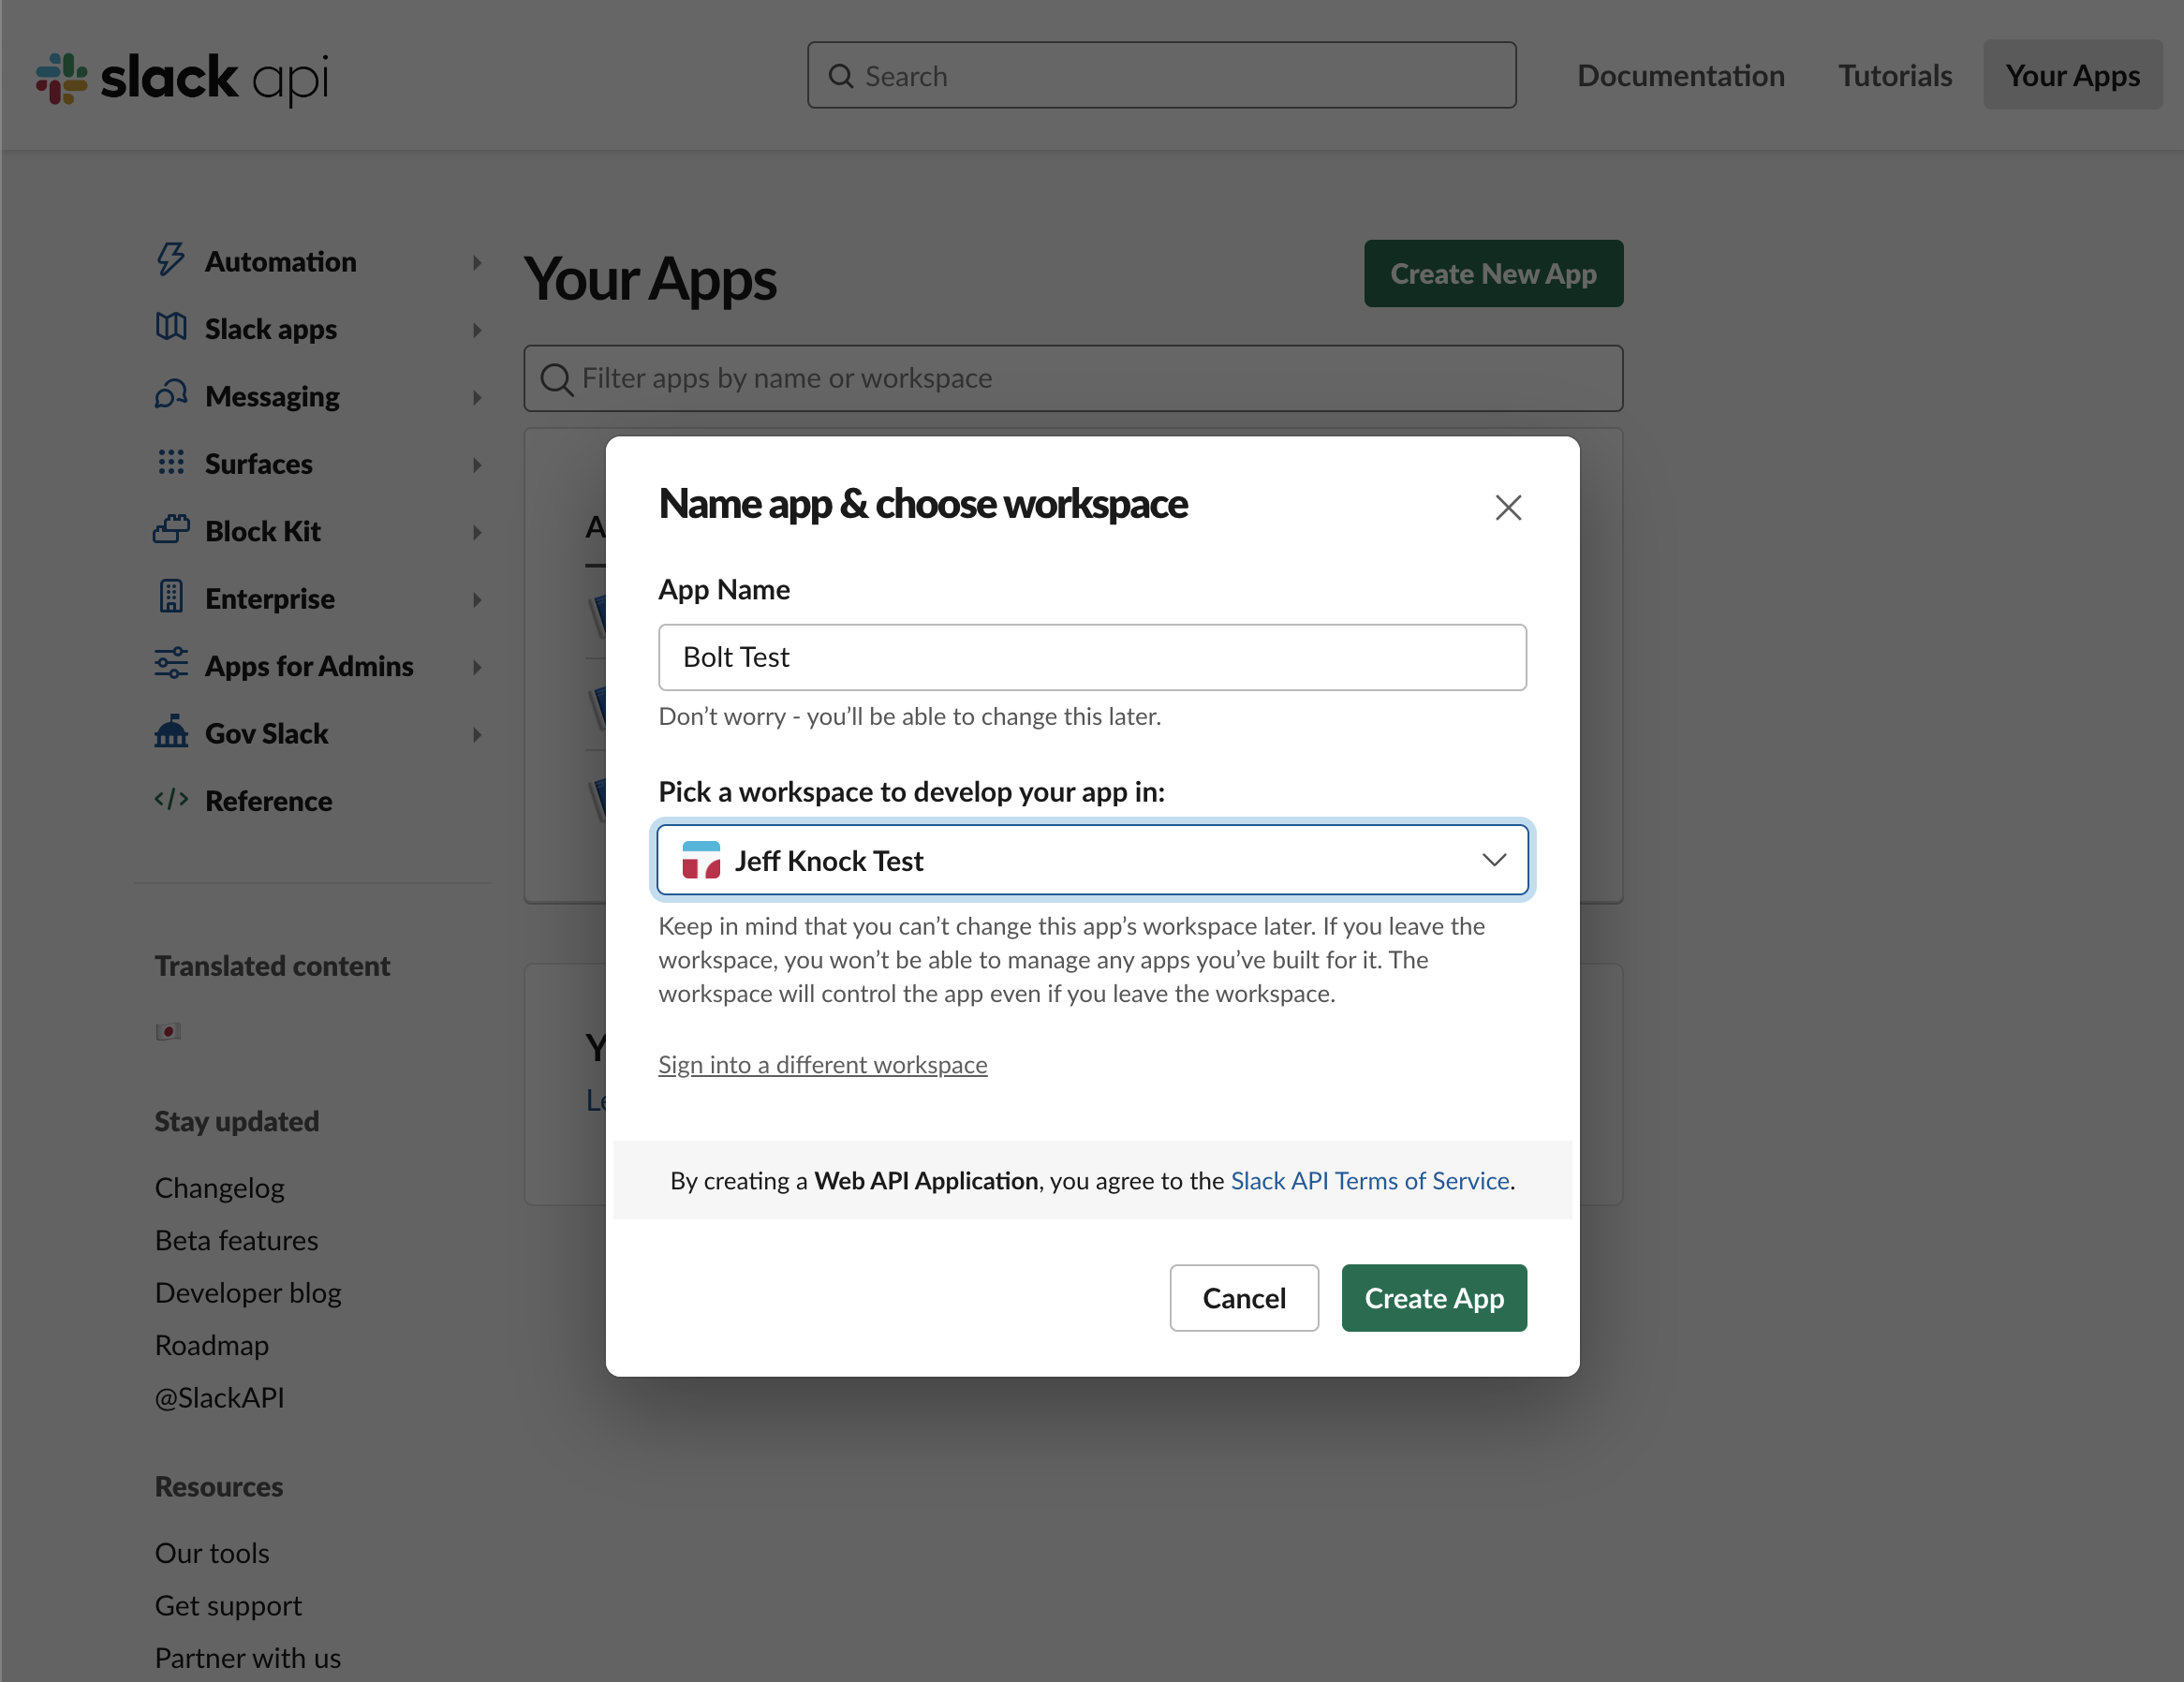
First, create a new app from scratch in the Slack API dashboard. You'll need to choose a name and select a workspace to install the app:
Add scopes & get Bot Token
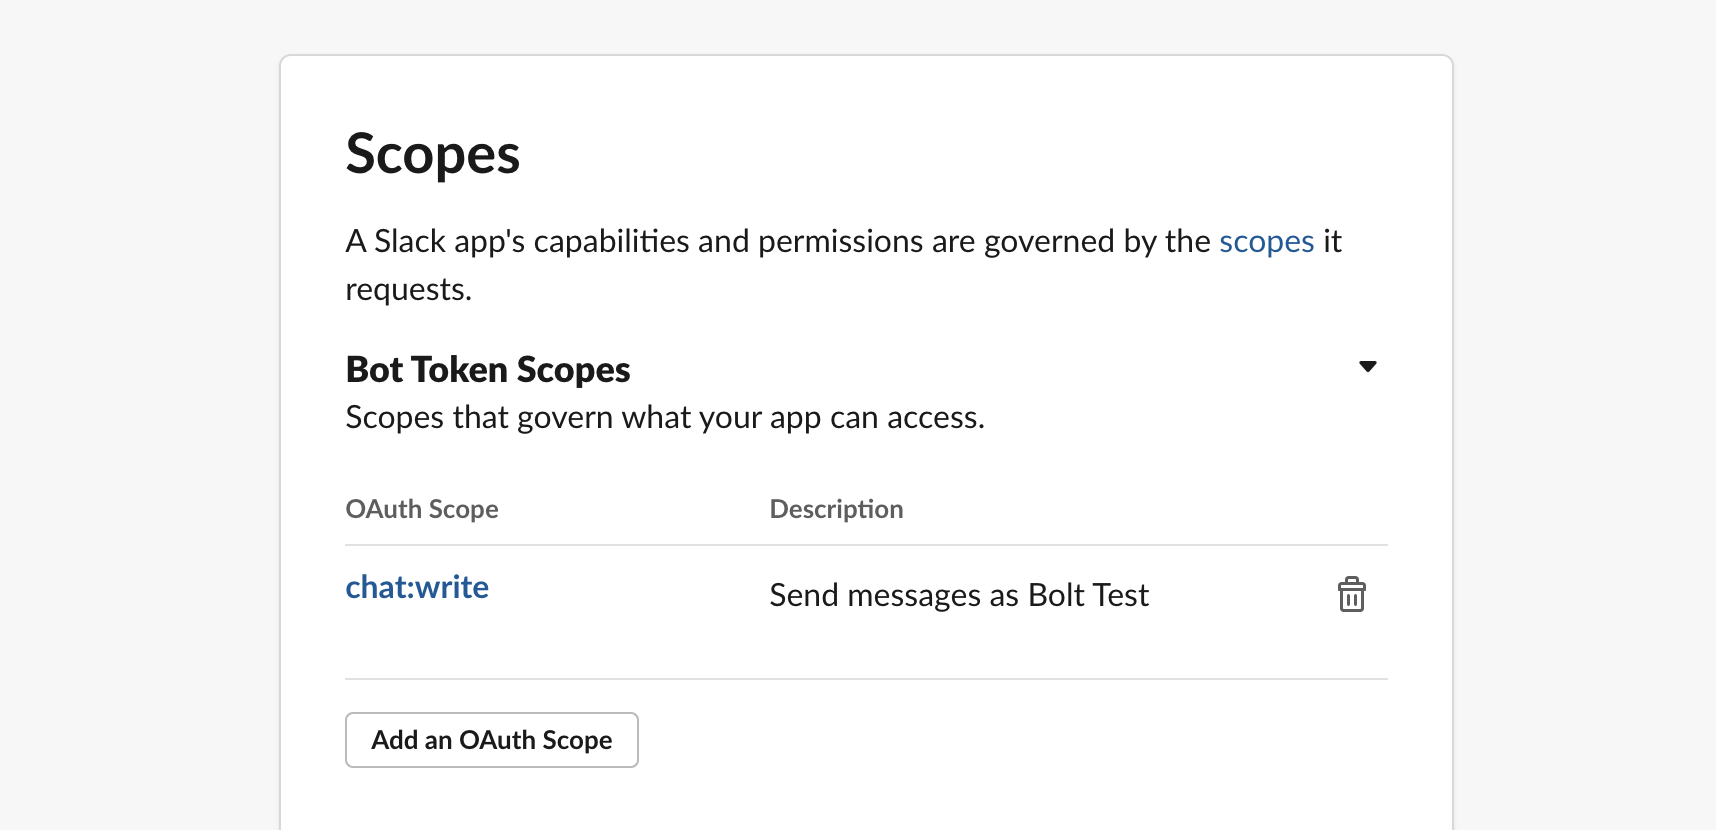
Next, head to the ‘OAuth & Permissions' page and scroll until you see the form element to add scopes to your bot. Here you'll add the chat:write scope to get started:
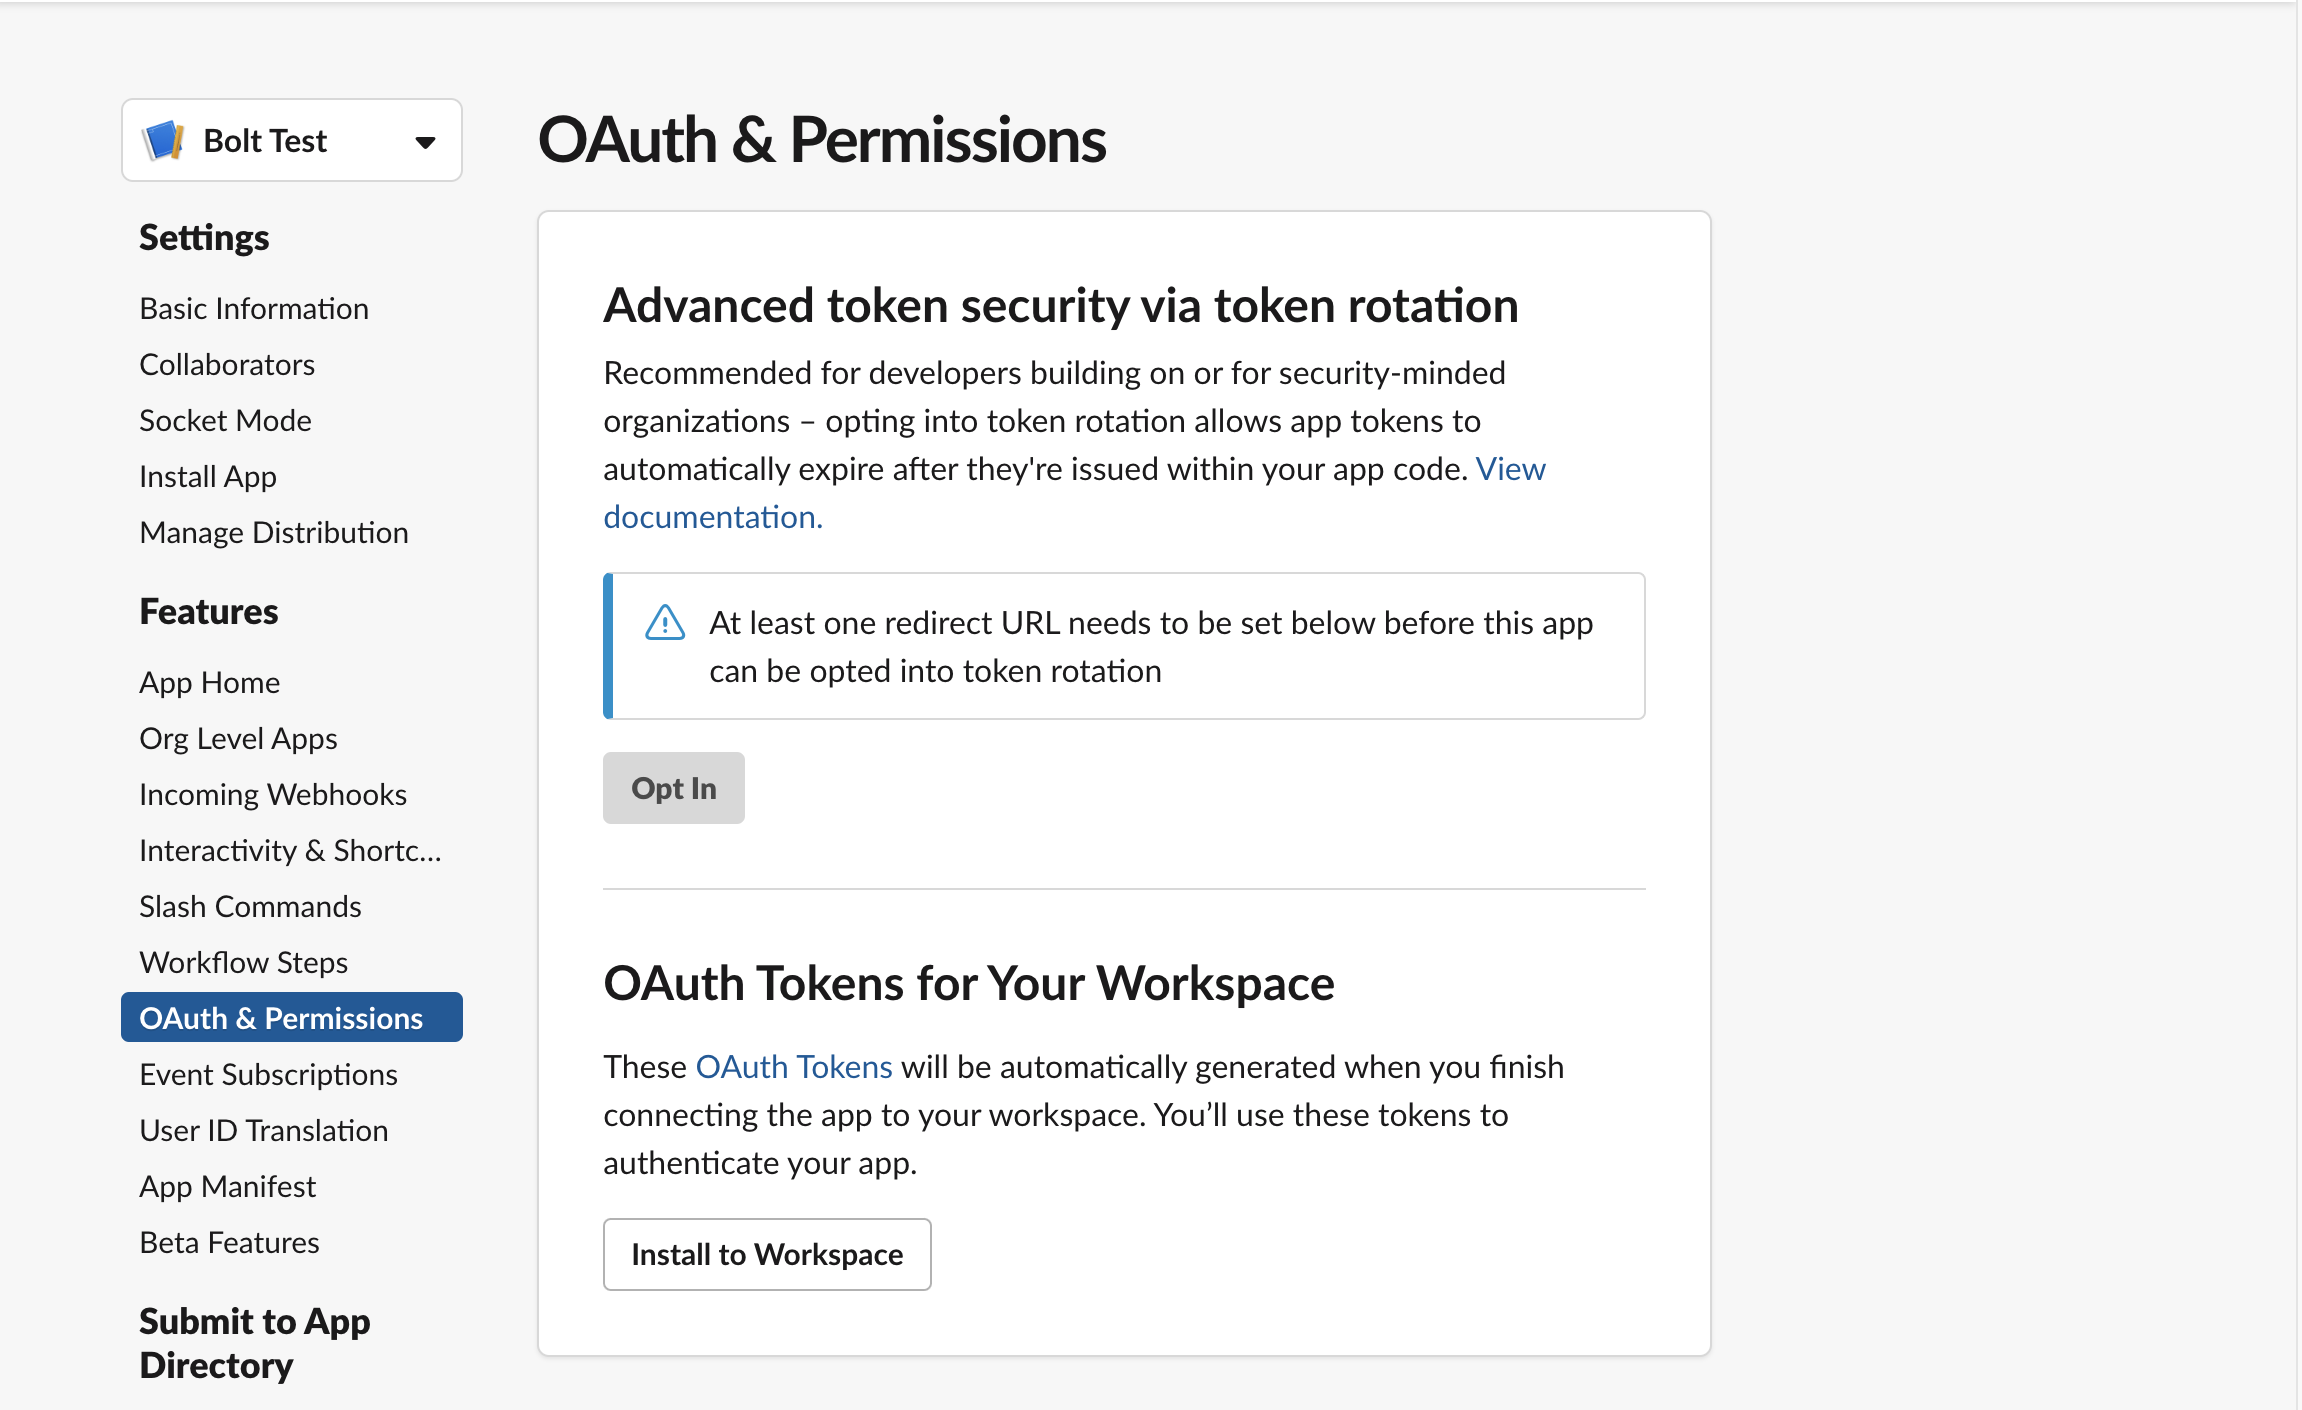
From there, scroll to the top of this page and locate the ‘Install to Workspace' button.
When you click this button, you'll proceed through an OAuth flow to grant your bot access to a particular workspace. When you get redirected back to this Slack API dashboard, you can copy the ‘Bot Token' value into your .env file as SLACK_BOT_TOKEN:
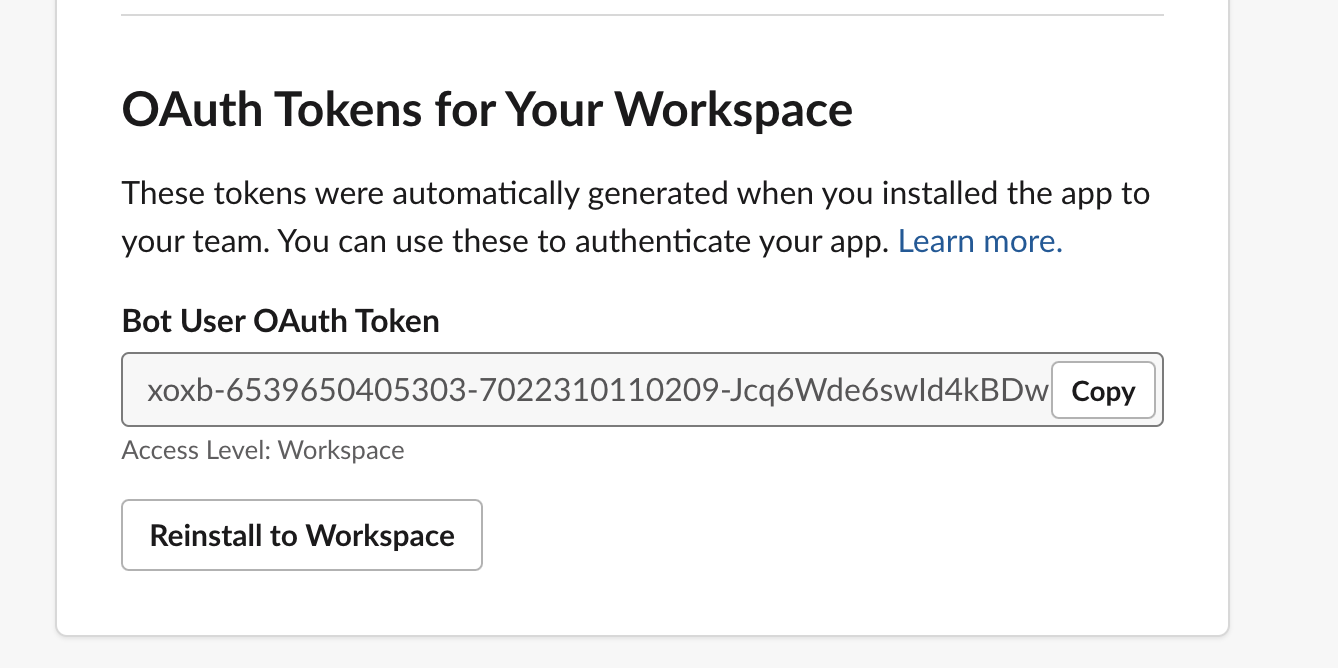
This value is a secret so it should not be exposed publicly.
Retrieve signing secret
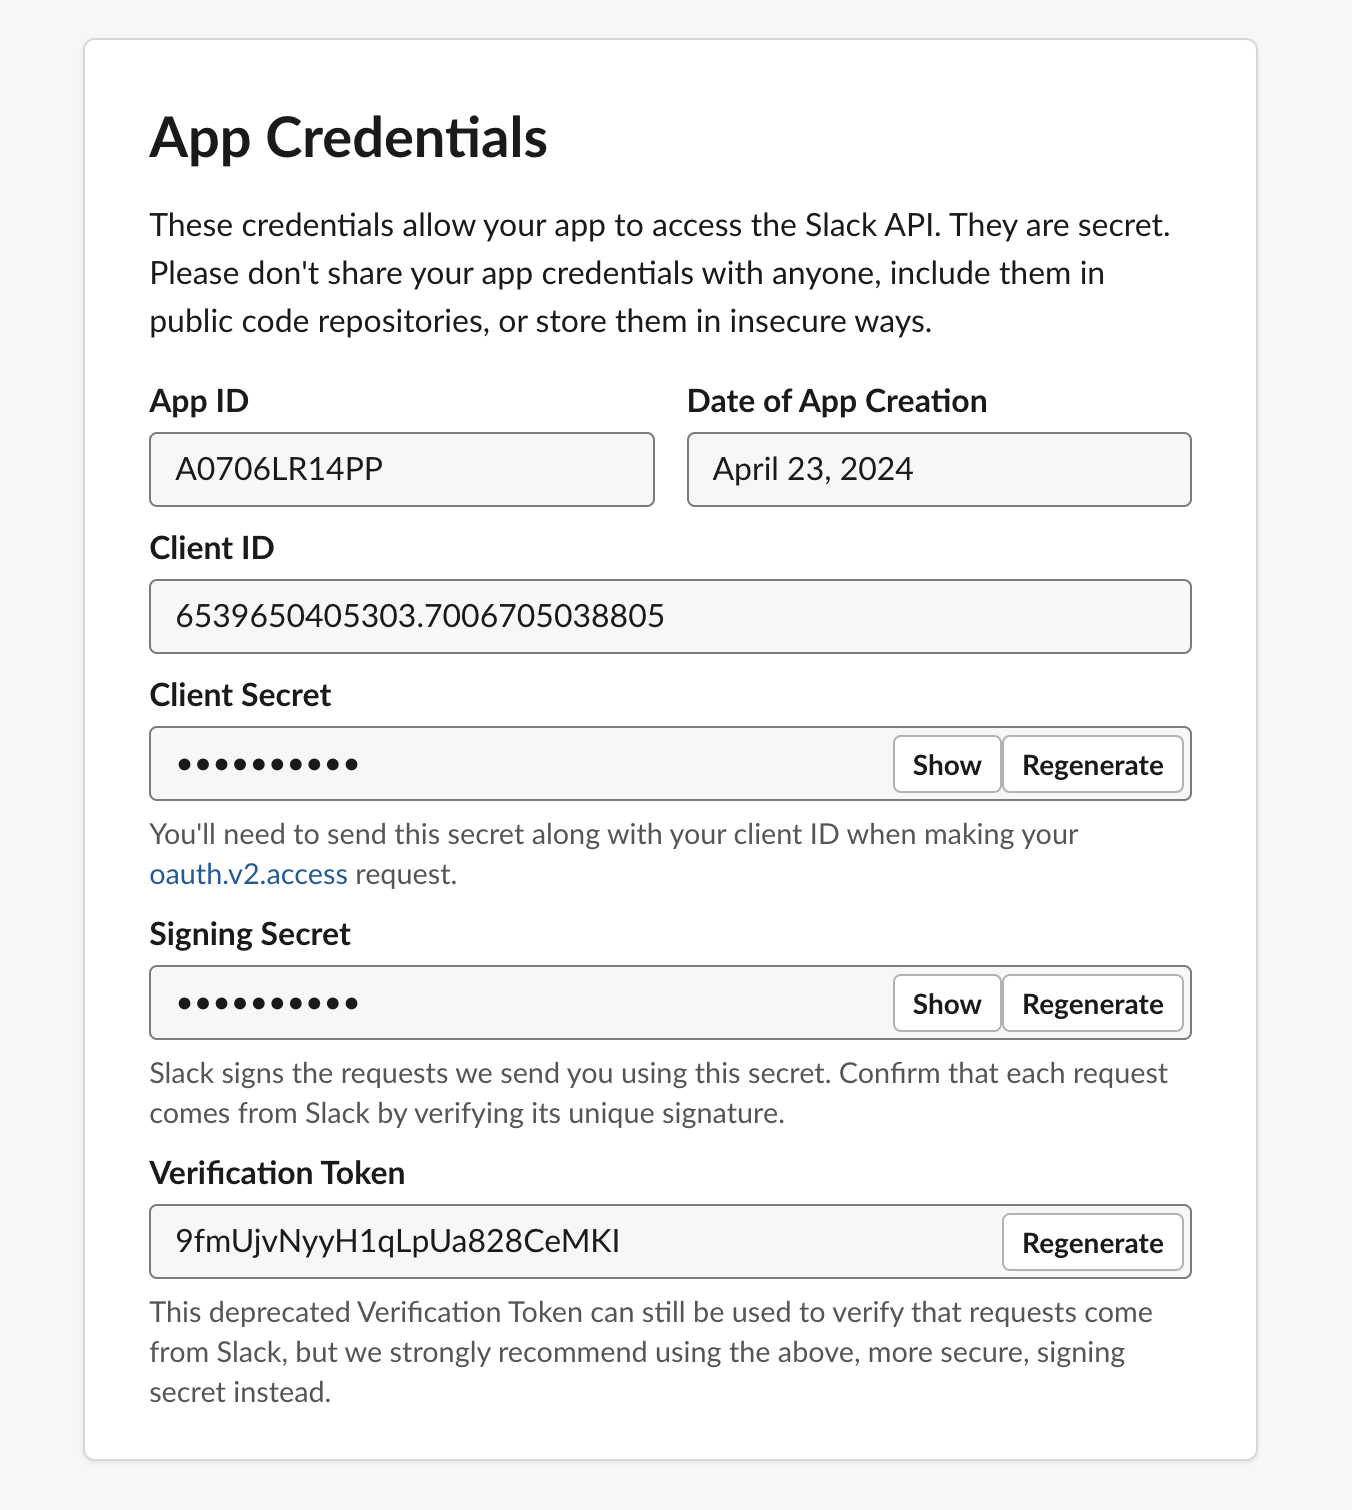
Next, head back to the ‘Basic Information' section of the Slack API dashboard, and locate the ‘Signing Secret' value and add that into your .env file as SLACK_SIGNING_SECRET. Again, this value is a secret and should not be exposed publicly.
Enable socket mode & subscribe to events
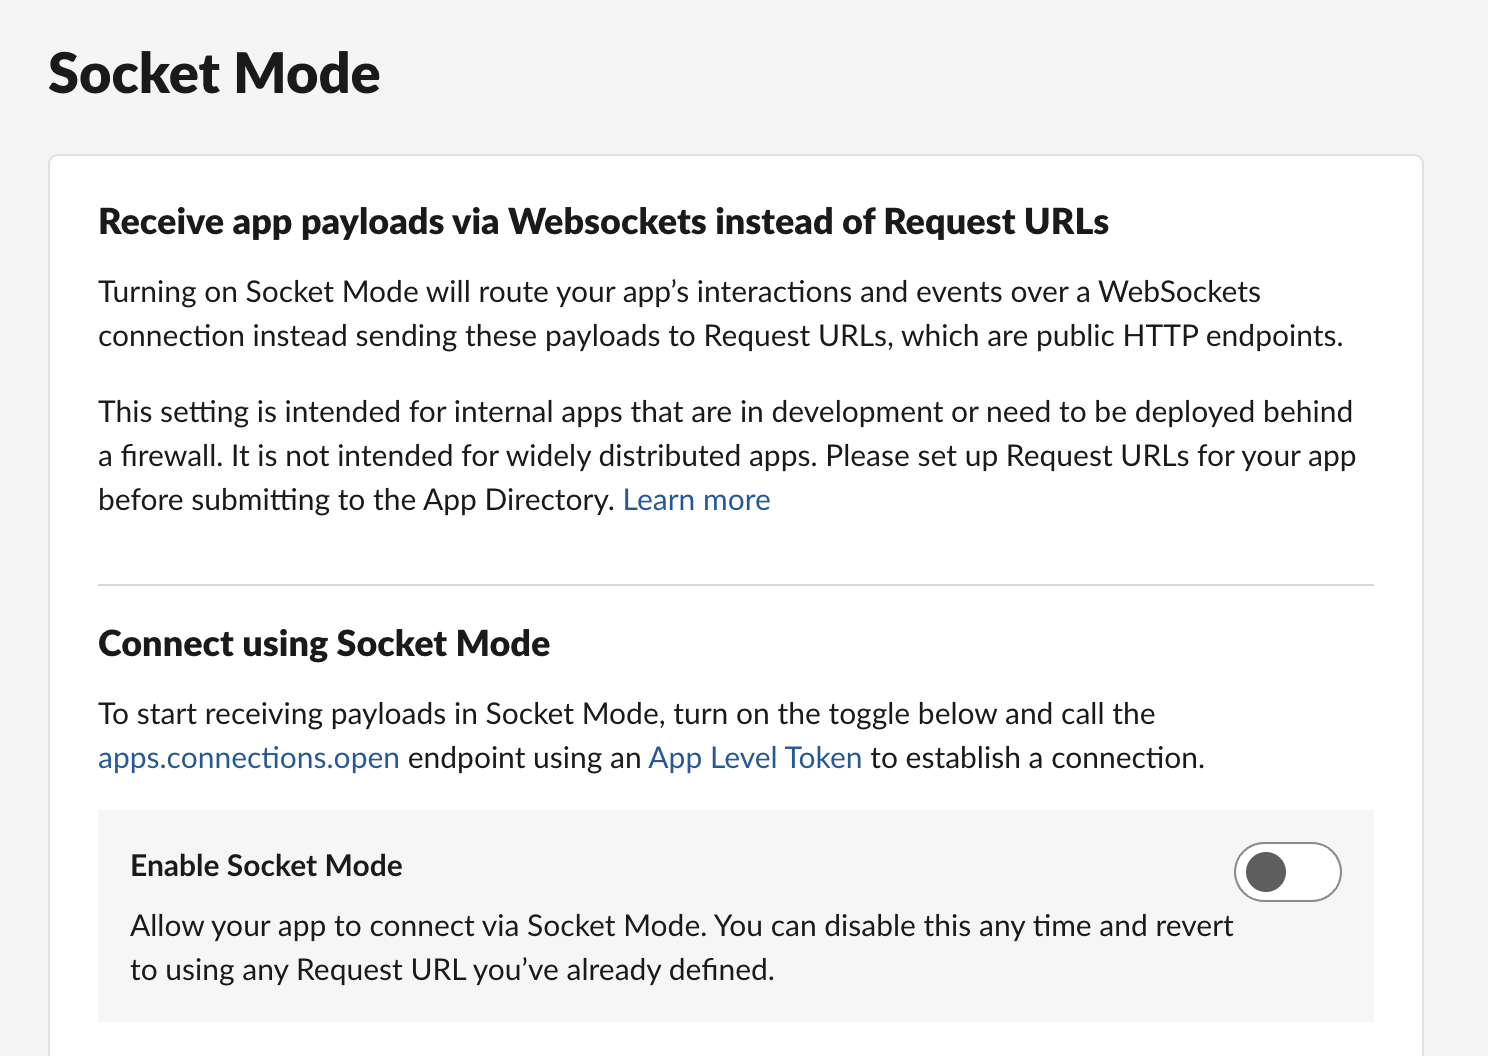
First, head to the ‘Settings > Socket Mode' page, and enable socket mode on your app.
Doing so will activate a modal where you provide a name for your app token and select the scope of actions your app will perform. For this example, we can stick with connections:write and click Generate.
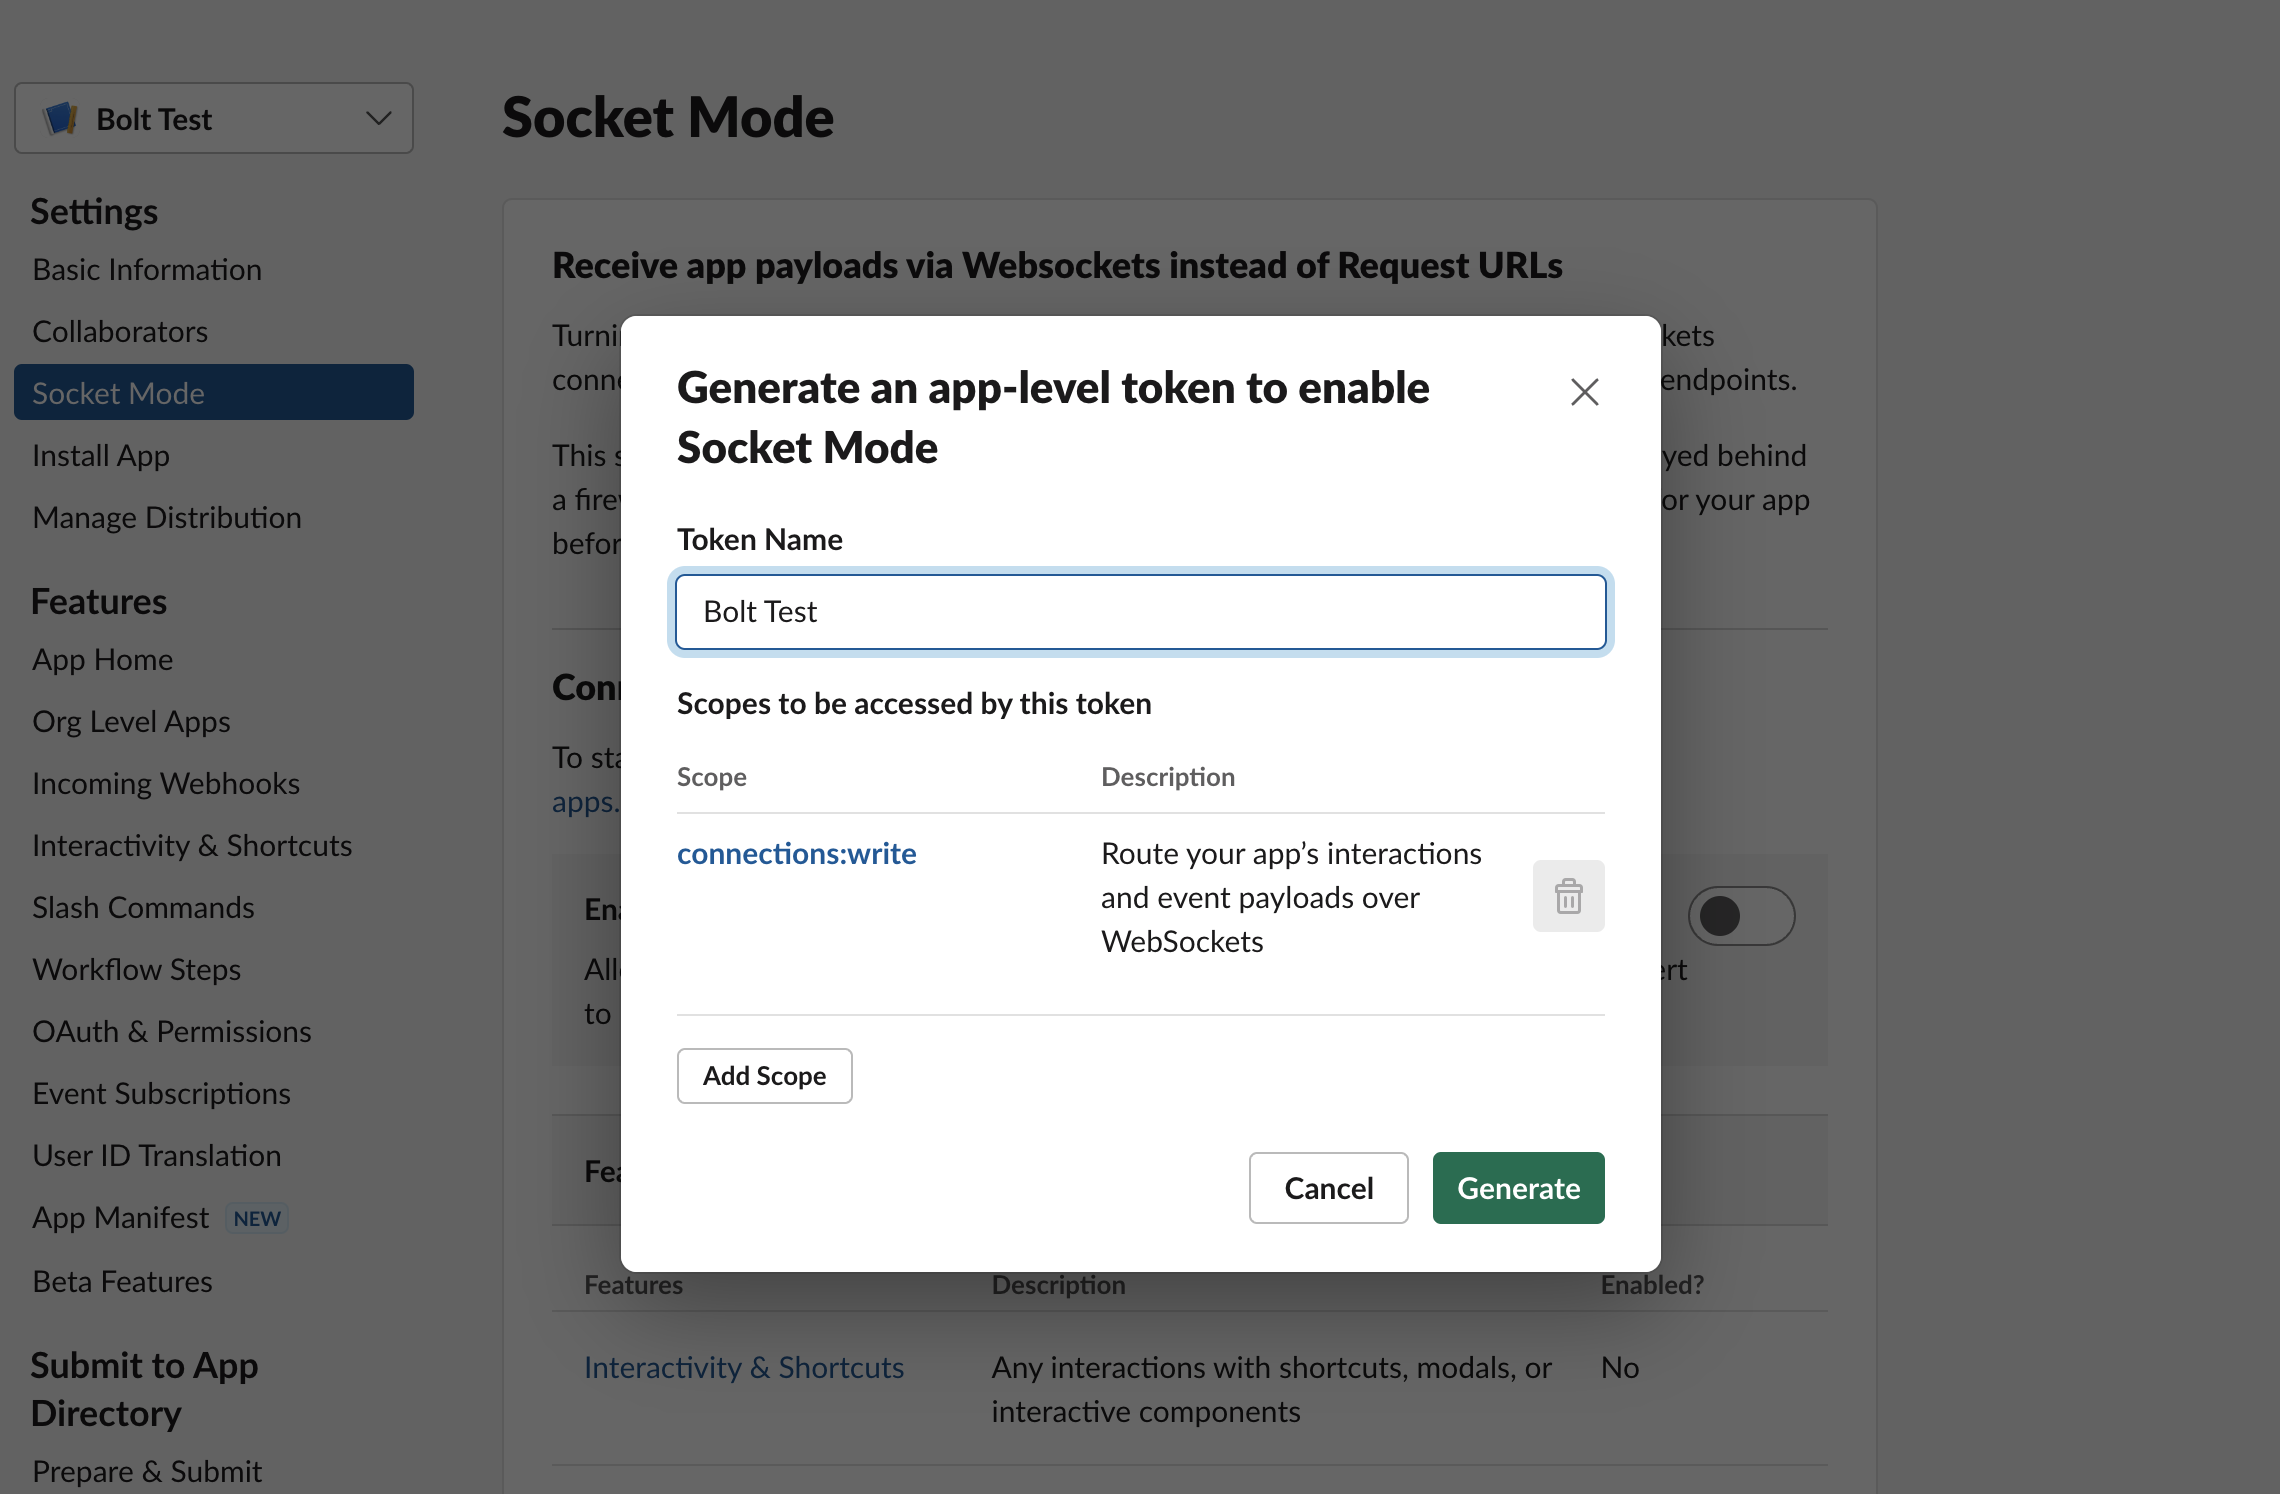
This will trigger another modal with an app token that you can copy and include in your .env file as SLACK_APP_TOKEN.

Lastly, head over to ‘Features > Event Subscriptions' and use the toggle to enable events. In the ‘Subscribe to bot events' menu, add the message.channels event type to your bot and click the ‘Save changes' button.
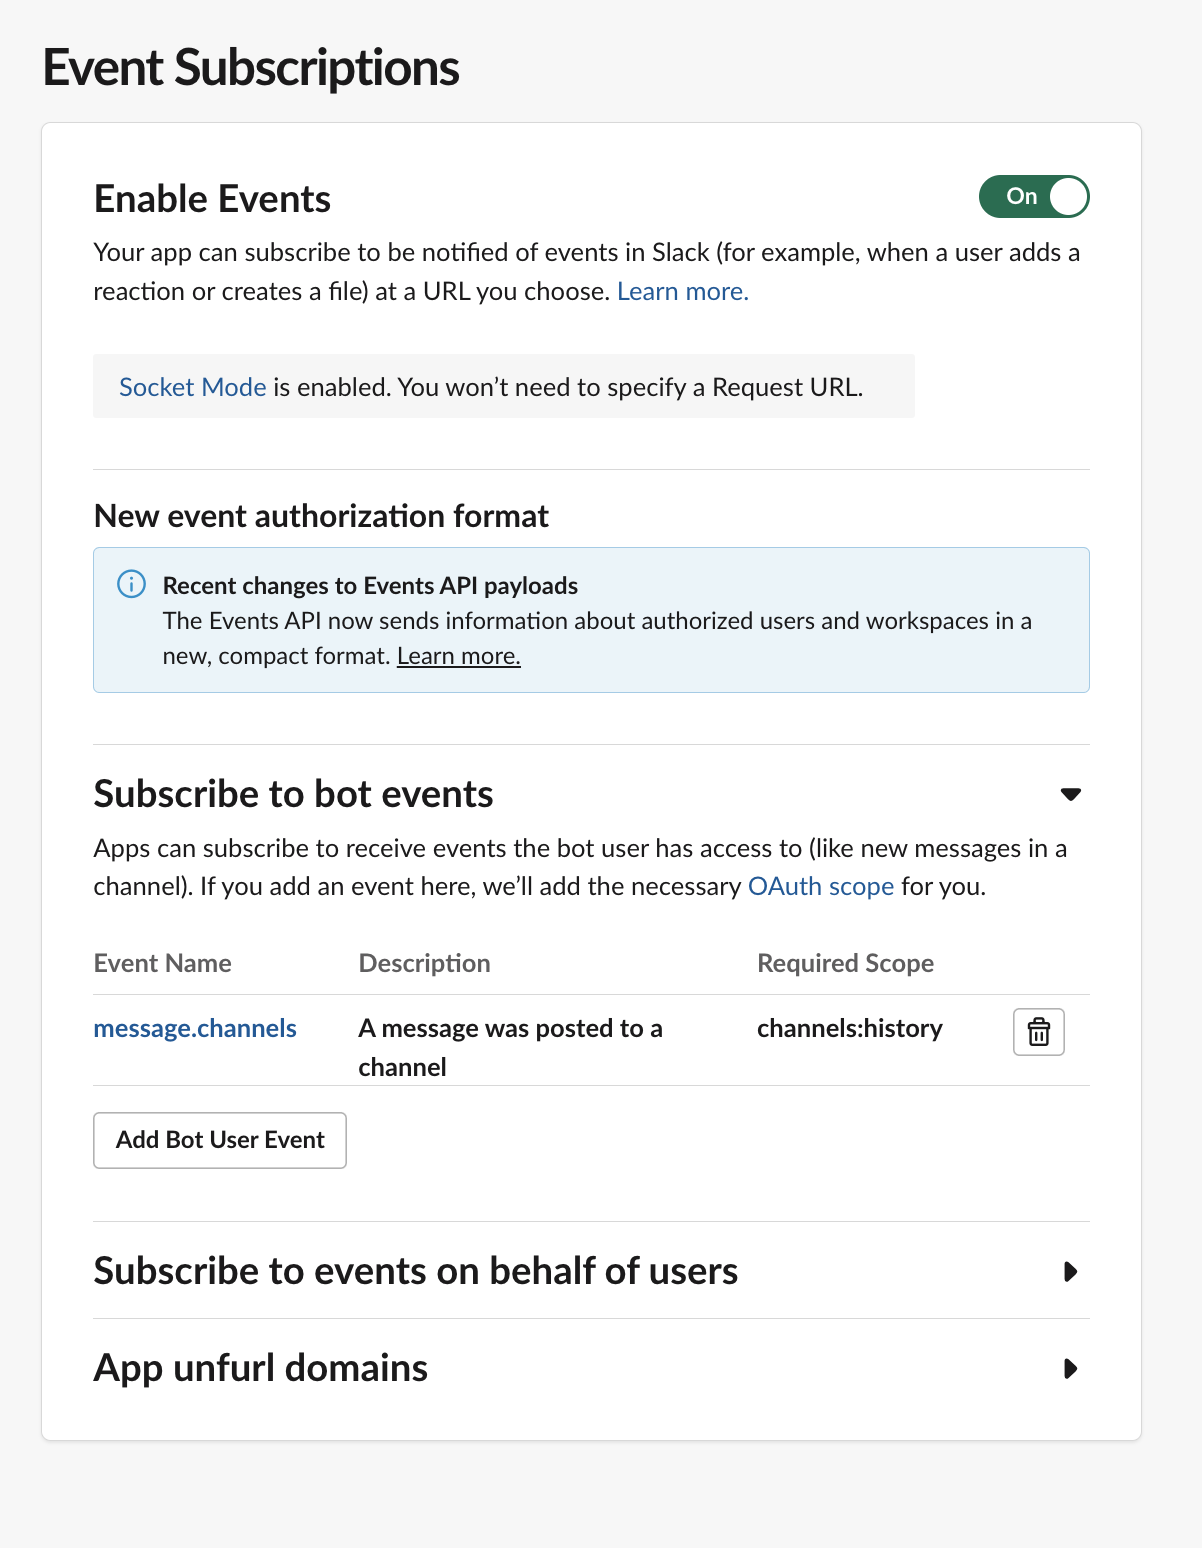
Since we're modifying the scope of our bot's capabilities, you will now be prompted to reinstall your bot to your workspace with the new scopes.
Bootstrapping your local app
Now that we have all the environment variables, let's focus on configuring our app. At the top of the index.js file import the necessary modules: @slack/bolt for Slack interactions and dotenv for managing environment variables. Calling dotenv.config() loads environment variables from a your .env file into process.env, allowing the app to use these variables in the rest of the code.
const { App } = require("@slack/bolt");
require("dotenv").config();
Then, we want to initialize a new instance of a Slack Bolt App with our configuration options:
- the bot token (
SLACK_BOT_TOKEN) - signing secret (
SLACK_SIGNING_SECRET) - app token (
SLACK_APP_TOKEN).
These tokens are used for authenticating and authorizing interactions with Slack's API. We also set the socketMode property to true because we will use WebSocket connections to communicate with Slack, which is particularly useful for receiving events without exposing a public endpoint.
const app = new App({
  token: process.env.SLACK_BOT_TOKEN,
  signingSecret: process.env.SLACK_SIGNING_SECRET,
  socketMode: true,
  appToken: process.env.SLACK_APP_TOKEN,
  // Socket Mode doesn't listen on a port, but in case you want your app to respond to OAuth,
  // you still need to listen on some port!
  port: process.env.PORT || 3000,
});
In the next step, we'll walk through how to create an app in Slack and obtain the values needed for your environment variables.
Building an interactive message in BlockKit
The app listens for incoming messages that contain the word "game" using the app.message method. The app responds with our interactive message when such a message is detected.
Event listener functions
The app.message function takes either a string or a regular expression as its first argument, and then a callback function as its second. It's called a listener function in the Bolt docs. This callback function accepts a payload and the say function as parameters, but this structure differs depending on the available arguments.
// Listens to incoming messages that contain "game"
app.message("game", async ({ message, say }) => {
  // say() sends a message to the channel where the event was triggered
  await say({
    blocks: [
      {
        type: "section",
        text: {
          type: "mrkdwn",
          text: "*Would you like to play a game?*",
        },
      },
      {
        type: "actions",
        elements: [
          {
            type: "button",
            text: {
              type: "plain_text",
              emoji: true,
              text: "Chess :chess_pawn:",
            },
            style: "primary",
            value: "chess_game",
            action_id: "chess_game",
          },
          {
            type: "button",
            text: {
              type: "plain_text",
              emoji: true,
              text: "Falken's Maze :cyclone:",
            },
            style: "primary",
            value: "maze_game",
            action_id: "maze_game",
          },
          {
            type: "button",
            text: {
              type: "plain_text",
              emoji: true,
              text: "Thermonuclear War :boom:",
            },
            confirm: {
              title: {
                type: "plain_text",
                text: "Are you sure?",
              },
              text: {
                type: "mrkdwn",
                text: "Wouldn't you prefer a good game of chess?",
              },
              confirm: {
                type: "plain_text",
                text: "Do it",
              },
              deny: {
                type: "plain_text",
                text: "Stop, I've changed my mind!",
              },
            },
            style: "danger",
            value: "war_game",
            action_id: "war_game",
          },
        ],
      },
      {
        type: "section",
        text: {
          type: "mrkdwn",
          text: "Select a player from the dropdown list",
        },
        accessory: {
          action_id: "player",
          type: "static_select",
          placeholder: {
            type: "plain_text",
            text: "Select an player",
          },
          options: [
            {
              text: {
                type: "plain_text",
                text: "Stephen Falken",
              },
              value: "Stephen Falken",
            },
            {
              text: {
                type: "plain_text",
                text: "Dr. John McKittrick",
              },
              value: "Dr. John McKittrick",
            },
            {
              text: {
                type: "plain_text",
                text: "David Lightman",
              },
              value: "David Lightman",
            },
            {
              text: {
                type: "plain_text",
                text: "Jennifer Mack",
              },
              value: "Jennifer Mack",
            },
          ],
        },
      },
    ],
  });
});
Almost all of the code in this function is Block Kit, which renders this interactive message in the Slack channel the app is connected to:

That might look like a lot of JSON for such a small message, but the wonder of Block Kit is that it is, well, blocks. Most of that can be easily copy-pasted with a few changes from Slack's Block Kit Builder.
Breaking down button blocks
Let's just look at one button to see what is going on:
{
  type: "button",
  text: {
    type: "plain_text",
    emoji: true,
    text: "Chess :chess_pawn:",
  },
  style: "primary",
  value: "chess_game",
  action_id: "chess_game",
}
This is the “Chess” button. The type property specifies the type of block element, which in this case is a button. Then, the text property defines the text displayed on the button itself. It is an object that specifies the text type as plain_text, which means it will show exactly as typed without formatting. The emoji property set to true allows for the use of emojis. The text property within this object is the button's label, "Chess :chess_pawn:," which combines both text and the chess pawn emoji.
The style property sets the appearance of the button. The value primary gives the button a green color that makes it stand out. Slack also supports a danger style that typically renders in red, which you can see with the Thermonuclear War button. The value property is a custom identifier for the button, which is "chess_game". When the button is clicked, this value is sent along with the interaction payload to our app so we know what button was pressed. The action_id property is a unique identifier for this specific action within the block. We'll use that in a second.
We also have an interactive dropdown list, but you could also use a calendar, file upload, checkboxes, or inputs.
Sending a response message
The say function is what sends this message to the channel where the original message (“I want to play a game”) was posted. It's an asynchronous function, so it needs to be await'ed, and it can accept either a plain string message or an object containing blocks as in this example.
For notifications, you can trigger this message by something that happened in your application or via a cron job. The ‘listening to messages' part is less important than the interactivity within the Block Kit UI above, and what comes next–the action.
Responding to Users
When a user clicks a button or makes a selection, Slack sends an action event to the app, which is handled by the app.action function. Slack expects an acknowledgement for a number of different event types, including actions. This ack allows Slack to maintain a consistent user experience across the many devices a user has connected to Slack.
In our example app, we have two actions: selecting a game and selecting a player.
Handling button clicks
For game actions triggered from the buttons, which are identified by a regex pattern that matches action IDs ending with "_game," the app similarly acknowledges the action using the async ack function. Then, it checks the selected game based on the action's value. Depending on the game, it sends a custom response.
If you recall back to the structure of our Block Kit message template, this action ID is passed as the action_id property on the buttons:
app.action(/.*(_game)$/, async ({ body, ack, say }) => {
  // Acknowledge the action

  await ack();
  if (body.actions[0].value == "chess_game") {
    await say(`<@${body.user.id}> wants to play chess.`);
    await say({
      blocks: [
        {
          type: "image",
          title: {
            type: "plain_text",
            text: "This is your opponent",
          },
          image_url:
            "https://upload.wikimedia.org/wikipedia/commons/a/aa/Carlsen_Magnus_%2830238051906%29.jpg",
          alt_text: "Magnus Carlsen.",
        },
      ],
    });
  } else if (body.actions[0].value == "maze_game") {
    await say(`<@${body.user.id}> wants to play Falken's Maze.`);
    await say({
      blocks: [
        {
          type: "image",
          title: {
            type: "plain_text",
            text: "Don't get lost",
          },
          image_url:
            "https://media.giphy.com/media/v1.Y2lkPTc5MGI3NjExMTc2YWtkc3l0ZXZsNTNhbW01c3p1OHZ4cTFkNHoxbnloaWQ2aWhiZyZlcD12MV9pbnRlcm5hbF9naWZfYnlfaWQmY3Q9Zw/6oOhZnoXQRg69dC1AI/giphy-downsized-large.gif",
          alt_text: "Maze",
        },
      ],
    });
  } else if (body.actions[0].value == "war_game") {
    await say(`<@${body.user.id}> wants to play Global Thermonuclear War.`);
    await say({
      blocks: [
        {
          type: "image",
          title: {
            type: "plain_text",
            text: "The only winning move is not to play",
          },
          image_url:
            "https://media.giphy.com/media/v1.Y2lkPTc5MGI3NjExdzRicXlyeGR2eWgzbjkxbW1iNzdjMjZzNDkxdDZlcnk5ZjhlcmliYiZlcD12MV9pbnRlcm5hbF9naWZfYnlfaWQmY3Q9Zw/yoJC2mtLhd0v19pJbW/giphy.gif",
          alt_text: "WOPR",
        },
      ],
    });
  }
});
Handling dropdown selections
For the "player" action, when a user selects a player from the dropdown, the app acknowledges the action with ack() and then uses say to send a confirmation message back to the channel using the selected_option from the action payload.
app.action("player", async ({ body, ack, say }) => {
  // Acknowledge the action

  await ack();
  await say(`${body.actions[0].selected_option.value} wants to play as well.`);
});
Again, we use Block Kit to craft our Slack message using the components available within the UI framework. Here, we're using these to send text and images, but you could use any Block Kit components to craft the correct message to the user in the channel.
Here's what all this looks like in action:
Finally, we have an async function to start the app. It calls app.start() to establish the WebSocket connection with Slack and listen for events.
(async () => {
  // Start your app
  await app.start();

  console.log("⚡️ Bolt app is running!");
})();
This Bolt app creates an interactive experience within Slack by responding to messages, presenting users with choices and decisions, and handling their responses in real time. It demonstrates the power of Slack's Block Kit and the Bolt framework for building sophisticated Slack apps that can enhance team communication and workflows.
Using Block Kit With Knock to Manage Your Slack Notifications
We've shown before how incredibly powerful Slack's Block Kit is for creating the exact notifications your application needs. Here, we've taken that a step further and shown how you can make these messages actionable for your users and an ideal interaction channel for your application.
Knock allows engineering and product teams to build their notification system without dealing with the infrastructure required. You can manage notifications across multiple channels, such as email, in-app, Push, and Slack. Knock supports Block Kit via the Knock JSON block editor, allowing you to design messaging like those above and easily send out those notifications to help your users.
If you want to try it out, sign up for a free account or chat with our team. 👋